03 June, 2026
Small Bath Shower Ideas for Australian Bathrooms
Discover small bath shower ideas perfect for Australian bathrooms. Combine your bath and shower to save space without sacrificing comfort.

Video Credit: Prefab Homes and Tiny House
Why Small Bathrooms in Australia Need a Combined Bath and Shower
Everyone is looking for the ideal shower-bath combo — the one that does not make you feel like you have sacrificed too much, and the one you will actually want to use. The right setup means you no longer have to give up that weekend soak.
The most common bathroom size in Australia, whether older homes or new apartments, is 3–4 m². Bathrooms of this size simply are not conducive to having a separate shower cubicle in one corner and a full-size bath elsewhere.
The shower-bath solution is a good fit, giving you the regular shower and the occasional soak when you need it. With the shower-bath, you are merging the bath and shower, the water feed and waste, and the waterproofing into a single footprint — usually a floor area of 750 mm × 1500 mm — which means all the plumbing sits in one wet zone. One waterproofed area, one waste, one water feed and one screen. The savings can be significant, especially since bathroom renovations in Australia are costly.
So if you want to make good use of your bathroom floor area without compromising on the bath, the shower-over-bath approach is the right option for small bath shower ideas worth pursuing.

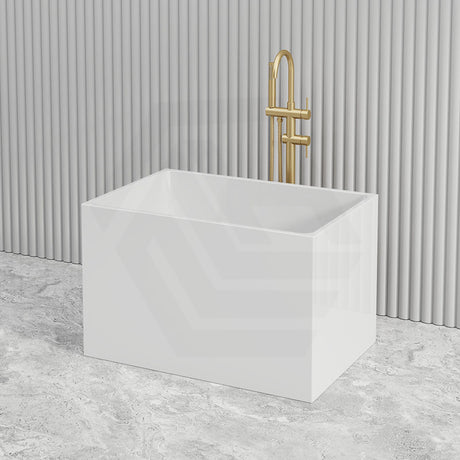
Picking the Right Small Bath for Your Bathroom
Good — the shower-bath combo is your go. Now the real question is which small bath will actually work in your space, size-wise and material-wise.
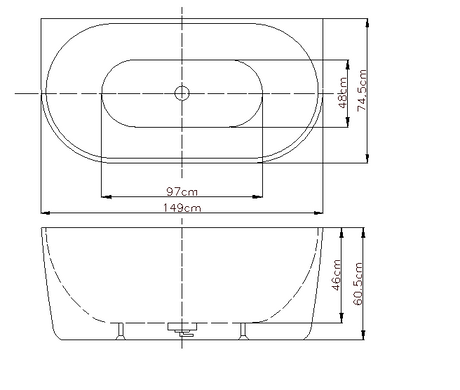
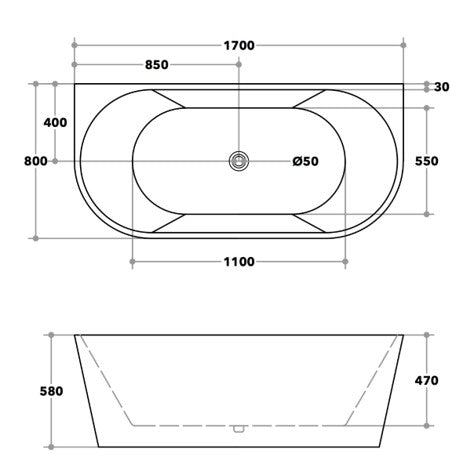
On the Australian market, you'll mostly see three lengths: 1200 mm, 1350 mm and 1500 mm. Adults should treat 1500 mm as the hard floor — drop below that and you're really in kids' bath territory. Take a careful measure of your wall run, then factor in at least 100 mm of clearance at each end — that gap is non-negotiable for installation and sealant.
Material choice is worth thinking about too. For an over-bath shower setup, acrylic is the go-to for most people. Weigh under 25 kg, warm to the touch, and easy on the wallet — acrylic drop-in models kick off at $312. Heat retention and a rock-solid feel are where steel wins — just know you're signing up for a heavier unit. Older timber floor joists under there? Flag it with your licensed plumber early — a structural check could be on the cards before any work kicks off.
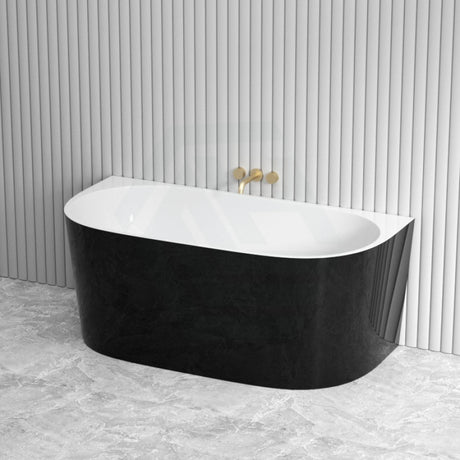
Compact drop-in and back-to-wall models for shower-over-bath setups? Broadway has a solid range worth a look. Tight on space? The rear panel on a back-to-wall bath sits flush to the wall — no gap at the back edge for grime to settle in.

Shower-Over-Bath Set-Ups: Options and Specs Worth Knowing
Bath locked in? Next up is the shower delivery system — rose type, hose length, mounting height — and each of those calls has a real impact on daily use.
There are three configurations to know about:
A fixed overhead rose gives you that rain-shower feel and looks the part — where it falls short is kid bath time or a quick rinse of the surround.
Mixed household needs? A handheld rail system on a 900–1200 mm rail is tough to top — the adjustable height means it works for pretty much everyone.
A combination of a fixed overhead rose plus a handheld on a separate rail is the most popular choice for good reason. Fienza and Aquaperla both offer twin rail shower sets starting from $269 that handle both outlets well.
Key specs to keep in mind: your showerhead should sit at least 2000 mm above the bath rim for comfortable showering clearance. The handheld hose should be a minimum of 1500 mm in length so the hand unit reaches the bath waste without strain. A wall mixer with diverter — available from around $83 — controls both outlets from a single fitting, which is the standard tapware solution for shower-over-bath setups. Your licensed plumber will rough in the mixer body during the initial fit-out, with the trim kit applied once the tiles are installed.
Factor in proper bathroom ventilation as well. Under the 2025 National Construction Code (NCC), the minimum exhaust flow rate required is 25 L/s. With the volume of steam a shower over bath produces, your exhaust fan must be capable of that rate.

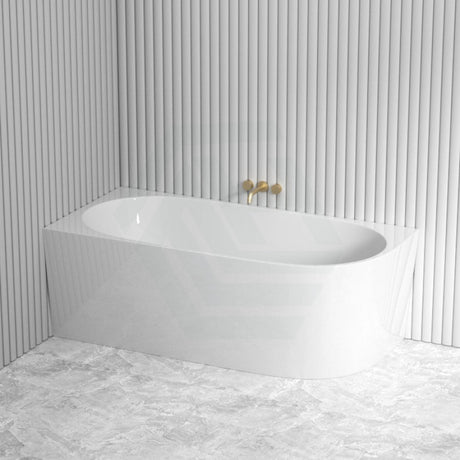
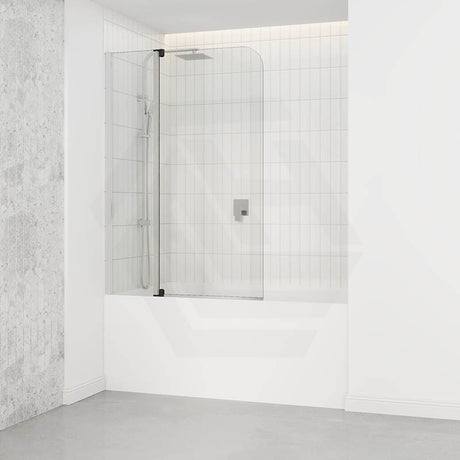
Screens, Curtains and Waterproofing: Making It Work
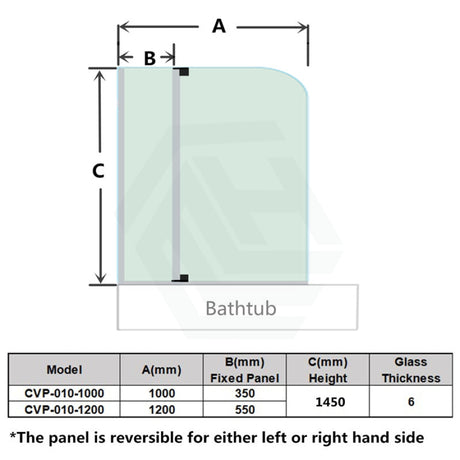
Whether to add over bath shower screens is not merely an aesthetic question. Framed, semi-framed and fully frameless over bath shower screens are all available. Framed types typically carry the lower price tag, from around $130. For the compact bathroom, a frameless bifold option ($400–$900) may be more practical than fixed swing panels that can impede circulation. Covey is the dominant supplier of over bath shower screens, and their range meets AS/NZS 2208:2023, which requires that partly framed and fully frameless screens use safety glass of a minimum 6 mm (AS/NZS 2208:2023) thickness.
If a framed or frameless screen isn't in the budget, a shower curtain mounted on an arm inside the rim is also an accepted option. Either way, waterproofing must be installed by a licensed waterproofer before tiling. Shower-area walls must be waterproofed to 1800 mm (AS 3740:2021) (NCC 2025, ABCB Housing Provisions, Part 10.2) above the floor substrate. Walls adjoining the bath must be waterproofed to at least 150 mm above the bath rim. A well-selected small bath, paired with properly installed over bath shower screens and correct waterproofing, will give many years of trouble-free use.

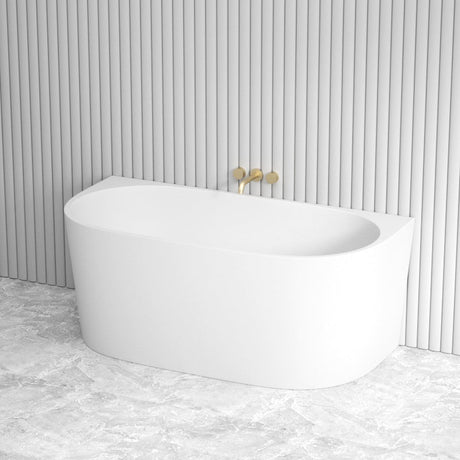
Small Corner Baths and Space-Saving Installation Tips
If your bathroom is square, the layout may not allow for a standard bath along a continuous straight wall. In this scenario, a small corner bath can be a practical solution. Corner baths are manufactured in 1200 × 1200 mm and 1350 × 1350 mm sizes and are positioned in the corner to maximise floor space. This is one of the best small bath shower ideas for square-shaped bathrooms. Broadway's corner bathtub range is priced from $958 to $2,085 and is constructed from acrylic and fibreglass-reinforced materials, making for a lighter bath that is easier to install.
Your licensed plumber should agree with you on the tapware and showerhead position for your small corner bath before the waterproofing membrane is applied. The wall-mounted mixer with diverter should be positioned along the longer side of the corner bath rather than deep in the corner. Confirm the bath waste position before waterproofing is installed — relocating the waste afterwards requires removing both the bath and the membrane, which is considerable work.
Waterproofing must extend at least 150 mm up all vertical walls adjoining the small corner bath hob. Ensure your waterproofer confirms the floor beneath the acrylic bath is fully supported — an acrylic bath cannot be rim-supported only and will develop problems as it settles. The most common installation issues are an inadequate supporting substrate, a waste positioned below the overflow outlet, and failure to inspect the waterproofing before tiling. Address these three points and your corner bath shower will deliver many years of trouble-free service.
References
National Construction Code 2025, ABCB Housing Provisions, Part 10.8 Condensation management
National Construction Code 2025, ABCB Housing Provisions, Part 10.2 Wet area waterproofing
AS 3740:2021 Waterproofing of Domestic Wet Areas, Standards Australia
AS/NZS 2208:2023 Safety glazing materials in buildings (incorporating Amendment No. 2:2025), Standards Australia