10 July, 2026
Complete Guide to Shower Sealing
Everything you need to know about shower sealing — sealant types, application steps, and when to call a licensed plumber in Australia.

Water is patient — it will find every unsealed joint in a shower enclosure and work its way through, often for months before the damage becomes visible. Applying a flexible, waterproof sealant to the junctions, edges and penetrations within a shower enclosure is the single most cost-effective step you can take to prevent hidden structural damage. Done correctly, the process involves choosing the right sealant for your substrate, applying a steady 6–8 mm bead with proper surface preparation, and allowing a minimum of 24–48 hours cure time before water exposure. Maintained well, a quality seal lasts two to five years before it needs attention.
Video Credit: DIY For Beginners
What Is Shower Sealing and Why It Matters
Bathrooms are a wet environment. Water finds the gaps, the weak joints and the corners between angles and, over time, will penetrate through them and cause structural damage.
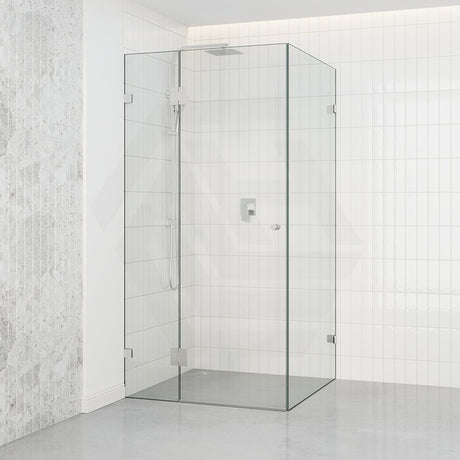
Shower sealing means applying a flexible, waterproof sealant to the junctions, edges and penetrations within a shower enclosure. This includes the joints between the shower screen and floor, corners between walls, the perimeter of the shower drain and the junction between the shower screen and the walls. It is more than a finishing touch. It is the seal that protects all these junctions and penetrations from water ingress over time.
When these joints fail to be sealed or the seals have deteriorated, you have the worst kind of leaks — ones that can't be seen until they've done damage. This will include moisture penetrating behind tiles and into the walls, where they damage the timber frame and can even grow mould. It is one of the most expensive and onerous repair works. If done right in the first place, it will take about thirty minutes to seal it. When I specify bathrooms for display homes, water leaks always come from the movement joint that hasn't been sealed.
Before we start, it is worth making a note: shower sealing is the silicone sealant applied at surface junctions. It is not the same thing as waterproofing with a membrane.
Under NCC 2025, ABCB Housing Provisions, Part 10.2, all the walls in a shower must be waterproofed to a minimum height of 1800 mm (NCC 2025, ABCB Housing Provisions, Part 10.2) above the floor substrate and the whole of the floor must be waterproofed. This must be undertaken by a licensed waterproofer prior to the installation of tiles. Sealant is then applied to seal the shower area after the tiles and grout have been installed.

Types of Sealants and Materials Used in Shower Sealing
Different sealant materials should be used depending on the substrate to be sealed. The choice of sealant is the first decision to make in your project and should be settled before the shower is tiled.
| Sealant Type | Best Use | Avoid On | Approx. Cost (AUD) |
|---|---|---|---|
| Neutral-cure silicone | Natural stone, acrylic bases, sensitive metal fixtures | No major restrictions | $15-$35 |
| Acetoxy-cure silicone | Non-stone, non-aluminium tiled junctions | Natural stone, aluminium | $8-$20 |
| Polyurethane sealant | Hob edges, non-tiled junctions, paintable surfaces | High-movement wet joints | $20-$40 |
Shower sealants come in three main types: neutral-cure silicone, acetoxy-cure silicone, and polyurethane sealant.
For most shower jobs, neutral-cure silicone is what you'd reach for first. Because it releases no acetic acid as it cures, it's safe against natural stone, acrylic shower bases, and sensitive metal fixtures. Expect to pay somewhere between $15 and $35 AUD for a decent neutral-cure cartridge. Acetoxy-cure silicone costs less, though it puts out a sharp vinegar smell while it cures — that's the acetic acid byproduct off-gassing. Stone and aluminium are exactly where you'd want to avoid it. Around hob edges and non-tiled junctions, polyurethane sealant is worth a look — it bonds and paints well, though it loses flexibility faster than silicone in a wet environment.
Grout sealer is a different product altogether. You brush a penetrating grout sealer over cured tile grout to cut down porosity — it has nothing to do with what silicone does at movement joints, so don't mix the two up. Sealants in a compliant wet area need to satisfy AS 3740:2021 and AS/NZS 4858:2004 — your licensed waterproofer will know these standards well.

Sealing a Shower: Step by Step
Application technique matters more than most people realise. Work through each step with care.
1. Strip out every trace of old sealant with a sharp blade or a dedicated removal tool. Never lay fresh sealant on top of old — it won't bond. 2. Scrub the joint well with a surface cleaner, then let it dry out fully. A trace of moisture left behind is enough to wreck the bond. 3. Run masking tape along both sides of the joint so you get a neat, straight line. 4. Fit the cartridge into a sealant gun and run a steady 6–8 mm bead along the joint in one smooth pass. 5. Use a wet finger or a purpose-made tool to work the bead into the joint, shaping it into a concave profile. 6. Pull the masking tape away straight after you've tooled the bead. 7. Allow the sealant to cure for a minimum of 24–48 hours before water exposure — check your product data sheet as there can be slight variations between products.
The typical re-sealing interval is two to five years depending on sealant quality and water use, and this is work you can certainly do yourself. But if there is any question about the condition of the waterproofing under the tiles, you will need to call a licensed waterproofer — application of waterproofing membranes is a restricted class of work in all Australian states and territories.

Common Mistakes When Sealing a Shower and How to Fix Them
The most expensive mistake is applying the bead when the joint is wet or contaminated. The product looks good at first, but it won't adhere properly and will lift within weeks. Remove everything, prepare the surface properly and start again.
Using acetoxy-cure silicone on natural stone is another frequent mistake — the acetic acid it releases as it cures can leave permanent staining. When that happens, the sealant has to come out and neutral-cure silicone goes in its place. The stone itself might need attention too.
Joints shallower than 4 mm deep don't hold enough sealant to move with the building, and the bead ends up cracking away. Where the joint can't be deepened enough, strip the sealant back and reapply with the right amount of material. On porous or tricky surfaces, primers tend to get left out — and that's a mistake. A compatible primer makes a real difference to long-term adhesion on fibreglass and most acrylic surfaces.
Getting a full shower enclosure professionally re-sealed will generally run you between $150 and $400 AUD, with size and condition driving the price. I've seen a client who'd had three DIY attempts at it — the remediation bill came to more than twice what one professional job would've cost from the start.

How Shower Sealing Fits Into Your Broader Bathroom
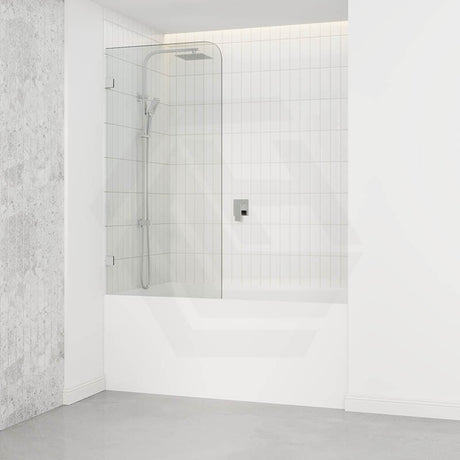
Your shower is just one piece of the bathroom puzzle. Over-bath setups demand close attention to the bath rim, the return wall behind the screen, and every tap and drain fitting — each one needs to be done right.
With over bath shower screens, the seal along the bath rim deserves careful attention. Water tracking down the glass screen pools at the screen edge and drips onto the bath rim. Leave that junction without a neutral-cure silicone seal and water will work its way under the bath edge into the cavity below. That same care applies to the wall return seal — movement joints, not grout lines, is what you're dealing with here.
Don't overlook the bathtub plug and drain body at the bath end either. A broken drain seal lets water into the floor below — often without any visible sign — and the damage it causes builds up over time. The bath hose connections from the taps to the shower or handshower outlets are worth checking too — look for any weeping or damp. None of that falls under silicone work as such, but each item plays a role in how the bathroom handles water — tackle them during any remodel or thorough inspection.
Think of the bathroom as a system, not a set of separate products — that mindset is what separates a bathroom that holds up for years from one that starts giving you grief within a few.
References
National Construction Code 2025, ABCB Housing Provisions, Part 10.2 Wet area waterproofing
AS 3740:2021 Waterproofing of Domestic Wet Areas, Standards Australia
AS/NZS 4858:2004 Wet area membranes, Standards Australia
State and territory plumbing licensing authorities (Building and Plumbing Commission Victoria; Building Commission NSW / NSW Fair Trading; Queensland Building and Construction Commission; Plumbers Licensing Board Western Australia (administered by Building and Energy); Consumer, Building and Occupational Services Tasmania; Access Canberra ACT; Office of the Technical Regulator / Consumer and Business Services South Australia; Plumbers and Drainers Licensing Board Northern Territory)