08 July, 2026
How to Change Washer on a Tap: What Aussie Homeowners Should Know
Discover how to change washer on a tap, what causes drips, and when a licensed plumber is the right call for your Australian home.

There's something oddly satisfying about repairing a dripping tap yourself (I know, weird). I'll admit it though, since my bathroom renovation, and my numerous lost hours waiting on hold with plumbers, I take a certain pleasure in completing a job well done. Dripping taps are the kind of issue that appear like a huge job to do at 2am when your eyes are half shut — but in actual daylight with your eyes fully open, it is actually a quick, simple job. Let's have a look at how to change washer on a tap, what it takes, and when to call someone in to do it.
Video Credit: Billshowto
Why Tap Washers Fail and When to Replace Them
Washers are small rubber or fibre discs, around the size of a large button, which sit inside your tap body. When a tap is closed, the washer presses up against the tap seat to provide a seal that keeps water from escaping. Each time a tap is turned on or off, the washer endures minor wear. Over time, after years of varying temperatures (mostly on the hot taps), buildup from mineral deposits due to hard water, and general daily use, the washers may start to compress or harden and ultimately break down — and this is even more likely with high water pressure.
After you have confirmed a leaking tap, you can determine if a washer needs changing. The tell-tale sign is a tap that drips after it has been turned off. A tap handle which is difficult to move or makes noise when you use it is also an indication of problems. While it may seem negligible, a dripping tap can waste many thousands of litres of water per year — an avoidable expense on your water bill. So, once you have confirmed that your problem is a worn washer, it is time to gather the right tools and a new part before you begin.

Tools and Materials Required
Good news — there is not a lot you need to collect prior to starting the job. You will need an adjustable spanner, a flathead screwdriver, and a Phillips head screwdriver. You will also need to buy a few washers in different sizes — commonly the 12 mm and 15 mm sizes for Australian homes. These can be obtained for a few dollars at your local hardware store. Most stores sell a multipack containing a range of sizes for under $5. When you're in there, also pick up an O-ring (this will sit in a different location on the tap body and also needs to be replaced alongside the washer) along with some plumber's grease and a roll of thread tape. A tap reseating tool is worth having if your taps are older, as this will cut and smooth out a scored tap seat so your leak won't return immediately with a new washer. If you need the tool, expect to pay between $20 to $30. Don't forget that all your new parts must carry WaterMark compliance to meet Australian standards. Once everything is laid out on the bench you're ready to begin working through the replacement instructions step-by-step.

How to Change a Tap Washer: Step-by-Step Instructions
The first thing to remember is that knowing how to change washer on a tap is a DIY-legal task in some Australian states and territories, but it differs depending on your jurisdiction. Please check your state/territory requirements beforehand, but note that any work connecting new tapware to the water supply requires a licensed plumber — no exceptions.
If you're feeling confident enough to proceed, your first step should be to turn the water off at the isolation valve (usually found under the sink or behind your bath panel) or the mains stopcock. Open the tap to its fullest to release any pressure in the system and allow any water left in the taps to drain. Next, take off the tap handle. This will always have a small cover on top — often a chrome or white plastic dome that can be removed with a flathead screwdriver — revealing a screw underneath that must be removed. With the screw out, the handle can be lifted clear.
Underneath is a cover plate, then the headgear of the tap. The headgear houses the jumper valve and washer. Loosen the headgear with an adjustable spanner by turning it anti-clockwise until you feel it disengage and you can easily finish unscrewing it by hand. The washer will be fixed to the bottom of the jumper valve, secured by a small brass nut — remove the old washer. The O-ring sits further up the spindle and must be removed as well.
Place your new washer, with its nut tightened by hand, onto the bottom of the jumper valve; fit the new O-ring back onto the spindle; and apply a small amount of plumber's grease to the O-ring and threads. Reassemble everything in reverse order, tighten the headgear by hand, then a quarter turn with your spanner. Do not overtighten — this is a common mistake that causes leaks. Reattach your handle and turn the water back on at your isolation valve slowly. Check that your tap has no drip from the spout or base.
A first-time replacement will take between 30 to 45 minutes from start to finish; if you have done a few replacements, you can easily finish in 15 to 20 minutes.

Common Mistakes to Avoid With the Replacement
The most common error is using the wrong washer material. Use rubber washers on cold water taps and fibre washers on hot water taps — rubber will break down much more quickly under high temperatures. Do verify what you're swapping out before you purchase a replacement.
Another frequent issue is overtightening the headgear. If you over-tighten, you could crack the tap body, particularly on older brass tapware. Hand-tight plus a quarter turn is all it takes.
Not replacing the O-ring is another error worth pointing out. If you replace the washer but not the O-ring, you may find a leak at the base of the spindle rather than from the spout. Always replace both, as the extra cost is negligible.
Finally, if you've fitted a new washer and the tap still leaks, check the tap seat. If the seat is scored or pitted, a new washer will wear out quickly — which is exactly when that reseating tool comes into its own.

When to Upgrade Your Tapware Instead of Repairing It
Replacement is likely more cost-effective than further repair for taps that are over 15 to 20 years old, if the seat is too deeply scored to be re-seated, or if the tap body is cracked.
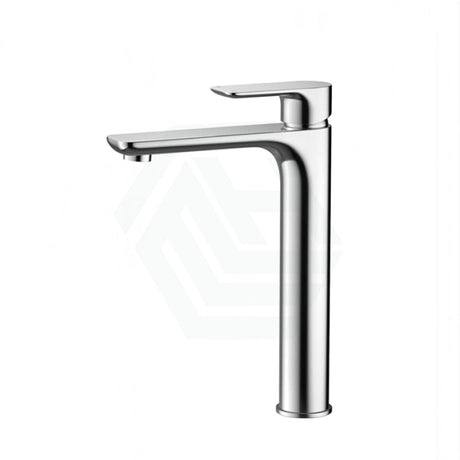
In new installations, most people are now moving to ceramic disc cartridge taps. The current standard ceramic disc cartridge size is 40 mm, and these discs will outlast rubber washers significantly under normal use conditions. Ceramic disc taps by Fienza and Meir are WaterMark-certified tapware, as required under Australian standards, and carry a Water Efficiency Labelling and Standards (WELS) rating. Meir is positioned more upmarket, and many of its pieces are priced well above $200.
If a licensed plumber is already onsite to connect the new tapware, it may also be a good time to consider a broader bathroom upgrade. Freestanding bath tapware is very popular right now, with floor-mounted styles particularly well suited to a show-off freestanding bath. A quality bath hose should be added to any bath replacement, and a well-chosen bath shower screen will keep your combination bath and shower area both stylish and functional.

When to Call a Licensed Plumber
Any work beyond how to change washer on a tap on an existing fitting — including the installation and replacement of tapware connected to water supply lines — must be carried out by a licensed plumber. If you are unsure whether you are crossing that boundary, check your state or territory plumbing licensing requirements before you start.
References
State and territory plumbing licensing authorities (Building and Plumbing Commission Victoria; Building Commission NSW / NSW Fair Trading; Queensland Building and Construction Commission; Plumbers Licensing Board Western Australia (administered by Building and Energy); Consumer, Building and Occupational Services Tasmania; Access Canberra ACT; Office of the Technical Regulator / Consumer and Business Services South Australia; Plumbers and Drainers Licensing Board Northern Territory)
WaterMark Certification Scheme, Australian Building Codes Board
AS/NZS 6400:2016 Water efficient products — Rating and labelling (incorporating Amendment No. 1:2022 and Amendment No. 2:2022), Standards Australia
AS 3718:2021 Water supply — Tap ware (incorporating Amendment No. 1:2024), Standards Australia