07 May, 2026
How to Replace a Toilet Cistern: Installation and Set-Out Guide
How to replace a toilet cistern: step-by-step DIY guide for close-coupled models, including tools, set-out and common mistakes. Save money with this practical Australian installation guide.

What Is a Toilet Cistern and When Should You Replace It?
Most people never spare a thought for the toilet cistern — until a hissing noise wakes them at 2am, or they walk in to find water streaming across the bathroom floor from a crack. Not good. That water container sitting above or behind your toilet pan? That's the cistern. It holds the flush water and releases a controlled amount into the pan each time you flush. Crack the lid and you'll find a fill valve — which refills the cistern after each flush — plus a flush valve, a float, and an overflow tube.
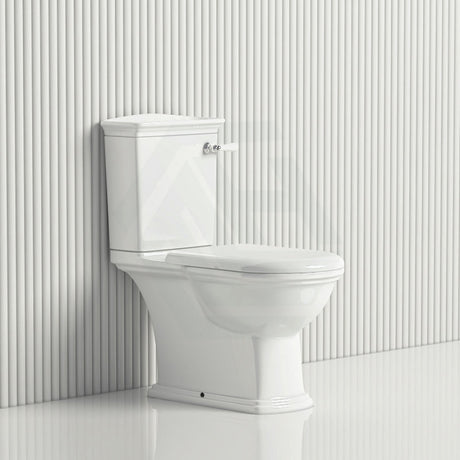
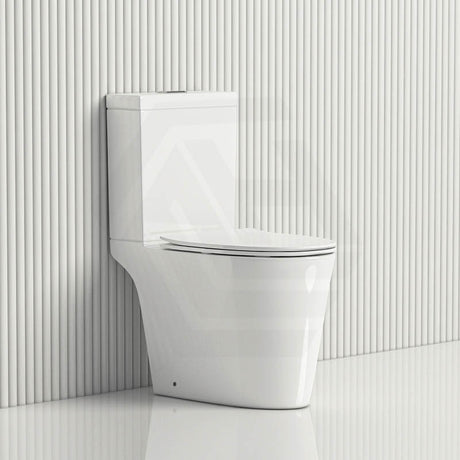
A home in Australia will typically have either a close-coupled cistern that sits on top of the toilet pan, or a wall-hung (also known as an in-wall) cistern concealed behind tiling within a wall cavity. If the cistern is concealed behind tiling, it is best to call a licensed plumber and leave well enough alone — they are very complex to install, such as those in the Geberit range. In the case of close-coupled cisterns, knowing how to replace a toilet cistern yourself is genuinely useful.
There are several scenarios where a replacement might be required: persistent phantom flushing, a visible crack in the cistern body, an old single-flush mechanism, or internal components so worn and corroded that finding replacements is problematic. Parts for a DIY project may cost between $50 to $250 AUD. Understanding the toilet installation cost upfront helps you budget accordingly — a licensed plumber will typically charge $80 to $120 per hour which is worth it for the water supply connection, which we will get to.

Tools, Materials, and Parts You Will Need
Before you touch anything, get every tool you'll need laid out — rushing off mid-job to find a wrench is a headache worth avoiding. Grab an adjustable wrench, a flathead screwdriver, a large bucket, thread-seal tape, and a good stack of old towels — you'll want more than you think.
Parts to source beforehand:
- New toilet cistern body and cistern lid
- New fill valve, flush valve, and button assembly
- Cistern-to-pan bolt assembly with rubber cone washers
Quick heads-up: WaterMark certification is mandatory on every component you buy. It's a national standard across Australia, and your local plumbing authority can knock back any job that uses non-certified parts. Look for the WaterMark stamp on the product packaging before you buy. Reputable suppliers' inlet valves and flush mechanism parts will almost always have it; suspiciously cheap products from unknown online sellers almost certainly won't. Do not risk it.

Removing the Old Toilet Cistern Without Causing Damage
With your tools and parts ready to go, it's time to pull the old cistern off. Before anything else — and this really can't be overstated — cut off the water supply. Behind the toilet, either on the wall or floor, you should find an isolation valve. A clockwise turn shuts off the flow. Can't find one? Shut off at the mains and call a licensed plumber — water supply line work is licensed plumbing in every Australian state, full stop.
Give the toilet a flush to drain the cistern, then mop up whatever's left with the bucket and towels. There'll always be a puddle sitting at the base of the cistern — that's what the spare towels are for. At the base of the cistern, uncouple the water inlet supply line. Rigid supply pipe instead of a flexible connector? Stop right there and ring a plumber.
Under the pan rim you'll find the two cistern-to-pan bolts — usually wing-nut fastened — so undo those now. Corroded bolts are par for the course on older fittings — hit them with penetrating oil and give it ten minutes before you try again. Lift the cistern straight up and rest it on a stable surface — drape a folded towel over the pan rim first, because a chip in the porcelain is easily done.

How to Fit the New Cistern: A Step-by-Step Walkthrough
Do the parts in the right order and the whole installation is far less stressful than it sounds. Old cistern gone and pan rim protected? Good — fit the flush valve and fill valve into the new cistern body first, before anything else goes on.
Push the flush valve through the cistern base, tighten the lock nut until it's firm, then add one more quarter turn. Do the same for the fill valve. Run the two cistern-to-pan bolts through the base, making sure the rubber cone washers are seated properly for a watertight seal — never skip them or reuse old ones.
Lower the cistern onto the pan, line it up over the bolt holes, then tighten the nuts from below — hand-tight plus a quarter turn is the target. Don't crank them past that — cracked porcelain is a costly mistake that's entirely avoidable.
Your licensed plumber will handle the supply line reconnection, wrapping thread-seal tape on the thread to stop any weeping. Float height is another job for your plumber — the water level needs to sit at 20mm below the overflow tube inside the cistern. If you are also replacing the pan, selecting the right toilet bowl and cistern combination ensures a matched bolt spacing and a proper seal. Check your state or territory's rules on what preparatory work a homeowner can legally handle.

Common Mistakes, Final Checks, and Key Measurements
Once fitting is complete and the water inlet has been reconnected, fill the cistern on the first run slowly and check every joint visually for weeping. Confirm your new dual-flush cistern delivers 4.5 litres on a full flush and 3 litres on a half flush, consistent with a WELS 4-star water efficiency rating. Check that the cistern lid sits flat and does not rock.
On set-out: an Australian S-trap (floor outlet) is normally set out 100 to 120mm from the finished wall to the centre of the waste outlet pipe. A p trap for toilet (wall outlet) set-out is normally 185mm from the finished wall to the pipe centre. Understanding the p trap on toilet set-out is especially important when changing a toilet as part of a broader bathroom project, as the pan position must align correctly with the waste pipe.
The most common mistakes are over-tightening the cistern-to-pan bolts (leading to cracked porcelain) and failing to use thread-seal tape on the inlet connection. Mismatched inlet thread sizes can also cause problems — always check the existing fitting size before purchasing a replacement. Finally, an incorrectly set float can cause phantom flushing. Anyone researching how to install a toilet or how to replace toilet cistern fittings should confirm the water level is correct on the final test run, check all joints are leak-free after 24 hours, and the job is done.
References
WaterMark Certification Scheme, Australian Building Codes Board
National Construction Code 2022, Volume Three (Plumbing Code of Australia), Part A5 Documentation of Design and Construction — Lead-Free Copper Alloy Requirements
National Construction Code 2022, ABCB Housing Provisions, Part 12.2 Livable Housing