07 April, 2026
Toilet Cistern Replacement: When to Fix or Replace
Toilet cistern replacement guide: when to repair vs replace, step-by-step DIY instructions, tools needed and tips to avoid leaks. Save money and restore your toilet’s performance quickly.

If you’re a homeowner, there will come a time when something will go awry with your toilet cistern. It might be a matter of a toilet that won’t stop running, a weak flush, or a water stain behind the toilet. Whatever the issue, this is the time when you’ll want to know whether you should repair or if toilet cistern replacement is actually the better option. I’ve been writing about home improvement for several years now, and though I’m not a licensed plumber, I have learned that it all starts with understanding your toilet cistern.
How to Tell When Your Cistern Needs Replacing
Ideally, a toilet cistern is something that you should hardly ever notice. It should quietly refill after each use, maintain a steady water level, and initiate a flush when you press the handle. But when it fails to do any of these things, it’s time to assess the situation. First and foremost, if there are any noticeable cracks in the porcelain or plastic cistern, then you’ll probably know what you’re up against. Water collecting at the base of the toilet or trickling down the outside of the tank are other obvious signs of a faulty cistern. Sometimes toilet cistern leaking happens because the internal seals have deteriorated—those rubber washers and gaskets wear out after years of use—but other times it’s the cistern itself that has failed. Cracks mean replacement; worn seals might mean a repair is still possible. The age of a cistern is also an important factor. If it’s over 20 years old and you’re noticing issues, replacement might be the better option. Not only are older cisterns less water efficient, but it also becomes increasingly difficult to find replacement parts. Plus, the cost of repairing an older cistern can sometimes approach the cost of installing a new one altogether. I’ve come across people who have spent $300 trying to fix a cistern that they could have replaced for $500.

When the Flush Stops Working (and What to Check First)
A toilet flush not working is an inconvenience, but before you assume that you need to replace a toilet cistern, there are a few possibilities to rule out first. For starters, a cracked, stuck, or non-responsive flush handle might be the culprit. In many cases, this is a simple (and inexpensive) fix that doesn’t require replacing the entire cistern. Inside every cistern, there’s a flush valve that opens to allow water to flow into the bowl. This valve can get worn out over time, or clogged with debris. Hard water conditions can also cause mineral buildup on the valve, preventing it from working properly. Finally, the chain that connects the handle to the valve can become broken or bent, disrupting the entire process. How to fix toilet flush problems often starts with shutting off the water supply and pulling the cistern apart. If you find any crud, remove it. If the flush valve is sticking, a brush and some vinegar may suffice. If your button is loose or won’t spring down, you may be able to swap that out without fitting an entire new cistern.

How to Replace a Toilet Cistern Step by Step
Once you’ve made the decision that a toilet cistern replacement is in order, the actual process is pretty simple if you’re happy to do a bit of basic plumbing. Start by shutting off the water at the isolation valve. This is usually located under the toilet or on the wall behind it. Now flush the cistern to drain as much water as possible, and then soak up whatever’s left with a sponge or an old towel. The last thing you want is water going everywhere. Uncouple the water inlet pipe, the flexible hose that feeds the cistern, by undoing the compression fitting. Have a bucket handy to catch any dribbles. Depending on the type of cistern, it will be either bolted to the pan from below or sitting on top of it with a rubber grommet in between. If yours is bolted from the bottom, you’ll see the nuts holding it in place. Undo these. If yours is top mounted, you’ll simply need to lift it off once the nuts are undone. Take out the old rubber grommet if there is one; you’ll be replacing it with the one that comes with your new cistern. Place your new cistern into position and line it up with the bolt holes. Do up the nuts until they’re snug, but not over-tight, as you don’t want to crack the new cistern. Reconnect the water inlet pipe and turn the water on. Check that none of the joins are leaking. Adjust the float valve to cut out at the right level, and test the flush. The job should take you somewhere between half an hour and an hour if you work at a moderate pace. If you’re not sure of your abilities when it comes to working with water connections, or if the cistern is in a tricky location, this is a time when it’s worth calling in a licensed plumber. They’ll have it done quicker, and they’ll guarantee their work.
Choosing the Right Replacement Parts
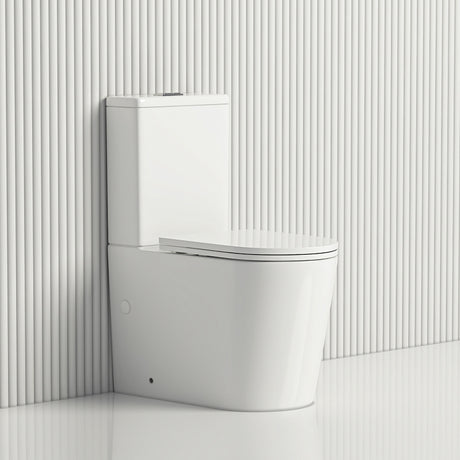
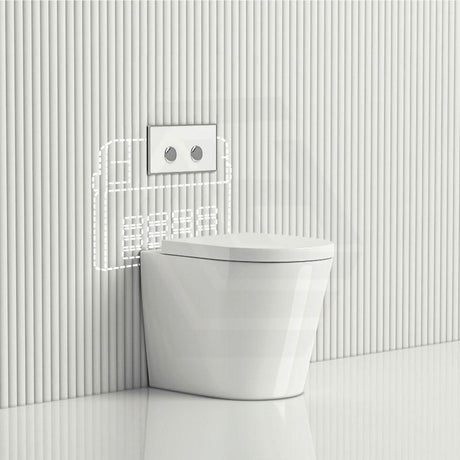
When it comes to toilet cistern replacement, selecting a new cistern means matching it to your pan. There are three common configurations, close-coupled (where the pan and cistern are bolted together to form a single unit), cisterns that sit on top of the pan, and cisterns that are mounted into the wall. Measure your old cistern and make a note of its dimensions before you place your order. This is also a good time to replace your toilet buttons if you wish to do so. If you are already inside the cistern, it is easy to replace the button. A replacement button will cost anywhere from $15 to $40 depending on the design and finish. Select one that suits the style of your bathroom, whether it be chrome, brushed nickel or a soft matte black. Browse a button for toilet options online to see the range available. You might also look at a button toilet from a specialty supplier if you want something a bit different from what your local hardware store offers. A quality toilet button will last longer and feel more satisfying to use every day.

Common Mistakes to Avoid During Cistern Replacement
The most common mistake that I see is purchasing the wrong type of cistern. You can’t just assume that all cisterns go with all pans. Consult your toilet’s manual or take a photo down to the hardware store and ask for assistance. The next mistake is over tightening the bolts. People worry about the cistern leaking and crank down hard, which actually cracks the ceramic. It is generally sufficient to tighten them by hand and then tighten a quarter turn further. Don’t forget the rubber seal. This is the all important part that sits between the cistern and the pan and keeps the water from leaking out. Every new cistern comes with one, but make sure it is there before you begin installation. If you are reusing an old cistern, the seal absolutely needs to be replaced. If the wall behind the toilet is not plumb, or the pan is not sitting level, it may be difficult to achieve a good seal. If you are still struggling to get a seal, pack up your tools and call a plumber. It’s just not worth risking a water damage issue underneath your floor.