29 May, 2026
Small Bathroom Layout Ideas for Australian Bathrooms
Explore small bathroom layout ideas for compact Australian bathrooms. Get practical tips on fixtures, clearances and NCC 2022 compliance.

Video Credit: 1898 Channel
Why Layout Is the Biggest Challenge in Small Australian Bathrooms
It can't be stressed enough — layout is key.
In a tiny bathroom, every single choice you make with regards to your bathroom fixtures (and even door swings and plumbing rough-in locations) comes with a consequence. And if you get it wrong, it'll cost you a lot more to sort out after than it would have been to figure it out on the drawing board.
In most small bathrooms in established Australian homes, you're talking floor spaces that run anywhere from between 3 m² and 4 m². Which isn't much, and the NCC 2022 clearance requirements tighten it further.
According to the ABCB Housing Provisions in the NCC 2022, if you're building a new dwelling, you now have to have an 820 mm clear door opening (NCC 2022, ABCB Housing Provisions, Part 12.2) and a 900 mm × 1200 mm clear zone in front of the toilet. And you can't count that clear zone under the swing of the door.
In other words, in a typical 1500 mm × 2000 mm bathroom, just those requirements can gobble up nearly a third of your space before you have even placed a single bathroom fixture.
There is another factor that often surprises homeowners about small bathrooms — plumbing rough-in locations. Having to move a toilet waste pipe, or moving around the supply locations for a bathroom basin, needs to be done by a licensed plumber and this can add to your project budget.
In my own experience of designing small bathrooms, the best results always tend to be achieved where you've got existing rough-in locations and you work out your layout around those.
The number one thing I stress to every client when working on a small bathroom project is that most of the time the reason bathrooms end up feeling small and unusable is down to a bad layout, not because the budget is inadequate.
A small bathroom will always perform better if it has been well thought out, rather than if it is stuffed full of expensive fixtures that jostle for space.
So with all of that in mind, what you now need to do is find out what bathroom floor plan works with the specific shape and size you are working with.

The Most Practical Small Bathroom Floor Plans
There are three small bathroom layout ideas that consistently deliver functional results in Australian homes, and they each work with a different room shape and plumbing arrangement.
The most common is the single-wall linear layout. In this scenario, all of the fixtures are lined up in a row against one wall of the room. This layout generally works for bathrooms with a width of 1400 mm minimum and allows for all plumbing to be located on one line of fixtures. This makes it the most affordable option, good both for new home bathrooms and renovations. The only drawback is that it is only suitable for rooms that are relatively narrow and long, and you're also limited in what fixtures you can arrange in what order.
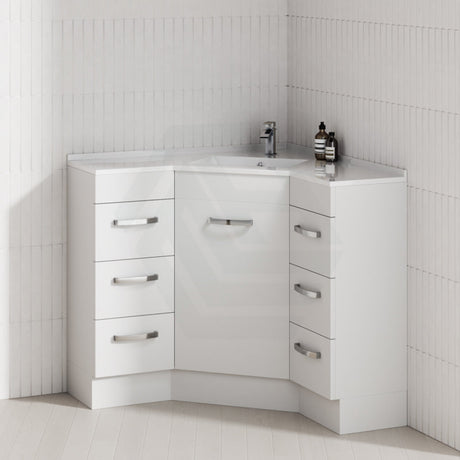
The L-shaped layout has two groups of fixtures against two walls that form an L-shape. Typically this means one wall holds a shower or a bathtub, and the perpendicular wall holds the basin and toilet. L-shaped bathrooms suit rooms that are more square, and it's also possible to have quite a spacious shower recess without affecting how much clear space there is for the basin and toilet. It is a little more expensive plumbing-wise since you are plumbing into two walls, but generally the pipe runs won't be that long.
Finally there is the galley layout. In a galley layout, you're running two groups of bathroom fixtures against two opposite walls. For a galley bathroom layout to be feasible, you generally will need at least 900 mm of clear walkway between the opposing lines of fixtures to meet circulation requirements. This layout suits bathrooms that are long and narrow, and can create a fairly roomy feel if you're able to leave the whole length of the room unobstructed. This setup features the most complicated plumbing because your water supply and drain are on opposite walls.
After you decide on the layout, one of the biggest space decisions you will make is the location of the shower and bath. In a small bathroom, changing to a wet room or a shower-over-bath combination can really help you maximise the room's usable size.

Wet Room and Combined Shower-Bath Configurations
A wet room is where the floor is totally waterproofed and sloped to a linear floor waste. With no shower screen or recessed shower tray, a wet room is the most compact shower format for a small bathroom of less than 4 m². There is no need to accommodate the swing of a screen or the need to step over a tray rim, and the lack of screens means your small bathroom reads as bigger than it really is.
The minimum shower recess under a conventional screen is 900 mm × 900 mm. However, in a frameless walk-in wet room set-up by Covey, you can achieve the same shower recess footprint without the need to accommodate a door swing which will save you 200–300 mm of floor space for other features.
A waterproofing requirement you need to stick to without exception: shower walls need to be waterproofed to 1800 mm above the floor substrate (NCC 2022, ABCB Housing Provisions, Part 10.2); bath-adjacent walls to 150 mm above the rim; and you must add a waterproofing flashing at the wall-to-floor junction with a horizontal leg of 40 mm. You can achieve this through compliance with the Housing Provisions or via the alternate pathway to AS 3740:2021. In most Australian states, you need to engage a licensed waterproofer to carry out this work.
A shower-over-bath combination is worth considering when you need a bath but space is tight. A Broadway back to wall bath with a shower rail on an overhead rail track lets you fit a shower and a bath in the footprint of one. The combined zone requires approximately 1500 mm × 750 mm, which is considerably smaller than having a separate shower recess plus a separate bath.

Space-Saving Fixtures That Actually Work
In a small bathroom of less than 4 m², selecting your fixtures is not so much an aesthetic choice but a space choice.
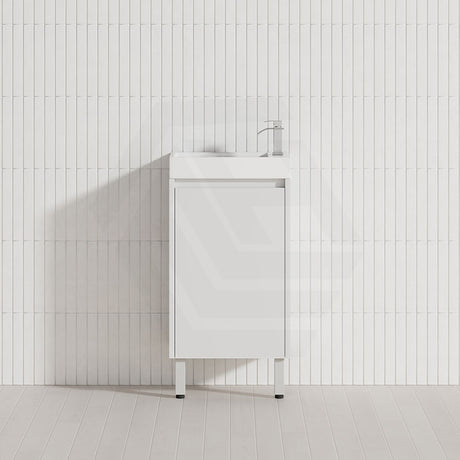
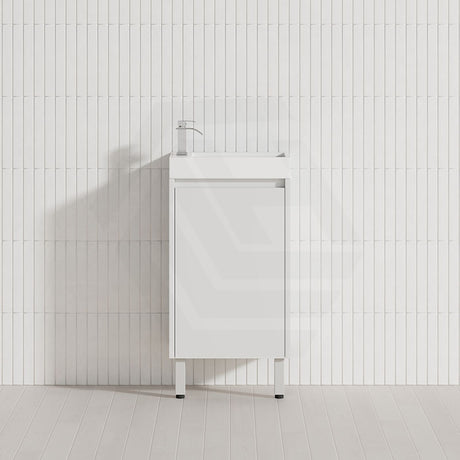
A wall hung vanity is one of the best solutions for a small bathroom. By attaching to the wall rather than resting on the floor, it recovers 150–200 mm of visual floor depth, making the floor look larger and uninterrupted. Brands like Lukka and CETO offer ranges in the 400–600 mm width suited to compact bathrooms, from $50 to $800. Note that a wall hung vanity requires a reinforced wall stud in the correct location, installed during the rough-in stage. All plumbing work must be carried out by a licensed plumber.
A back to wall toilet tucks the cistern into or against the wall, reducing the toilet's floor projection by 100–150 mm compared to a standard close-coupled suite. Poseidon and Fienza both produce quality back to wall toilet suites, with prices ranging from $185 to $1,199. In a bathroom where you're trying to hold onto the 900 mm × 1200 mm clear zone in front of the pan, that extra projection matters — so consolidating wall-mounted products above the vanity is a smart way to claw back visual and physical space.
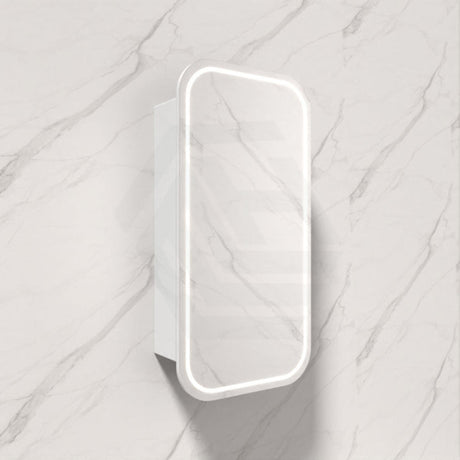
An LED shaving cabinet — combining mirror, storage, and lighting in one unit — removes the need for three separate wall products and keeps the wall above the vanity clean and functional, priced from $390 to $1,096 (NCC 2022, ABCB Housing Provisions, Part 10.8). The electrical connection requires a licensed electrician and must be RCD protected.

Layout Mistakes to Avoid and Final Fitout Tips
The most common small bathroom mistake is a door that swings into the fixtures. A bathroom door that swings inward in a 3 m² bathroom makes the room unusable with the door open. Wherever possible, specify a sliding door or cavity slider, or reverse the swing to open outward.
Undersizing the shower recess is the most frequent error in my experience. A shower with an internal size of 760 mm × 760 mm is too small and will feel cramped. The 900 mm × 900 mm minimum is just that — a minimum. A 1000 mm × 1000 mm shower would be considerably more comfortable if your plans allow for it.
Not specifying adequate exhaust is one of the most expensive mistakes in a small bathroom. If there is no natural ventilation from a window, your bathroom must have a mechanical exhaust fan with a minimum capacity of 25 L/s. Poor ventilation leads to mould, waterproofing membrane failure, and paint degradation at a much faster rate. Rectifying this post-fitout is very expensive, so include a quality exhaust fan in your budget from the start.
Allow a minimum clearance of 600 mm between the vanity and toilet. Ensure your door swing won't clash with any fixture before plans are finalised. Get your waterproofing certified — there is an inspection hold point where the certifier must approve the waterproofing before tiling can proceed.
If your bathroom is fairly square, a corner bath by Broadway can be a great fit. At 1200 mm × 1200 mm it has a manageable footprint, and in a larger room it leaves plenty of circulation space once installed — priced from $958 to $2,085.
The key point to any small bathroom layout ideas that work is a carefully calculated, well thought-out floor plan — one that makes your bathroom feel and function well, whatever the size.
References
National Construction Code 2022, ABCB Housing Provisions, Part 12.2 Livable Housing
National Construction Code 2022, ABCB Housing Provisions, Part 10.2 Wet Areas
AS 3740:2021 Waterproofing of Domestic Wet Areas, Standards Australia
National Construction Code 2022, ABCB Housing Provisions, Part 10.8 Condensation Management