01 June, 2026
Bath and Shower Combo Ideas for Australian Bathrooms
Discover clever bath and shower combo ideas perfect for compact Australian bathrooms. Smart layouts and design tips to maximise your space.

Video Credit: The Homeowners Cookbook
Why Bath and Shower Combos Work Well in Australian Bathrooms
It's the dream that most of us share with our bathrooms, isn't it? Being able to unwind with a long, relaxing bath soak on the weekend, followed by a quick, efficient morning shower before the kids head off to school. All done within one well thought out, and very compact space — that's what bath and shower combo ideas achieve for us. A very simple concept that has a lot of merit, especially in Australian homes where space is always at a premium.
It is well known that the average Australian bathroom is between 5 m² and 8 m². While that's plenty to fit the usual four appliances required, there really isn't much scope to fit a bathing area and separate shower zone within this same space. When it comes to baths and showers, having a combo design where they share the one wet area means that you only need one waterproofed enclosure, one waste, one set of drains. Not two. You're already seeing cost savings and reduced materials required just by having them in one setup. If you were to install a separate shower and bath into a wet area, you're looking at twice the materials, which includes waterproofing and tiling, and potentially even twice the installation fees as well. A bath combo setup helps keep the costs down, without the need for sacrificing the features you desire in your bathroom design.
Water usage is also something to take into consideration in an Australian context. We are a nation of water conservationists, which is only fitting that our homes reflect this by only being required to use the water that we really need when we are using the bath or the shower. With a bath combo, you are not required to use both.
The bath and shower combo layout may be the best fit for your bathroom and budget, but not every bath style is suitable for the shower-over-bath option.

Choosing the Right Bath Type for Your Combo Setup
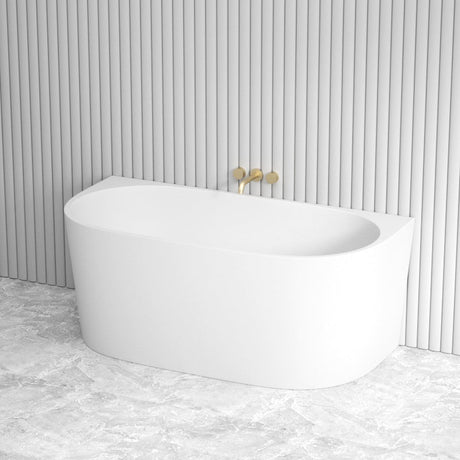
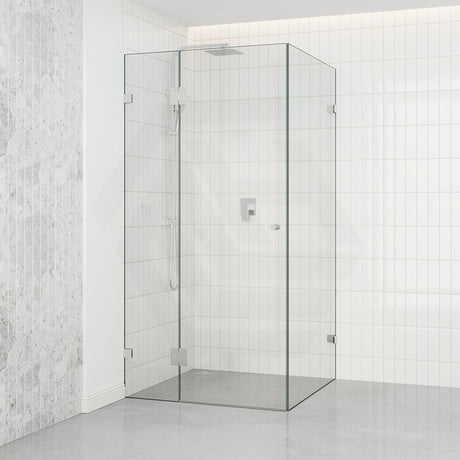
We can't stress enough that the decision regarding which bath style suits the combo setup is the most important part of the process. There are basically two bath types that are the best choice for your bath and shower combo ideas: the back to wall bath and a built in bath (alcove). Freestanding baths, though very stylish and great looking, cannot accommodate over bath shower screens, and should be left out of this discussion.
A built in bath is very common for bath and shower combos. The typical built in bath has three sides against the walls, allowing for an enclosed finish around the entire bathtub, which allows the most ease for fitting a screen, and is easy to tile and waterproof as well. Standard Australian bath lengths run at 1500 mm (the practical minimum for an adult), 1675 mm, and 1800 mm (NCC 2022, ABCB Housing Provisions, Part 10.2) — with the 1500 mm being the most common in an average size bathroom. They are typically made out of acrylic, and Broadway offers solid acrylic built in options starting from $312 AUD. Other materials such as steel enamel and stone resin are also available, with stone resin being the heaviest of the three — sometimes exceeding 100 kg — requiring confirmed floor load capacity before installation.
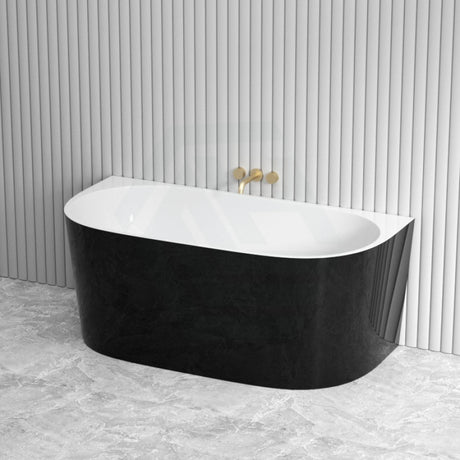
A back to wall bath suits bathrooms where one side is against the wall and the remaining sides present a finished face. While offering a slightly more elegant appearance than a recessed alcove bath, this style also works well with a fixed or hinged screen on one long side. Back to wall bath options from Poseidon range from $938 and $2,085 AUD depending on material and size.
Now that the bath type and dimensions are confirmed, it's time to focus on the shower itself — specifically how to size and position the shower rose, mixer, and water delivery.

Shower Configuration and Sizing Considerations
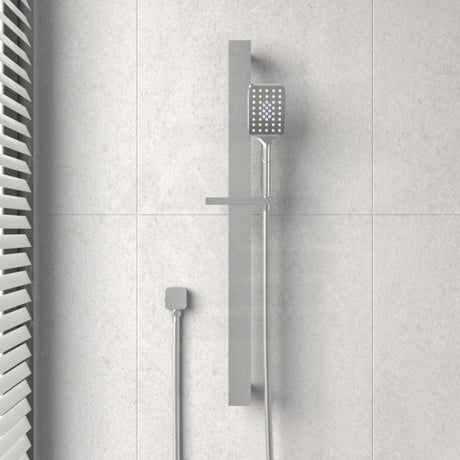
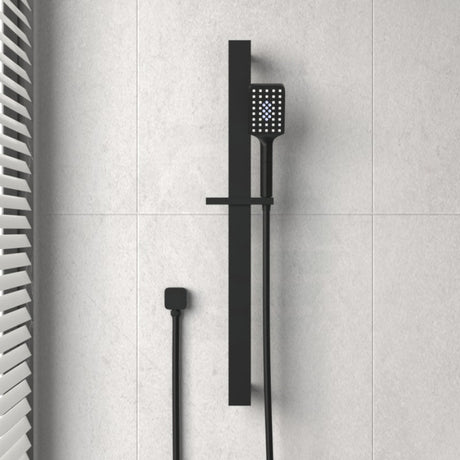
Now, how does the shower side of things work over a bath? The essential product here is a wall mixer with diverter — a single mixer that controls two outlets, commonly a fixed overhead showerhead and a handheld unit on a rail. Meir and Fienza both offer wall mixers with diverter options ranging from approximately $83 to $758 AUD, covering everything from entry-level chrome finishes to premium matte black.
The shower rose needs to be mounted at a height that you can stand underneath it comfortably — normally 1950 mm to 2000 mm above the bath rim. Of course, you need to consider that you are standing in the bath, not on a shower base. The advantage of a rail-mounted hand shower is that you can rinse out the bath surround — also useful for helping small children or pets bathe.
The NCC (2022) requires that shower walls must be waterproofed to 1800 mm from the finished floor, including the area over the bath. Bath-adjacent walls must be waterproofed to 150 mm (AS 3740:2021) above the rim of the bath. These are mandatory requirements, not optional.
Once you have your shower rose and wall mixer with diverter sorted, the next step is to contain the water so it stays within the bath. This involves choosing the right screen or enclosure, where cost, glass specification, and practicality can vary widely.

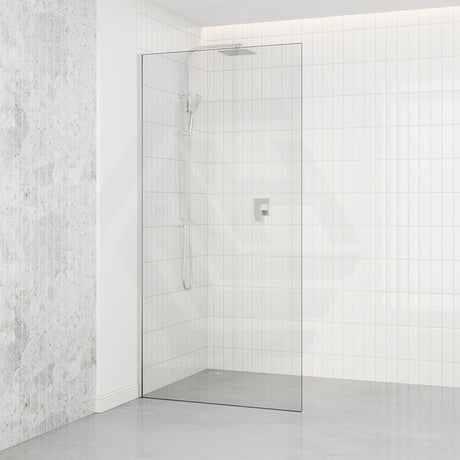
Over Bath Shower Screens and Enclosure Options
This is where some bathroom renovations come together or go wrong. The right over bath shower screens prevent water getting everywhere, protect your walls, and when done well can look very polished.
Consider the choices as being on a continuum from the minimal fixed panel to the fully enclosed cabin. A fixed panel is simply a sheet of toughened glass mounted from one end of the bath to deflect water spray. Hinged screens swing open from one end of the bath, offering wider access in and out — more commonly chosen where people want to step in for a full bath rather than just showering. Bi-fold screens fold up against themselves and work well when the bathroom door swing limits available space.
The thickness of the glass is critical. Standard over bath shower screens use 6 mm toughened safety glass, with 8 mm and 10 mm options offering increased rigidity and a more substantial feel — though 10 mm glass is significantly heavier and may require reinforced wall fixings. All glass used in shower screens must comply with AS/NZS 2208 for safety glazing — confirm this with your supplier. Many Covey screens available locally feature a nano coating, which reduces water mark build-up and saves you scrubbing limescale deposits. Frameless and semi-frameless screens provide a sleeker, modern look, while aluminium-framed screens may carry a lower price and can be easier to seal at the bath-to-screen junction.
Depending on design and construction, over bath shower screens range from around $130 AUD to $2,550 AUD. Ensure any light fixtures near the bath are installed in accordance with the clearance zones defined in AS/NZS 3000:2018 — your licensed electrician will confirm adequate clearance.
The choice of bath and screen is step one. How they are installed is just as important. If you are also considering a back to wall bath for this setup, confirm the finished face dimensions suit your alcove before ordering.

Installation Tips and Common Mistakes to Avoid
Even the very best built in bath and shower screen combination can be let down by poor installation. Here are the key things to watch out for.
The wet area must be waterproofed to AS 3740:2021 before the bath is installed. For a built in bath sitting in an alcove, the membrane must extend at least 150 mm above the bath rim on all adjacent walls. There must also be a minimum 40 mm (AS/NZS 3500.4) horizontal flashing leg at the floor-to-wall junction per AS 3740:2021. Both of these waterproofing requirements are mandatory — skipping either one is not an option.
Stone resin and cast iron baths are significantly heavier than acrylic — confirm with your builder that the floor can safely support the load. A minimum 40 mm bath waste diameter is required per AS/NZS 3500.4; this is one of the most common installation oversights and can lead to slow-draining baths and overflow issues.
Silicone sealant around the bath-to-wall gap and the bath-to-screen junction is essential for a watertight finish. Use a good quality sanitary silicone that is mould-resistant. Inspect all silicone periodically and replace it immediately if cracking or separation appears — water behind tiles and into wall cavities causes serious damage.
The temperature of hot water at bathroom outlets must not exceed 50°C per AS/NZS 3500.4. Most thermostatic mixers can be set to this limit — confirm the setting with your licensed plumber.
All plumbing, waterproofing, and shower screen installation must be carried out by a licensed plumber and licensed waterproofer (per state plumbing legislation). Your plumber will issue a certificate of compliance on completion, which is important for your insurer and future buyers. Done properly by the right people, your bath and shower combo ideas will deliver years of trouble-free service.
References
National Construction Code 2022, ABCB Housing Provisions, Part 10.2 Wet Areas
AS/NZS 3000:2018 Electrical Installations (Wiring Rules), Standards Australia
AS 3740:2021 Waterproofing of Domestic Wet Areas, Standards Australia
AS/NZS 3500.4 Plumbing and Drainage — Heated Water Services, Standards Australia
State plumbing licensing legislation (VBA Victoria; Fair Trading NSW; QBCC Queensland; Building Practitioners Board WA; CBOS Tasmania; ACTPLA ACT; Building & Energy SA; ABPB NT)