06 May, 2026
Feature Wall Bathroom: Highlighting a Freestanding Bath as the Focal Point
Feature wall bathroom ideas with freestanding bath as focal point: smart layouts, tiling tips and lighting to create stunning impact. Transform your compact Australian ensuite into a standout space.

The Impact of Placing the Freestanding Bath on a Feature Wall
Where you look when you enter a room is the area with the most visual impact. You don't want it to be by chance. Ideally, you should control where your eyes are directed first once you've entered the bathroom. By positioning your freestanding bath against a feature wall bathroom, you're creating a great opportunity to accomplish this.
It works in favour of, and not against, the plumbing in the bathroom. Having a freestanding bath means you're condensing the floor waste, the water connection and the bath spout all into about 600 mm of one wall. In other words, a freestanding bath on a feature wall is a clever design strategy, not just an aesthetic consideration.
You need to allow space. It's imperative that you allow at least 200–300 mm on each of the long sides for accessing the tub, cleaning and allowing visual room to air. The feature wall should be designed at least 150–200 mm past both sides of the freestanding bath to ensure the bath isn't lost in the wall but rather appears to be set into it. From my design experience for display home bathrooms, rooms that looked more finished were always the ones where we had carefully measured the clearances before selecting the first piece of tile.
With the spatial logic and clearances established, what do you build that wall out of? The material you choose will affect your cost, your waterproofing and your maintenance in the future.

Choosing the Right Feature Wall Material and Finish
For an Australian feature wall bathroom, I suggest large-format porcelain tiles, either 600×1200 mm or 800×1600 mm. Porcelain tiles are a higher-fired, lower-porosity tile than regular ceramic tiles, something that is worth being conscious of in a wet-adjacent environment. Installed cost generally ranges from $120 to $280 per square metre depending on format and complexity, and the large format reduces grout lines, which is a great benefit when looking at the back of a freestanding bath.
Natural stones are stunning and I've seen it done beautifully at European bathroom fairs. The problem with natural stone is the weight load placed on an upper-storey floor, which needs to be assessed by a structural engineer. You also have to keep in mind the ongoing sealing and maintenance that stone requires. For most Australian renovation budgets, a porcelain tile in a stone or marble finish delivers 80 percent of the visual result at a fraction of the complexity.
The final option would be a textured render, but this needs a very skilled hand. Regardless of what you build the feature wall out of, the waterproofing membrane is mandatory in all wet-area feature walls. Under AS 3740:2021 and NCC 2022 Part 10.2, bath-adjacent walls must be waterproofed to a minimum of 150 mm above the bath rim (NCC 2022, ABCB Housing Provisions, Part 10.2) (AS 3740:2021), with correct flashing at the wall-to-floor junction. Have a licensed waterproofer involved early in the design, before tiling commences — it is much harder to remedy after the fact.
Now that the wall material is selected, next is the lighting — not just fixture aesthetics but choosing the right fixture type, IP rating and lumen output to properly display the selected wall.

Lighting the Feature Wall: Practical Bathroom Lighting Ideas
Unfortunately, this is the area where many bathrooms fall short. The beautiful tiled wall, the stunning bath and then a single ceiling downlight washes the entire wall flat. Thoughtful bathroom lighting ideas can make the difference between a wall that looks good in a picture and a space that's actually enjoyable to spend time in.
Three approaches, used in combination, work well. Use recessed downlights positioned 600–800 mm from the feature wall to graze the tile surface and reveal texture. Use wall-mounted sconces flanking the bath at approximately 1400–1500 mm above finished floor to add warmth and intimacy. Use LED strip lighting behind a valance or around the bath deck to create soft, ambient, layered light. Aim to achieve 300–500 lux at bath level. When specifying globes and LED strip lights, choose 2700–3000 K — this colour temperature is warm and welcoming on stone-look tile and render alike.
AS/NZS 3000:2018 requires that all bathroom lighting be suitable for its zone. Zone 1 is located directly above the bath to a height of 2.25 m and requires a minimum IP45 (AS/NZS 3000:2018) rating; Zone 2 extends 600 mm beyond the perimeter of the bath and requires a minimum IP44 rating. Before finalising your lighting layout, ask your licensed electrician to confirm that all proposed fixture locations comply with these zone requirements — it is a non-negotiable part of the sign-off process.

Bath Sizing and Positioning
Common sizes for a freestanding bath are: lengths of 1500 mm, 1600 mm, and 1700 mm; and widths of 700 mm and 800 mm. If your bath is going to be situated on an upper storey, note that a filled acrylic freestanding bath weighs approximately 300 kg. Discuss floor loading capacity with your structural engineer before your licensed plumber roughs in the waste position. Ideally, the floor waste should sit 100–150 mm from the bath overflow outlet so that an accessible trap is provided.
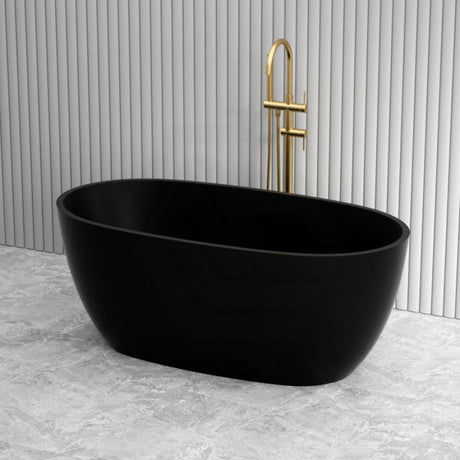
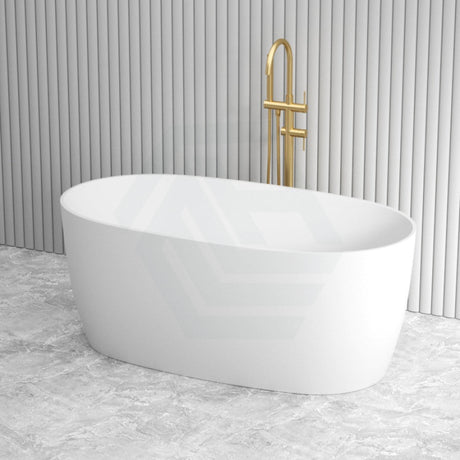
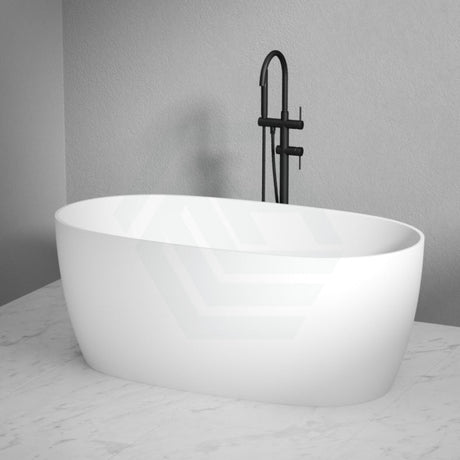
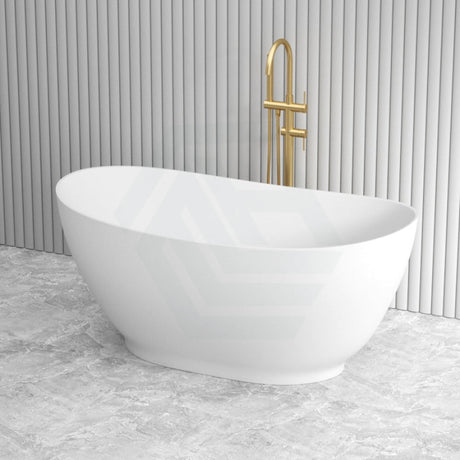
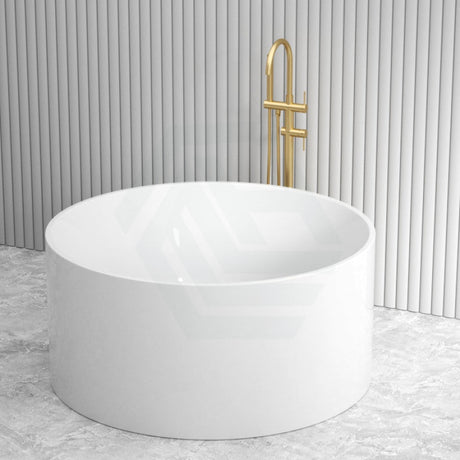
A round bath, at around 1500–1600 mm in diameter, has a larger footprint than a rectangular bath of similar nominal length and requires a larger area of floor space. It looks impressive, but a 1500 bath in an oval or rectangular shape will be more practical in smaller bathrooms. A 1500 bath centres well against most feature wall bathrooms of 1800–2100 mm wide and still offers plenty of bathing space.
Broadway and Poseidon both produce acrylic freestanding bath ranges in a variety of shapes and sizes — browse the full range of bathtubs sydney australia to compare styles and proportions before finalising rough-in locations. If you choose a round bath, confirm the diameter footprint fits within your clearance allowances before ordering. Once the bath position is confirmed, the remaining feature wall elements such as tapware finish, bath filler type, and niche placement can be coordinated around it.

Completing the Look: Black Bathroom Fixtures, Niches, and Accessories
The black bathroom finish — matte black tapware, a floor-mounted bath filler, towel rail, and robe hooks — is the most popular feature wall bathroom combination in Australia and works well with both stone-effect porcelain and textured render. When selecting black fixtures, PVD (physical vapour deposition) coating is more durable and scratch-resistant than powder coating, which is particularly relevant for a floor-mounted bath filler that sees frequent handling. Both Meir and Bella Vista offer WaterMark-certified matte black bath mixer ranges. Confirm that all fittings to be connected by a licensed plumber carry WaterMark certification — non-certified fittings cannot legally be connected. Floor-mounted bath fillers also require a minimum dynamic water pressure of 150–200 kPa, so ask your licensed plumber to test pressure at rough-in.
Regarding bathroom niche ideas, a recessed niche is typically 100 mm deep to align with a 90 mm stud wall. The niche must be specified at the framing stage, when waterproofing is being carried out — adding one later is very difficult. Position the niche 600–800 mm above finished floor level alongside the bath to hold candles, a small plant, or bath accessories, with the feature wall tiles continuing inside. Ensure any portion of the niche falling within Zone 1 or Zone 2 is fully waterproofed. When a 1500 bath is centred on a feature wall of 1800–2100 mm, a single niche to one side tends to look more resolved than two — the wall width leaves limited space and two niches can feel busy.
The overall feature wall bathroom renovation typically takes eight to twelve weeks from demolition to completion. Waterproofing membrane requires 24 to 48 hours cure time between each coat — confirm the membrane is completely dry before tiling commences.
References
AS 3740:2021 Waterproofing of Domestic Wet Areas, Standards Australia
National Construction Code 2022, ABCB Housing Provisions, Part 10.2 Wet Areas
AS/NZS 3000:2018 Electrical Installations (Wiring Rules), Standards Australia
WaterMark Certification Scheme, Australian Building Codes Board