06 May, 2026
Bathroom Paint Ideas: Vintage Grey Palette with a Clawfoot Tub
Bathroom paint ideas with a vintage grey palette: warm greige tones, clawfoot tub styling and perfect finishes. Create timeless elegance in your Australian bathroom.

Why a Vintage Grey Palette Works in Australian Bathrooms
Envision a room with walls painted in a soft, weathered grey, the light drifting lazily around the space and a clawfoot bath nestled in just so. This is the understated beauty of a vintage grey palette, a favourite grey bathroom ideas choice to consider when updating an Australian bathroom.
The thing about grey, of course, is that there is no such thing as just "grey". Warm greiges (greys that slide over towards beige in their undertones of sand or pink) work particularly well in bathrooms with a southerly aspect where there is little direct sunlight; cool, blueish greys do well in an easterly or northerly bathroom where the light is warmer — in these cases the grey balances out the yellow tinge of the light. LRV (Light Reflectance Value) is important: in a small space, a grey in the LRV range between 50 and 65 will make the bathroom appear larger, whilst a darker shade in the LRV 30–45 range looks best in a large bathroom or on a single wall in an otherwise neutral bathroom. In a bathroom with no natural light, choose a grey with an LRV of 60 or above and fit warm-white globes rated at 2700–3000K to keep the space feeling bright.
Older Australian bathrooms, especially in heritage or period-style homes such as Melbourne's Federation suburbs or Adelaide's inter-war bungalow neighbourhoods, or indeed Brisbane's Queenslander dwellings, often boast high ceilings with one small window, so this kind of palette really complements the proportions. The only other thing to note in terms of bathroom specifications is that in an enclosed bathroom the NCC stipulates an exhaust fan or duct of at least 25 L/s of air (NCC 2022, ABCB Housing Provisions, Part 10.8). Ensure that such a system is in place as the best bathroom paint job will fall foul of a humid, unventilated bathroom.
Next, consider the paint itself and which type of grey paint is best suited for your bathroom environment.

Choosing the Right Grey Paint: Finishes, Formulas, and Costs
First, there is a distinction to be made between the different types of paint for bathroom walls, and one thing that will not work is a flat or matte finish which soaks up the moisture and, as a result, is very difficult to keep clean and maintain. In terms of finish, satin paint for bathrooms is best, as it has some resistance to moisture but will not reflect the light in the room so aggressively like a semi-gloss finish. The semi-gloss is reserved for skirting boards, architraves, window sills, and the edges of a bathroom ceiling where there is most likelihood for moisture to gather.
Another important consideration is that in an enclosed bathroom it is essential to choose a water-based paint that is low-VOC in its chemical makeup. Budget water-based bathroom paint ideas start at $15–$25 per litre in Australia, mid-range products sit at $30–$45 per litre, and at the top end, $50–$70 per litre for premium quality products. Most standard paints cover approximately 12–16 m² per litre on a smooth, primed surface, though some older plaster and timber bathroom walls will need to be primed first. A tile primer must also be used to paint bathroom tiles if one is undertaking this. The same grey shade should be applied in two coats onto a good, primed surface to get the required depth and durability of finish for this vintage style.
Now that the walls are addressed, consider the joinery and storage elements. These will be called upon to do a lot of work in a hard-working space, but should look like they belong together with your bathroom paint ideas and the general vintage grey palette.

Bathroom Storage and Cabinet Ideas That Suit a Vintage Grey Scheme
Storage is actually the most common area where vintage-style bathrooms fail. Since the overall aesthetic is meant to be deliberate and restful, having open shelves cluttered with half-used bottles is the very last look you are after. So, be strategic with your bathroom storage ideas and keep surfaces clear. For bathroom cabinetry, keep everyday items behind closed doors, and keep open shelves for things you want to look at such as a folded towel, a small plant, or an attractive bottle of bath salts.
For bathroom cabinet ideas in a vintage grey colour scheme, the best answer for bathroom furniture is to consider a freestanding vanity with legs. Lukka and Aulic both offer freestanding vanities available in woodgrain finishes that contrast against the grey walls, with prices ranging from $238–$1,378 depending on size and materials. A wall-mounted cabinet is another good option, as long as the room allows, to give you discreet storage. These will be around 300–450 mm deep, so will not take up much floor space. Whatever cabinetry or joinery you use, be sure to pick products designed for high-humidity environments, as moisture will shorten the life of the materials considerably. Expect to pay between $153–$701 installed for a wall-mounted shaving cabinet.
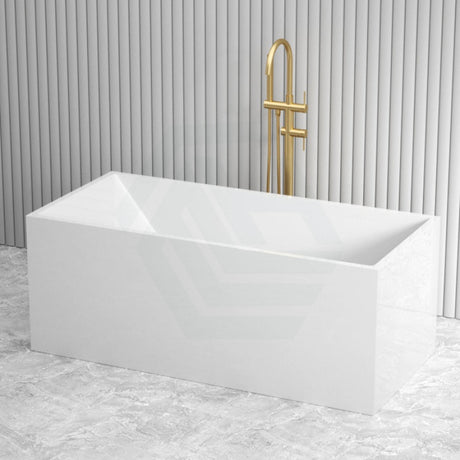
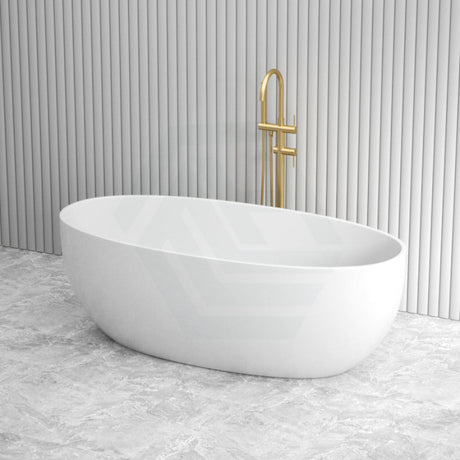
Bathroom storage and cabinetry are functional, but what really anchors the entire scheme and defines the vintage style of the room is the clawfoot bath. Placing the clawfoot bath involves much more than where it looks best — you have to think about clearances from the walls and floor, the plumbing needs, and how the floor will cope with the weight of the bath.

Placing and Styling a Clawfoot Bath
So where is the bath best positioned? The natural urge is to place it under a window, and if the room allows for it, then yes, go for it. However, the necessary clearances must be adhered to first. A freestanding bath should allow around 150–200 mm from any wall to the short end of the bath, and 600 mm of clear access along the long side. That 600 mm is required so you have comfortable use and cleaning access, and also to give the licensed plumber a workspace to connect the water and waste plumbing. This is not a DIY project — a licensed plumber must carry out all water supply, waste, and overflow connections.
A cast iron can weigh between 150–180 kg on its own. When filled with water and occupied, the floor has to be rated to support 350–450 kg over a quite small area. If you are retrofitting a bathroom in an older Australian house, a builder will need to confirm whether the floor is structurally capable of supporting this load. An acrylic clawfoot soaking tub is significantly lighter — between 30–50 kg — and so will be a more appropriate fit for an upper-storey bathroom or a house with an older timber subfloor. Acrylic holds heat decently, although cast iron is the better option for lengthy, relaxing soaks.
Align the bath with the rough-in plumbing in the floor, positioning it to suit the location of the waste outlet specified by the manufacturer. Check with your licensed plumber at the first site visit to confirm the precise distance from rough-in to waste outlet. Try to face a grey feature wall or a window, if you can, to accentuate the deliberately designed, retro appeal.

Completing the Look: Fixtures, Tiles, and Finishing Details
The tapware finish is really important in a grey bathroom and can define the overall scheme. Brushed nickel suits greige and gives a classic, timeless appearance. Chrome works best with cooler, blue-greys. Matte black has a stronger presence, making a bolder, more contemporary vintage statement. Use this finish for the towel rail, robe hook, basin mixer, toilet roll holder, and all other accessories throughout the bathroom.
All Australian bathrooms must comply with water efficiency standards, and all fixtures must be WaterMark certified — with an important update on the horizon. From 1 May 2026 (WaterMark Certification Scheme), any fixture within the WaterMark Certification Scheme must be lead free. Check WaterMark certification before you purchase. Wall-mounted bath mixer sets, such as those from Fienza and Meir, come in a variety of finishes and retail from $52–$807.
Tiles for the floor in the wet area outside the bath must have a slip-resistance rating of at least P3 per AS 4586. A P4 rating is required if drainage is slow. White or pale grey hexagonal floor tiles look great in a vintage grey bathroom, or you can use a light-coloured porcelain tile with a stone-look finish. A mid-grey grout will create a unified floor, or you can use white grout for greater contrast. Waterproofing membranes on the walls around the bath must extend at least 150 mm above the bath rim (NCC 2022, ABCB Housing Provisions, Part 10.2).
For clawfoot for tub models, coordinate the finish to suit your tapware — brushed nickel or chrome are both good choices. A framed mirror in brushed nickel or a timber finish ($138–$448) suits the vintage scheme, but LED mirrors are also a popular choice. All hardwired electrical work, including the LED mirror and the heated towel rail, must be performed by a licensed electrician, and an RCD must be installed on all wet area circuits. A well-specified exhaust system will maintain your paintwork, your joinery, and the finish on your bathroom paint ideas scheme for years to come. When researching claw feet for tub sets, always confirm that the finish is available to match your selected tapware before placing an order.
References
National Construction Code 2022, ABCB Housing Provisions, Part 10.8 Condensation Management
WaterMark Certification Scheme, Australian Building Codes Board
National Construction Code 2022, ABCB Housing Provisions, Part 10.2 Wet Areas
AS/NZS 3000:2018 Electrical Installations (Wiring Rules), Standards Australia