14 April, 2026
Microcement Bathroom: Materials, Application and Costs Explained
Microcement bathroom guide: seamless concrete-look walls and floors explained. Compare materials, application process, costs and maintenance for a modern, grout-free finish in Australian homes.

What Is Microcement and Why Choose It for Your Bathroom?
Have you ever wished you could have seamless, smooth walls in your bathroom without any grout lines? If so, then microcement could be the ideal solution for your project. What is microcement? It is a composite mixture of cement, fine sand, polymer resins and specialised additives. Applied in very thin layers (typically a combined 2–5mm in total), it sticks to tiles, plaster, or concrete without any need to strip out old surfaces first.
Consider the alternative: in a polished concrete bathroom, it would need a 100mm+ concrete slab and weeks of grinding to achieve a smooth finish. A microcement bathroom, however, takes only two to three days to apply and produces a continuous finish that covers floors, walls and benchtops. The downside? Microcement is vulnerable to harsh cleaners, requires periodic resealing and will start to develop hairline cracks over time (though it won't impact structural integrity). If you are looking for a low maintenance, hands off surface you will never have to do anything to, tiles might be more up your street. If you love the look of a microcement bathroom's seamless finish and don't mind a little bit of ongoing work, read on!

Material Composition: Understanding Microcement vs Polished Concrete
The two materials are easy to confuse. So, let's explain the differences. Polished concrete, as the name suggests, uses the existing concrete floor slab. It is ground and polished to bring out the aggregates. The aggregates are quite large (up to 30mm), require a slab depth of at least 100mm, and create a speckled appearance. Cost is typically $40 to $80 per square metre for the materials and application. It generally lasts between 15 to 20 years with relatively little maintenance.
Microcement uses fine aggregates that are less than 0.5mm mixed with resins to increase flexibility. It is applied as 3–5 thin coats on top of a sound, flat surface. Costs are $60 to $120 per square metre for materials and labour. There is more upfront cost but it can be applied to just about any surface; no need to pour a concrete slab first. The appearance is much finer than polished concrete.
There are differences in durability also. Microcement will last 7 to 15 years, whereas polished concrete can last more than 15 years. The main deciding factor is your substrate and your budget. Whether you would rather have a finer, smoother surface or a rougher, textured surface is a personal decision.

Application Process: Preparation, Coating and Sealing Explained
A properly applied microcement needs meticulous preparation. Otherwise, within months of completion you could be facing cracking or flaking. There are seven basic steps to follow when applying microcement. The surface being treated must be prepared by the applicator. It must be free of dirt and contaminants. Then repairs must be made to the surface. Next a primer coat is applied to the surface. This helps the first microcement coat bond to the surface underneath. The first coat is applied at 2–3mm thick using a trowel. Curing time takes 48 hours between coats; do not rush this. The second and third coats are then applied. The first coat builds the surface, the second adds a little depth, while the third completes the seal and gives the seamless surface you are looking for. It needs another 48 hours to cure. A polyurethane or epoxy sealant is then applied on top of this. Finally, the sealant is buffed to give it a smooth, finished look. The application takes a day or two but you must allow five to seven days for the cure process. The surface cannot be exposed to water during this period so make sure you have your bath dimensions planned and everything else in place! A 5-square-metre bathroom typically runs $150 to $250 for materials and $200 to $400 for installation. With floor and wall coverage, you're looking at $550 to $1,050 in total.

Make the Most of Microcement's Minimalist Aesthetic
One of microcement's big draws is the freedom it offers designers. Grout lines are a thing of the past, so a bathroom can flow seamlessly over vanities, up walls and across benchtops. This gives even a small space a spacious feel.
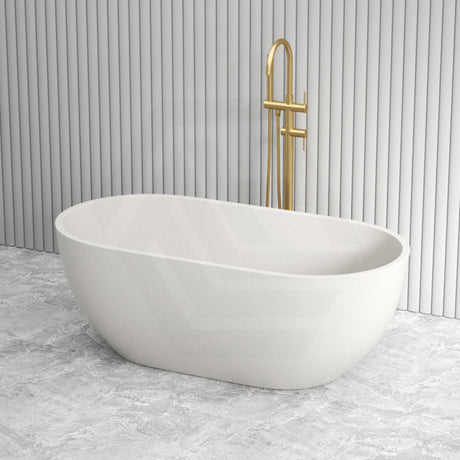
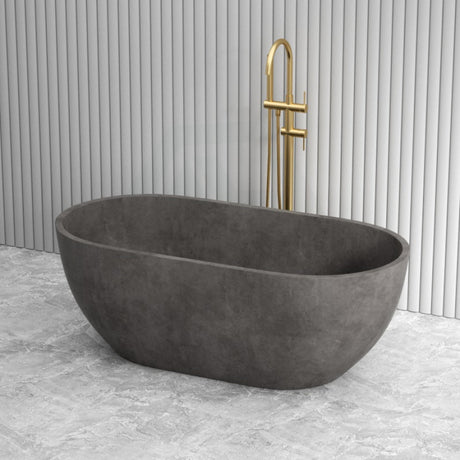
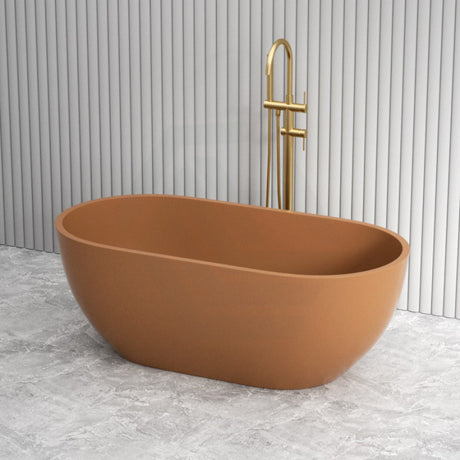
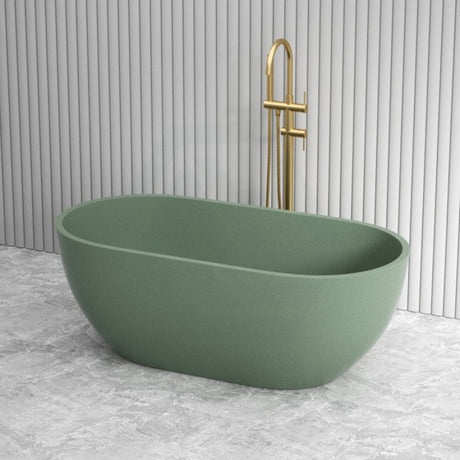
You'll find the widest range of microcement shades in light grey and natural concrete. These offer a happy medium between style and practicality, as they're less likely to show water marks than a lighter white and won't highlight the dust that dark charcoal does. For easy care, choose a matte rather than glossy finish, as this conceals watermarks and fingerprints better.
A stone tub is a great way to anchor the look, with the organic texture of natural stone complementing microcement's smoothness. You'll find a range of microcement textures available, from silky smooth to slightly textured, although you can control the surface finish during the burnishing process.
Maintenance, Durability and Long-Term Cost of Ownership
So what does it actually take to live with microcement? A weekly clean will require non-acidic (pH-neutral) cleaners and a microfibre cloth; don't use scouring pads, or acidic cleaners like vinegar or citric acid, which can etch the material. Once every few months you should check the condition of the microcement's sealant and re-apply if the water isn't beading on top anymore.
Expect to re-seal your microcement every 7 to 15 years, depending on its use. You may see very small hairline cracks over time, but these are purely cosmetic and to a certain extent inevitable. Smaller areas of damage can be repaired in-situ ($300 to $600), but larger areas of damage are best remedied by re-coating the whole surface area.
Total cost breakdown: Installing microcement in a 5 square metre bathroom will cost $550 to $1,050 and maintenance costs $100 to $200 annually (in sealant), plus resealing costs of $300 to $600 every 2 to 3 years. Over 10 years you are looking at total costs of $1,200 to $2,050. Stone bathtubs or tiled bathrooms may be $1,500 to $3,000 upfront but won't need any additional maintenance costs. For some, that concrete tub aesthetic and seamless finish make microcement the right choice, but tiled bathrooms might be the lower cost alternative in the long term.