26 June, 2026
How to Remove the Toilet Lid: Australian Bathroom Maintenance Guide
Learn how to remove the toilet lid safely, inspect your cistern components, and keep your Australian bathroom in excellent working order.

Nothing is as fulfilling as being able to DIY it — when it's actually pretty simple. Is your cistern running endlessly? Is your toilet flushing weakly or leaking constantly? Have you been listening to your toilet's constant dripping sound for days or weeks? It is a problem that usually only becomes clear once you have removed the cistern lid. Knowing how to remove the toilet lid — the cover on top of the water tank — is probably the most useful DIY skill you'll have as a homeowner.
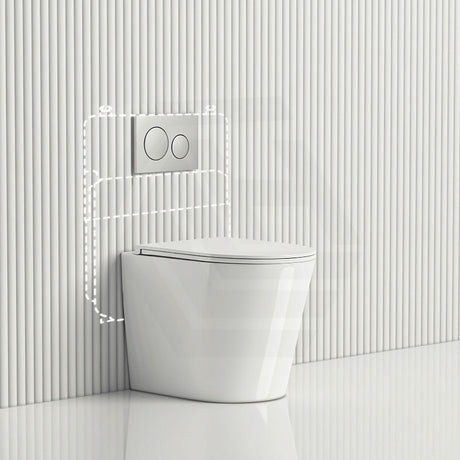
Let's just clear things up before we get started. The cistern lid is the cover on top of the water tank. It is not the toilet seat on the bowl. The toilet flush button can be integrated into the cistern lid assembly but it is still a distinct component from the lid itself. The cistern lid, the toilet seat, and the toilet flush button are three separate parts — keep them distinct in your mind throughout this process.
Video Credit: DIY Tips, tricks and hacks
Why You Might Need to Remove a Toilet Lid
A constantly running cistern is the culprit more often than anything else — and your water bill climbs a little more each week because of it. A weak flush, a dud inlet valve that won't refill the cistern properly, or a bathroom reno that calls for a look inside — any of these can send you reaching for the lid. A flush button that's lost its clean click is another reason to get in there and check the mechanism underneath.
Across every state and territory in Australia, lifting the cistern lid is something any homeowner can do — no plumbing licence needed. Once the lid's off, though, your intentions matter — that's where the rules change. Close the isolation valve and swap out an internal part? Fine to DIY. Actually disconnect the water supply pipes? That's licensed plumber territory, full stop. If you're unsure, a licensed plumber is your safest call.

Tools and Safety Checks Before You Start
The kit list is short: rubber gloves if you want them, a folded towel to set the lid down on, and a bucket close by if it makes you feel better. Honestly, that's it — nothing else needed.
First thing before the lid comes off: kill the water at the isolation valve — the small one sitting on the supply pipe behind or beneath the toilet. Clockwise, all the way until it won't go further. Give the toilet a flush and wait for the cistern to drain right out. A dry cistern means no surprise refill while you're poking around, and the internals are a lot easier to see and handle.
The lid deserves a bit of respect. Drop a ceramic lid from a quality suite — Fienza or Kohler, for instance — and it'll chip or crack; those things tip the scales at two and four kilograms at either end. Before you go for the lift, get a folded towel down on the floor or vanity top.
Water off, workspace sorted — now you can get into the removal itself, though the exact steps shift a little depending on how your cistern holds its lid.

Step-by-Step: How to Remove the Toilet Lid
Your first job is figuring out which type of lid you're dealing with. In most Australian homes, back-to-wall and close-coupled suites — Poseidon and Fienza are two you'll see constantly — rely on gravity alone to hold the lid in place, so it just lifts straight off. Both hands, both sides, even pressure — up it comes.
Where people get tripped up is when the flush button is built right into the lid. Here, the button assembly threads through the lid and a plastic retaining nut underneath locks the whole thing in place. The lid won't budge until that flush button is unscrewed or unclipped. A quarter-turn anticlockwise usually does it, or you press the button inward a touch before it'll lift free. Button out of the way, the lid comes off without a fight.
Forcing a cistern lid is always a mistake. Still stuck after the toilet flush button is off? Run your fingers along the back of the cistern — there may be clips or brackets anchoring the lid to the tank from behind.
Lid off — set it somewhere safe, then have a proper look at what's going on inside the cistern.

Inspecting and Servicing What's Inside the Cistern
These are the four key components to inspect:
• the toilet inlet valve, which refills the cistern with water after each flush
• the flush valve, which releases water into the pan when the flush button is pressed
• the float, which signals the toilet inlet valve when the cistern is full
• the overflow tube, which prevents the cistern from overflowing
A visual check will often reveal the problem. You may spot mineral deposits on the toilet inlet valve seat, a distorted flush valve seal, or a misaligned float. If the toilet inlet valve is not closing fully, water will trickle slowly down the overflow tube — you may be able to hear it.
If you can inspect the cistern yourself, you can also replace internal components as needed, since in most cases no plumbing licence is required for this work. However, any work involving disconnecting plumbing pipes requires a licensed plumber.

Replacing Parts or Refitting the Lid Correctly
You'll find toilet parts like an inlet valve, flush valve, or seal at pretty much any hardware store. Got a Poseidon, Fienza, or Kohler suite? Double-check that replacement parts actually suit your cistern before you buy. WaterMark approval isn't optional — it's a legal requirement for any replacement plumbing part sold here in Australia.
Line up the button aperture with the flush button, then ease the cistern lid straight down into position. Clip everything back that you took off earlier. Thread the flush button clockwise into the plastic retaining nut under the lid to lock it back in. Twist the isolation valve anticlockwise, let the cistern fill back up, then give it a flush to make sure all's good.
While you have the lid off, it is also worth considering whether to upgrade to a more water-efficient toilet flush button. A four-star WELS-rated toilet uses 4.5 litres on a full flush and 3 litres on a half flush — a meaningful saving over time. You might also take the opportunity to check your toilet seat; toilet seat replacement is a straightforward DIY task that can take as little as five minutes. Understanding how to remove the toilet lid is the first step toward confidently maintaining your entire cistern assembly.
References
State and territory plumbing licensing authorities (Building and Plumbing Commission Victoria; Building Commission NSW / NSW Fair Trading; Queensland Building and Construction Commission; Plumbers Licensing Board Western Australia (administered by Building and Energy); Consumer, Building and Occupational Services Tasmania; Access Canberra ACT; Office of the Technical Regulator / Consumer and Business Services South Australia; Plumbers and Drainers Licensing Board Northern Territory)
AS/NZS 3500.2:2025 Plumbing and Drainage — Sanitary Plumbing and Drainage, Standards Australia
WaterMark Certification Scheme, Australian Building Codes Board
AS/NZS 6400:2016 Water efficient products — Rating and labelling (incorporating Amendment No. 1:2022 and Amendment No. 2:2022), Standards Australia