30 October, 2026
How to Make a Sensor Toilet Flush (and Retrofit One)
Learn how to make sensor toilet flush systems work properly, troubleshoot common issues, and understand retrofit options for your bathroom.

I still remember hovering awkwardly over my own bathroom, wondering why nobody had told me sensors could do this job better than my finger ever did. Here's the short version: a detector unit clocks when you stand up, triggers a flush unit inside the cistern, and the whole thing runs on a power source that's usually just batteries. No lever, no lingering hygiene worries, no drama. Already own a toilet you love and just want the upgrade? The easiest fix is a smart toilet seat with sensor flush that mounts straight over your existing pan, running on a battery that lasts four to eight months before you need to swap it out.
Video Credit: ShortWithTech
What is a sensor toilet flush?
I'll admit it, the first time I saw an automatic toilet flush I thought the toilet was going to do more stuff afterwards. It took a few years to figure out the mechanism by which a sensor toilet flush works, but once you understand the concept, it's simple. Learning how to make sensor toilet flush systems work for your bathroom starts with knowing the sensor flushes the toilet when you stand up from it. Your finger used to push the lever, now the sensor does the work. You don't need to push or touch anything, and whoever sits on the toilet next doesn't have to worry about hygiene.
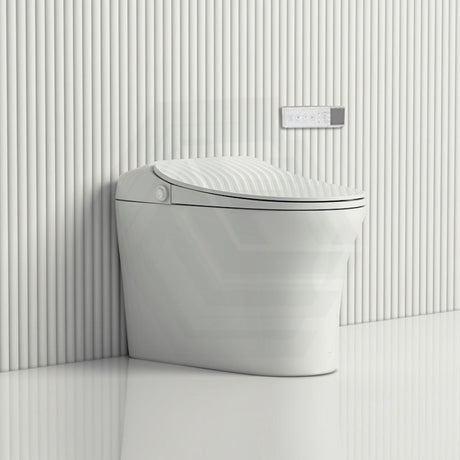
Automatic flush sensors are increasingly common as a feature built into some smart toilets and smart toilet seat covers, rather than being sold as a separate product. Think of them less as their own category of toilet and more as a neat extra feature your regular toilet can have. If you're looking for a nice little upgrade for your bathroom, particularly if you have children or elderly relatives who live with you, a sensor toilet flush might be just the ticket.

What Makes a Sensor Toilet Flush: The Core Components
Now that you understand that the sensor is taking over your job, you may be curious about what's behind the curtain.
The first thing you'll see is the detector unit, which is generally attached to the toilet bowl or the toilet cistern, and detects when the person has gotten up from sitting on the toilet. Next comes the flush unit, which is located inside the cistern and releases the water when triggered by the detector. I'm not going to go into the technical details of how the flush unit works because you really don't need to. The final component is the power source. Most sensor units are battery-powered, although some are hardwired into the mains.
This last point is critical. If you have a sensor unit that is hardwired to the mains, you must hire a licensed electrician to install it. Don't even think about attempting this installation yourself.

How to Make a Sensor Toilet Flush: Troubleshooting Steps
Now that we know the basics of what goes into a sensor toilet flush, let's get to the details of troubleshooting it. Understanding how to make sensor toilet flush issues resolve quickly comes down to working through a short checklist before assuming the worst.
The easiest thing to check is whether the sensor lens is dirty. Simply wipe it down gently with a clean, dry cloth, and you might be surprised at how many problems can be solved this way.
If the sensor is battery-powered, try replacing the batteries. It's a low-cost, straightforward solution that should be tried before you lose your mind. If the sensor is behaving erratically, flushing when nobody is around or not flushing at all, try adjusting the sensitivity/range. Most units have this adjustment option.
Finally, locate the manual override button. Almost all sensor toilets have this, in case this ever happens. If none of the above solutions work for you, and you're reasonably convinced that the problem lies within the internals of your toilet, then that's the limit of what you should attempt. Don't take your toilet apart.

Retrofitting an Existing Toilet with Sensor Flush Technology
If you don't already own a sensor toilet, the question now shifts to: how to make sensor toilet flush work on a toilet you already have?
The easiest solution is to simply buy a smart toilet seat with sensor flush, which mounts over your existing toilet. This generally runs on a battery that lasts four to eight months before needing replacement, and installs like any other toilet seat, depending on the pan and seat size you have rather than the type of cistern. This is a great solution if you'd like a smarter toilet but aren't yet up for a complete bathroom rebuild.
Or you could opt for a full smart toilet suite, which comes with a new pan and cistern in one integrated design. It also adds features like self-cleaning and heated seats. This is a much bigger investment and is considerably more functional than simply pushing the button on your dual flush toilet, so figure out what kind of bathroom experience you want as soon as you can.
A key consideration here is that any toilet installation or replacement involving the water supply or waste pipe is licensed plumbing work, and must be carried out by a licensed plumber. If your sensor flush unit requires hardwiring, that part must be done by a licensed electrician. DIY only covers installation of a battery-operated seat cover retrofit; everything else is left to the professionals.

Choosing the Right Sensor Flush Upgrade for Your Bathroom
So, after you've decided to either retrofit a sensor flush seat cover or upgrade to a full suite, the next thing is to make sure it will fit in your current bathroom.
If you go for the suite, get the set-out measurement before purchasing. This is the distance from the finished wall to the middle of the floor outlet (or the height of the wall outlet, if you have one). This is one of the most common and most frustrating renovation mistakes I see.
It's also worth checking out the type of toilet cistern you have, especially if you're considering moving to an in-wall cistern at some stage, as concealed and close-coupled cisterns have different mounting methods. Whichever option you pick, remember that installing a sensor won't change the certified flush volume of the toilet suite; its WaterMark certification and WELS star rating remain unchanged. Sensor flush is a handy extra, but it doesn't replace a properly installed toilet.
References
AS/NZS 3000:2018 Electrical Installations (Wiring Rules) (incorporating Amendment 3:2023), Standards Australia
AS/NZS 3500.2:2025 Plumbing and Drainage — Sanitary Plumbing and Drainage, Standards Australia
State and territory plumbing licensing authorities (Building and Plumbing Commission Victoria; Building Commission NSW / NSW Fair Trading; Queensland Building and Construction Commission; Plumbers Licensing Board Western Australia (administered by Building and Energy); Consumer, Building and Occupational Services Tasmania; Access Canberra ACT; Office of the Technical Regulator / Consumer and Business Services South Australia; Plumbers and Drainers Licensing Board Northern Territory)
WaterMark Certification Scheme, Australian Building Codes Board