12 November, 2025
How to Replace a Tap Washer: A Simple DIY Guide
Stop dripping taps! Learn to replace a tap washer in minutes with basic tools. Step-by-step DIY guide saves water and prevents damage.

A constantly dripping tap is an annoyance that wastes water and money. In most cases, the source of the problem is a worn-out washer. Learning how to change a washer in the shower is a fundamental home maintenance skill that can solve the issue in under an hour. This guide will provide a clear, step-by-step process for this common DIY task. We will cover the tools you'll need, the correct procedure, and when to leave the job to a professional.

Tools, Materials, and Preparation You’ll Need
Before you begin, gathering the right tools is essential for a smooth process. You do not want to be searching for a tool while the water is shut off.
- Adjustable spanner (or wrench): It is your main tool for loosening the tap components.
- Screwdriver set: You will likely need both a flat-head and a Phillips-head screwdriver to remove the tap handle screw.
- Replacement washers: Tap washers come in many sizes. It is best to buy an assorted "tap washer kit" to ensure you have the one you need.
- Clean rags: You'll need one to plug the drain and others for cleaning parts and wiping up small spills.
- Optional: A can of penetrating oil spray can be helpful if tap parts are corroded and stuck.
For preparation, the most important step is to plug your sink or tub drain with a rag or plug. This will prevent small screws or parts from being lost.
How to Replace the Tap Washer: Step-by-Step
Follow these steps in order. Do not rush, especially when dealing with older, corroded fixtures.
Step 1. Shut Off the Water Supply
This is the most important step. You must turn off the water before you do anything else. Look for an isolation valve (a small handle or screw) on the pipe directly under the sink and turn it off. If there isn't one, you will need to shut off the main water supply to your entire house, usually located where the water pipe first enters your property.
Step 2. Turn On the Tap
With the water supply off, open the tap you are fixing. This will drain any remaining water in the pipe and confirm that the water is off.
Step 3. Remove the Tap Handle
The handle (or tap cover) is held in place by a small screw. The screw is often hidden under a decorative cap (which may be labeled 'H' or 'C'). Carefully pry this cap off with a small flat-head screwdriver. Use your screwdriver to remove the screw underneath, and then lift the handle off.
Step 4. Expose the Spindle
With the handle gone, you will see the tap "bonnet" or "shroud." This is the metal cover over the main mechanism. It should unscrew by hand. If it's stuck, wrap it with a cloth (to prevent scratching) and use your adjustable spanner to gently loosen it.
Step 5. Remove the Headgear (Spindle)
You will now see the main brass mechanism, often called the headgear or spindle. It will have a hexagonal (six-sided) nut. Fit your adjustable spanner to this nut and turn it counter-clockwise to unscrew the entire assembly. Lift it straight out of the tap body.
Step 6. Replace the Washer
Look at the very bottom of the spindle you just removed. You will see the old, worn washer, usually made of black rubber. It is held in place by a small screw or nut. Remove that screw, take off the old washer, and replace it with a new one of the exact same size. Secure it with its screw, but do not overtighten—just firm is enough.
Step 7. Clean and Reassemble
Before you put the spindle back in, use a cloth to clean any small bits of debris or buildup from inside the tap body (the "seat"). This helps the new washer seal properly. Now, reassemble everything in the reverse order you took it apart:
- Screw the spindle (headgear) back in, hand-tight first, then a gentle nip with the spanner.
- Screw the tap bonnet/shroud back on.
- Put the handle back on and secure it with its screw.
- Pop the decorative cap back on.
Step 8. Turn on the Water and Test
Go back to your isolation valve or main water supply and turn it back on slowly. Check for any leaks around the tap. Finally, turn the tap on and off. The drip should be gone. This same general process applies if you're learning how to change a shower tap washer (the taps controlling your showerhead), though the components may be recessed into the wall and require a special "box spanner" to reach the headgear.

When to Call a Professional Plumber
While this is a common DIY task, there are times when it is better to call a professional.
- The Tap Still Drips: If you replace the washer and the tap continues to drip, the tap seat inside may be damaged or worn. The tap seat is the brass ring that the washer seals against. Repairing it needs a special reseating tool and careful handling, so it’s better to let a plumber take care of it.
- Stuck or Corroded Parts: If the tap handle, bonnet, or spindle is "frozen" with corrosion and will not budge despite reasonable force, do not force it. You risk breaking the tap or the pipe inside the wall.
- You Cannot Shut Off the Water: If your main valve is stuck or you are not confident in shutting off the water, call a plumber.
- The Drip Gets Worse: If you reassemble the tap and the leak is worse, you may have misaligned the spindle or used the wrong size washer.
Tips to Extend the Life of Your Tap and Washer
The best way to fix a drip is to prevent it. Following these tips can make your washers last much longer.
- The single most important tip is to never overtighten a tap. When you turn off the water, only tighten the handle until the water stops. Turning it further with excessive force does not stop the water "more"—it only crushes the washer against the tap seat, causing it to wear out quickly. This "gentle close" rule applies to all taps, from your sink to your shower, and it will reduce how often you need to replace shower tap washer components.
- Adress small drips immediately; a persistent drip can erode the tap seat over time.
- If your water pressure is high, consider having a plumber install a pressure-limiting valve for your whole house, as high pressure wears out all fixtures faster.
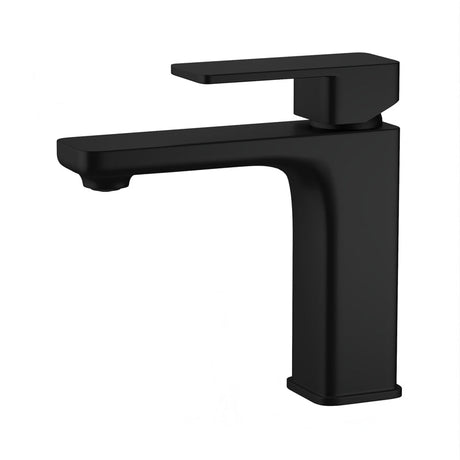
- When it's time to replace your old bathroom tapware, consider installing modern "ceramic disc" taps. They do not use washers and are far more durable.
Conclusion
Replacing a tap washer is a job most homeowners can do themselves. Turn off the water, take the tap apart, change the worn washer, and put everything back together carefully. This quick fix can stop leaks and save water. Learning how to do this, whether for a sink or a shower, is a useful skill that helps you keep your home in good shape and avoid extra plumbing costs.