20 May, 2026
Bathtub Installation: What You Need to Know Before You Start
Plan your bathtub installation the right way. Our Australian guide covers dimensions, alcove sizing and what to sort before you start.

Video Credit: Everyday Home Repairs
Looks simple on paper, a bathtub install — until you're already knee-deep in the mess. Late planning has wrecked more bathrooms than most people realise. Get the basics sorted up front — everything after that is a whole lot easier.
Bathtub Dimensions: What You Need to Know Before You Choose
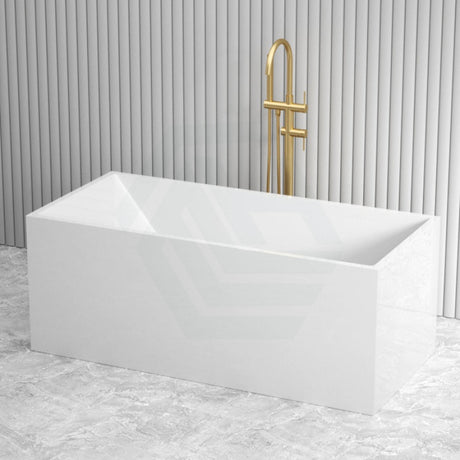
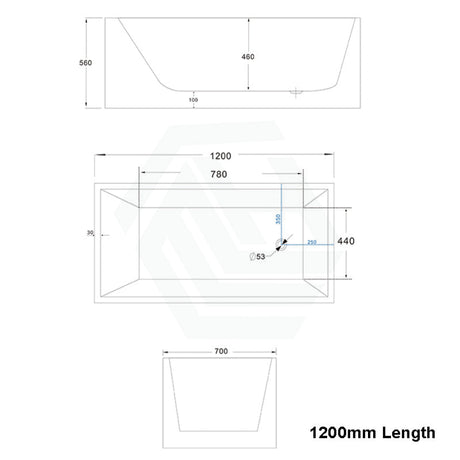
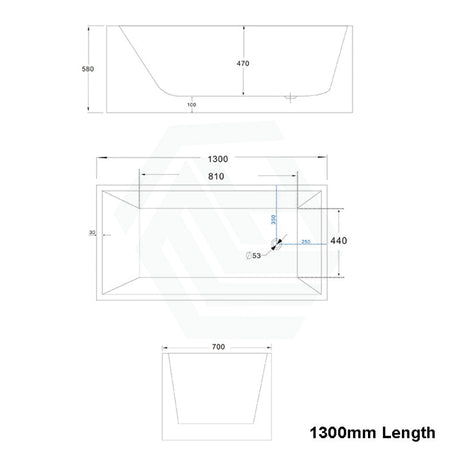
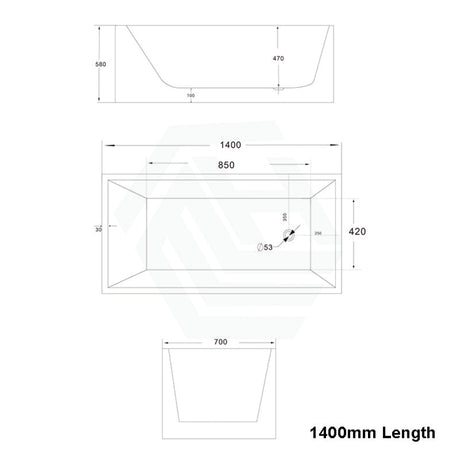
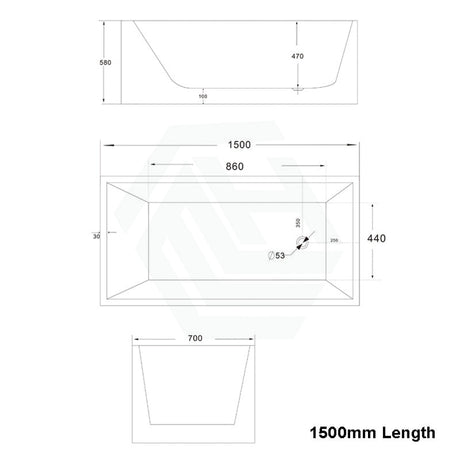
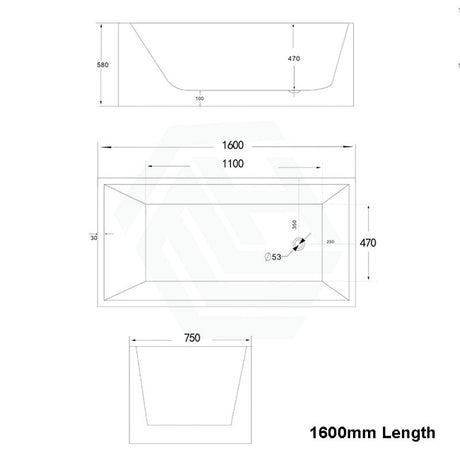
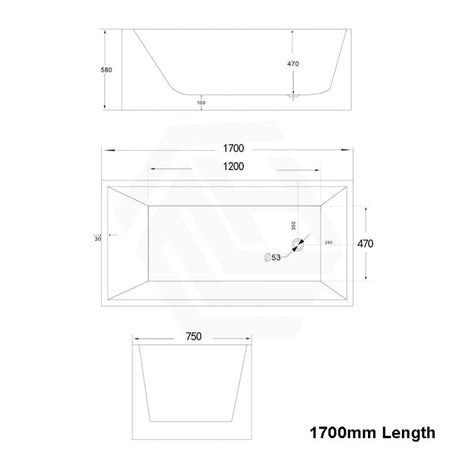
Standard bathtub dimensions in Australia typically range from 1500 mm × 750 mm up to 1800 mm × 900 mm, with 1500 mm being the practical minimum for a comfortable adult bath. Any shorter than this is not really a comfortable size for an adult bath.
Before you look at any products, get your available floor space or the opening to the alcove measured, noting length, width, and crucially, depth of space (including ceiling height in the case of a freestanding bath in an eaves space) — and don't forget to factor in side clearances as well. Leave clearances of at least 150 mm (NCC 2022, ABCB Housing Provisions, Part 10.2) on accessible sides for cleaning and maintenance access.
Bathtub dimensions also impact the positions of your rough-in plumbing positions. A bathtub that is 100 mm longer than the waste location you will be using will result in the plumber having to reposition pipework, and that means additional expense. Check the position of waste outlets (centre waste or end waste) on the product specification before ordering as these are not interchangeable without moving pipework.
Finally, check the strength of your floor structure. A cast-iron tub filled with water and a person can approach 400 kg. If you have a timber-framed home, the builder or your plumber should check the floor joist capacity before you go any further.

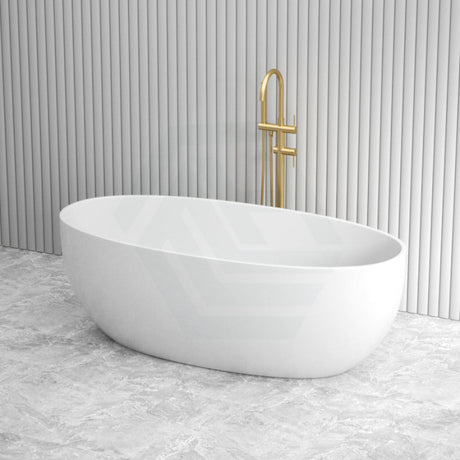
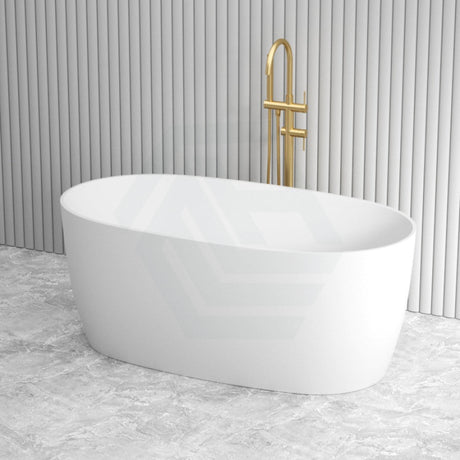
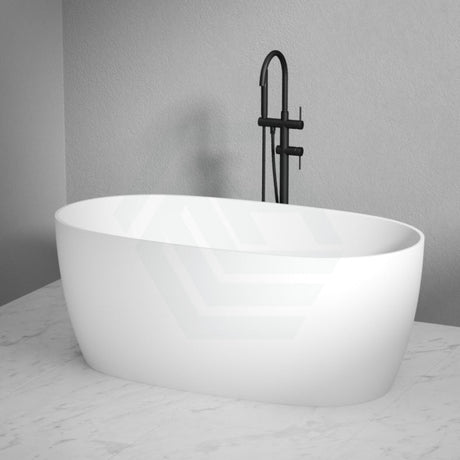
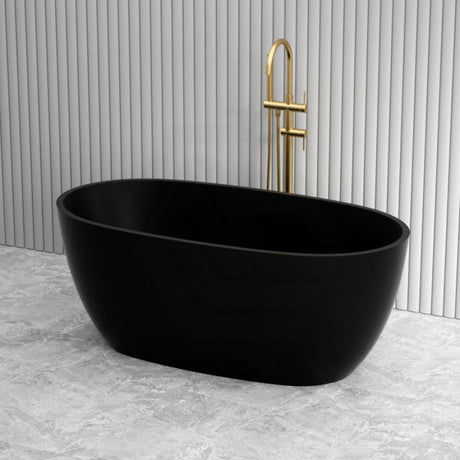
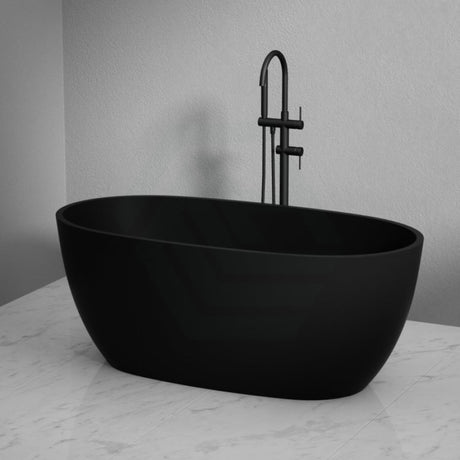
Types of Bathtubs: Built-In, Clawfoot, and Freestanding Options
Now you have determined your space dimensions, the next step is to look at what types of bathtub will fit in that footprint and which bathtub type will fit into the rest of your bathroom renovation.
Built In Tubs — sometimes called alcove or drop-in baths — are often the most practical option for smaller bathrooms. These have the benefit of being the most affordable, with drop-in options starting around $312, and also integrate with a tiled wall or floor surround. The bathtub sits within a framed enclosure, which is then tiled.
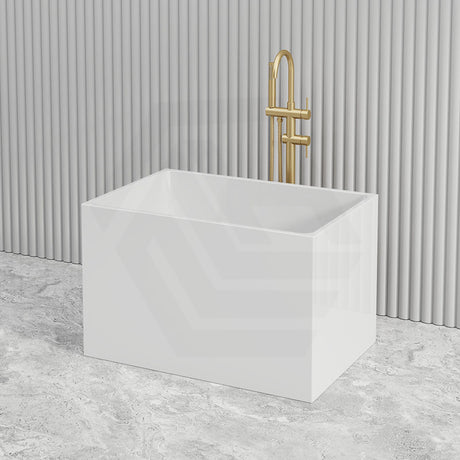
Clawfoot tubs and other freestanding baths are in a completely different world. They require floor-mounted tapware (in the case of clawfoot) or wall-mounted tapware, with visible floor or wall pipes, as well as much more floor space — a minimum of 1800 mm of clear floor space is a reasonable guide. Freestanding tubs start at $878 and go well beyond $7,000 for premium stone resin or cast-iron options. They are not a budget product.
On materials: acrylic is the most commonly used, typically weighing 25–40 kg, which makes them easier to handle during installation. Cast iron runs 130–160 kg and requires structural consideration, but retains heat exceptionally well — I have seen cast iron baths that are still excellent after 20 years. Stone resin sits between the two in weight and offers a solid, premium feel without the thermal mass of cast iron.

Bathroom Plumbing Requirements for Bathtub Installation
Knowing what kind of bathtub to use will dictate what type of rough-in plumbing you need, as the position of the drain and location of supply lines for the tapware differs between a built in tub and a freestanding option. When comparing options, built in tubs typically require end-waste rough-ins, while clawfoot tubs need floor-mounted supply connections.
All bathroom plumbing connections — waste, overflow, and water supply — must be completed by a licensed plumber in every Australian state and territory. This is not a choice. It is a legal requirement in accordance with state plumbing licensing legislation. Your licensed plumber must supply you with a compliance certificate once the work is finished, which you will need for insurance and resale purposes.
Plumbing rough-ins need to account for drain location, P-trap depth, and hot and cold water stub-out positions for your specific taps. Under AS/NZS 3500.4, hot water must be delivered to all bathroom outlets at a maximum of 50°C (AS/NZS 3500.4) — check with your plumber that a tempering valve is installed in your system. Licensed plumbing labour in Australia typically ranges between $150–$250 per hour. Allow at least three to four hours of a licensed plumber's time for a straightforward bathtub installation, and more if waste relocation is involved.

Bathroom Waterproofing and Substrate Preparation
Plumbing rough-in done? Now the substrate — under the bath and up the walls — deserves a hard look. Skip the NCC-compliant waterproofing membrane and even the tidiest plumbing work counts for nothing. Adjacent walls must be waterproofed at least 150 mm above the bath's top edge — that's what the National Construction Code demands. When it comes to membrane work, AS 3740:2021 is the standard that governs it. Compliance isn't optional — full stop. In most states and territories, bathroom waterproofing has to be done by a licensed waterproofer — check what applies in your area.
Floor flatness? Don't let that one slip past you. Across any 1800 mm span, ±3 mm is the accepted tolerance. Push past that tolerance and the tub won't sit flat — stress builds up in the shell and the waste connections cop it too. Sort it out before the waterproofing membrane goes down — fixing it afterwards is a nightmare. The order is non-negotiable — waterproofing, then tiling, then fixtures. Reverse it and you'll regret it.

Bathtub Installation: The Steps That Matter and the Traps to Dodge
With a solid, level subfloor and compliant waterproofing sorted, you're ready to set the tub. Set the bathtub on the base, then get your licensed plumber in to hook up the waste, overflow, and supply connections. Check it's level, and once confirmed, run a silicone seal around the perimeter. A continuous bead of sanitary silicone at the bathtub-to-tile joint is something you can handle yourself — just make sure it's done properly.
Three issues account for most of the mistakes seen on bathtub installs:
Too little fall on the waste line. The waste line needs at least a 1:60 fall — fall short of that and you'll be dealing with slow drains or blockages.
A poor silicone seal at the bath-to-tile joint. Once water gets behind the tiles, the wall substrate cops the damage — and a full re-tile usually follows within a few years.
Leak checks left until after the tiles are on. Fill the tub, leave it to sit, and inspect every joint before a single tile goes up. A leak found after the tub's enclosed means tearing the whole thing apart.
On a bathtub install, the DIY line is fairly clear — you can position the shell, apply silicone, and handle cosmetic finishing. In most Australian states, a licensed plumber must handle all plumbing connections and drainage — confirm the rules for your state or territory.
References
National Construction Code 2022, ABCB Housing Provisions, Part 10.2 Wet Areas
AS 3740:2021 Waterproofing of Domestic Wet Areas, Standards Australia
AS/NZS 3500.4 Plumbing and Drainage — Heated Water Services, Standards Australia
State plumbing licensing legislation (VBA Victoria; Fair Trading NSW; QBCC Queensland; Building Practitioners Board WA; CBOS Tasmania; ACTPLA ACT; Building & Energy SA; ABPB NT)