14 April, 2026
Bathroom Renovation Ideas: Creative Ways to Transform Your Space
Bathroom renovation ideas to transform your space: cosmetic updates, phased renovations, layout tips and budget strategies. From quick facelifts to full overhauls with real costs for Australian homes.

From Cosmetic Updates to Complete Overhaul: Renovation Scales
I've watched many homeowners get stuck at the gate because they believe bathroom renovations are an all or nothing affair. That isn't true at all. The best bathroom renovation ideas really begin with recognising the scale that works best for your wallet.
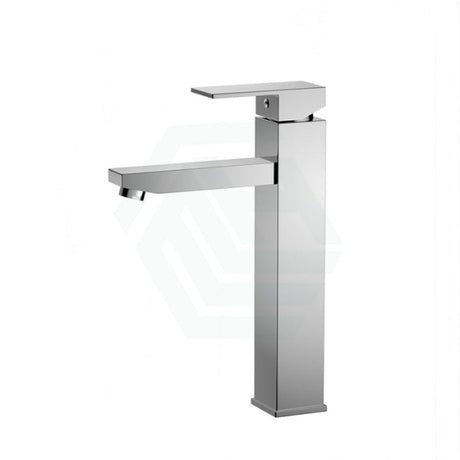
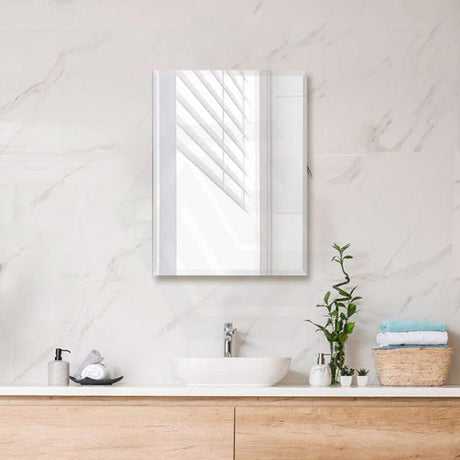
A simple facelift, with new paint and a modern mirror and taps, could be completed in 1-2 weeks and costs $1500 to $3000. New matte black taps and a stylish, modern bathroom mirror completely change the look of an outdated bathroom. A partial update, where you put in a new vanity, add tiling to one wall and replace the shower screen will take between 3-4 weeks to complete and cost $6000 to $12000.
With a full bathroom renovation, you can expect to redo the layout and replace all the fixtures, and waterproof it as well. This could take 4-8 weeks to finish and cost $20000 to $40000. With a luxury bathroom makeover, which uses high-end materials and fixtures, you can expect to spend more than $40000. Be clear on your bathroom renovation ideas before you start hunting around for tiles.

Phased Renovation: Spreading Costs and Minimising Disruption
Not everyone has $25000 ready for a bathroom upgrade, so the phased option splits a renovation up to suit each budget. This means you pay for one stage at a time but your bathroom won't be unusable as some areas will still be active during the renovation process.
In stage one, you focus on the cosmetic layer with new paint, accessories and mirrors for between $2000 to $4000. In stage two, you replace the vanity and tapware for between $3000 to $5000. The final phase is tiling and other finishes. The disadvantage of going with a phased approach is that it's generally between 5-10 per cent more expensive due to multiple calls for trades, plus coordinating the styles between each stage needs a bit of work so stage one painting doesn't clash with the phase three tiles. However, it may be the only way you can afford to spread a quality bath renovation ideas project over six months.

What You Can DIY and What Requires Professional Help
That is where it goes wrong, and I say that with the benefit of watching more than a few renovations that didn't quite work out for contestants on the television series The Block.
Safe DIY bathroom renovation territory includes a paint job (around $200 to $400 for materials, saving you $400 to $800 for labour), swapping out the mirrors and accessories ($300 to $600), and changing the taps if the connections are simple ($200 to $400 in materials).
A DIY job that can lead you astray in a bathroom upgrade are plumbing beyond simple connections (permits required and must comply with codes); all electrical work; structural work; waterproofing; and tiling. I know people have tiling as a DIY job, but there is a huge difference between the finished product when tiling in a wet area compared to professional tiling. Professional tilers are around $50 to $80 a square metre, which when combined with the cost to rectify DIY errors, is usually the least expensive option in the long run.

Layout Transformation Ideas: Maximising Flow and Functionality
It may surprise some that the best improvement to a bathroom may actually not be what you put into it, but rather where you place it. Moving the toilet behind a half wall or into a recess instantly changes the perception of the space. Provided that moving the bathroom isn't a distance greater than a metre from the current waste plumbing, relocation shouldn't add too much cost to your project. Moving the vanity to create more shower room is another great option, especially for an old 1970s build home. In smaller bathrooms, replacing a traditional unit with a corner bathroom vanity can open up floor space and improve movement flow without sacrificing storage. The best bathroom layout ideas often really are that simple. If you've decided to go with a bathtub, then drop in bathroom tubs sit flush with a surround or deck which works great in mid-size bathroom renovations where the size of the space isn't huge.

Budget-Conscious Renovation Strategies and Material Swaps
The number one cost saving tip is this: if you can, keep your layout the same. Every time you move plumbing, your project will cost an extra $2,000 to $5,000 dollars. If you don't really want to reposition fixtures, use your existing positions as the basis for your bathroom renovation ideas. Changing materials makes a HUGE difference. If you can stick with porcelain tiles at $40-$60 a sq/m it offers the same longevity as bigger format tiles which often start at $80 and upwards. An acrylic bath can save you $1,000-$2,500 compared to a stone composite one. Painting the wall above splash zone instead of tiling it can save $1,500 to $2,000 in both materials and labour. An off the shelf vanity starts at around $600-$800, a custom vanity will usually run $1,500-$2,500. The quality of vanity units in stock is getting great now. With the bath, a tub drop in model is a great alternative to a freestanding one, particularly if you like the built in appearance of a stone bath, as you can create this look in your bath surround at less cost and time A drop bathtub installed into a tiled surround creates a custom look on a mid-range budget.