19 November, 2025
How to Remove Silicone Easily: Full Guide
Remove old silicone like a pro! Step-by-step guide with tools, softening tricks, safe scraping, and surface-specific tips for tiles, glass & showers.

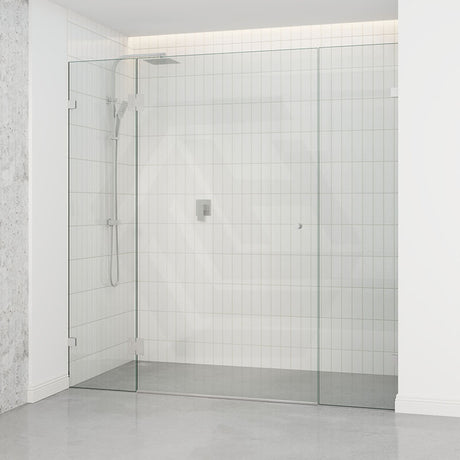
Silicone is widely used around tiles, splashbacks, windows, and shower screens to create watertight and airtight seals. However, over time, it can deteriorate, discolour, or trap moisture, leading to mould growth and potential surface damage.
When this happens, removing the old silicone is an effective way to refresh and protect your bathroom or any area exposed to water and humidity. So, do you know how to remove silicone?
With the right tools and a little prep, you can take off old silicone cleanly and leave the surface smooth again. The job is simple, and the results can help your bathroom stay cleaner and safer. Let’s look at how you can handle this DIY task step by step.

What You'll Need: Tools & Materials
Ready to get started? Here’s everything you’ll need to remove silicone cleanly and safely.
Tools:
- Hair dryer
- Razor blade or plastic scrapper
- Protective gloves
Materials:
- Solvent or silicone remover
- Cloth

How to Remove Silicone Cleanly: Step-by-Step
With your tools ready, it’s time to begin the removal process. Follow these steps to achieve a clean, precise result. This simple approach works effectively on a variety of surfaces, from tiles and glass to areas around the showerhead.
Here is how to remove silicone from shower areas and any other surfaces without causing damage.
Step 1. Safeguard your hands
Before you begin, put on a pair of protective gloves. Removing silicone can take some effort, and you’ll likely be using tools and applying pressure throughout the process.
Wearing gloves helps you maintain a firm grip, prevents skin irritation, and keeps your hands safe while you work. It’s a simple but essential first step for a cleaner, safer silicone removal.
Step 2. Soften the silicone
Warm the silicone a little to make it easier to lift off. Use a hair dryer on medium heat and warm the area for a few minutes. This helps soften the sealant so it peels more easily.
Just be careful not to heat plastic or painted areas too much, as they can warp or lose colour.
Step 3. Remove the excess
Once softened, use a razor blade or plastic scraper to lift and remove the majority of the silicone. On smooth tiles or glass, a razor blade works best for precision. For delicate materials like wood or textured surfaces, switch to a plastic scraper to prevent scratches or surface damage.
Step 4. Use silicone remover or a solvent
After removing most of the silicone, apply a commercial silicone remover to tackle stubborn residue. These products break down the remaining sealant for easier cleaning.
Follow the manufacturer’s instructions closely, ensuring the product sits for the recommended time before wiping away to avoid damaging surrounding materials.
Step 5. Remove any leftover residue
Once the remover has softened any leftover silicone, use a clean cloth or scraper to wipe it away gently. For thick residue, repeat the process until the surface is completely clean.
Work carefully around corners or edges, ensuring all traces are removed before proceeding to the final cleaning stage.
Step 6. Clean the surface
To finish, wash the area thoroughly with warm, soapy water to eliminate leftover chemicals or oils. Dry it completely using a clean cloth before applying new silicone.
A clean, dry surface ensures proper adhesion, preventing future leaks, mould, or peeling for a smooth, long-lasting seal.
Surface-Specific Tips: Tiles, Glass, Metal & Windows
Each surface reacts differently to silicone and cleaning products. The following tips will help you remove any remaining residue safely and prepare various materials for resealing.
- Tiles: Use a sharp knife or plastic scraper at a shallow angle to lift the sealant without scratching. Make minor, controlled cuts along the edges.
- Glass: Remove residue from glass surfaces, like the shower screens, with a plastic scraper or putty knife using light pressure. Warm stubborn silicone with a hair dryer to soften it for easier removal.
- Metal: Avoid metal scrapers that can scratch the surface; use rubbing alcohol to loosen and wipe away residue instead.
- Windows: Gently heat the sealant with a hair dryer, then clean leftover bits with rubbing alcohol for a clear, smooth finish.
Common Mistakes & How to Avoid
Even with the right tools and techniques, some simple mistakes can affect your results. Here are the most common errors to avoid when removing silicone.
-
Applying Strong Solvents on Sensitive Surfaces
Strong chemicals can damage materials like polycarbonate, acrylic, painted surfaces, and softwoods. Always test removers on a small, hidden area first. -
Mixing Chemical Cleaners
Never mix different solvents or removers; this can cause toxic fumes or reactions. Stick to one trusted, purpose-made product. -
Skipping Patch Testing
Always patch-test new cleaners to check safety and effectiveness before applying them to larger areas. -
Over-Scraping
Too much force or using metal tools can scratch tiles, glass, and benchtops. Use plastic scrapers and pair them with a silicone remover for safer results.
Conclusion
Learning how to remove silicone the right way helps you get a smooth, clean result. With the right tools, steady hands, and a little patience, you can take off old sealant from almost any surface.
Always test your products first, avoid harsh chemicals, and work gently so you don’t cause damage. These simple steps will help you remove silicone safely and effectively each time.