18 May, 2026
Bathroom Layout Ideas: Planning the Perfect Floor Plan
Discover bathroom layout ideas that really work. Our Australian guide covers dimensions, space planning and flow for a smarter renovation.

Video Credit: designchickee
There's nothing like starting a bathroom design from scratch or revamping an existing bathroom that isn't working for you. It is truly one of the most rewarding renovations that you can tackle in your home. It's important to emphasise how much of a difference the choices you make for your floor plan, prior to the removal of any tiling, will influence the outcome function and overall flow of the room. You see, if the bathroom layout is good, the rest will just follow suit. If it's not, then nothing is going to fix it.
Understanding Bathroom Dimensions and Space Requirements
The first thing to consider when it comes to a bathroom design is size and measurements. There are some bathroom dimensions you need to take into account before you decide that the freestanding tub of your dreams is going in the middle of the floor. First, measure the length and width of the bathroom along with ceiling height. Then, note the location of any windows, doors, as well as existing drainage and supply points. Keep in mind that it is going to be costly to move any of these features, as you'll need to hire a licensed plumber to reconfigure the drainage and supply points. This is something that you'll want to keep in mind when designing your bathroom floor plan.
In terms of minimum clearances, the NCC 2022 Livable Housing Design guidelines specify a minimum 820mm clear opening (NCC 2022, ABCB Housing Provisions, Part 12.2) for bathroom doorways and a 900mm × 1200mm clear zone in front of the toilet suite. The code also stipulates there needs to be at least 600mm measured from the centre of the toilet suite to any adjacent fixture or wall. A shower screen also needs 1000mm of clear floor space in front of it. In a small ensuite, a bathroom vanity that measures 600mm in width will work, while a 900mm or 1200mm unit is a better fit for a larger family bathroom, where you may have more wall run to work with.
One of the things that I see the most is people designing without considering where the doors need to go. An inward-opening door can take up 700–800mm of floor space and it's not until you're in a finished bathroom, opening the door onto the toilet suite, that you realise you've not left enough space. So, when you know the clearances and the size of your fixtures, you can begin to work out how you're going to lay out the bathroom within a specific floor plan configuration. A minor toilet waste point adjustment of 200–300mm can often be achieved by adjusting the pan connector without a full plumbing overhaul.

Common Bathroom Floor Plan Layouts
Four bathroom floor plan configurations can generally satisfy most Australian homes, including the single-wall, L-shaped, U-shaped, and wet-room layouts. There are advantages and disadvantages of each layout to suit any sized room.
In a single-wall floor plan, all fixtures are lined up against one wall. Not only does this design make plumbing easier, keeping costs lower, it works very well with narrow bathrooms around 1500mm wide. Also, for ensuites at around 1500mm × 2400mm, it can be the perfect fit.
In an L-shaped design, the room has its fixtures arranged around two walls, making it great for smaller, square rooms around 2400mm × 2400mm. The L-shaped design also splits the space between a shower and vanity, giving you a more defined wet area.
In a U-shaped floor plan, there are fixtures on three walls, which makes it better for larger bathrooms around 2700mm × 2700mm or more. It gives you more storage and workflow, although you need to design carefully to avoid a boxed-in middle.
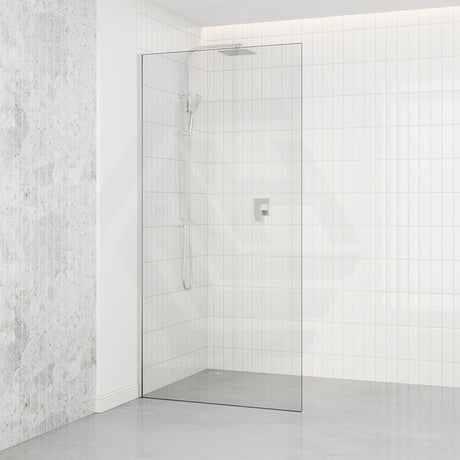
There are also wet-room designs which feature an open shower area. They are popular now (thanks largely to shows like The Block), but require waterproofing to 1800mm (AS/NZS 3000:2018) across the entire floor and walls. Every electrical installation must comply with the bathroom zone electrical requirements of AS/NZS 3000:2018.
Once you know which bathroom floor plan type suits your room, the next step is to turn it into an accurate, scaled plan before you engage any trades. This is where a bathroom layout planner becomes an essential tool.

How to Use a Bathroom Layout Planner Effectively
A bathroom layout planner — whether an app like Planner 5D or a scaled paper grid at 1:20 — lets you experiment with fixture arrangements without making costly commitments. Draw the room perimeter with all doors, windows, and drain locations marked accurately. Then scale the fixtures and add them to the plan. A typical toilet suite takes up about 380mm × 680mm of floor space. A standard shower takes 900mm × 900mm. Check that doors don't foul anything. Think about how you use the room — can two people use the bathroom simultaneously? Allow at least a 40mm horizontal flashing leg where walls and floors meet in wet areas, and ensure your shower recess is waterproofed to 1800mm by a licensed waterproofer. A layout planning app can get you through three or four layouts in minutes; a scaled paper plan is tactile and free.

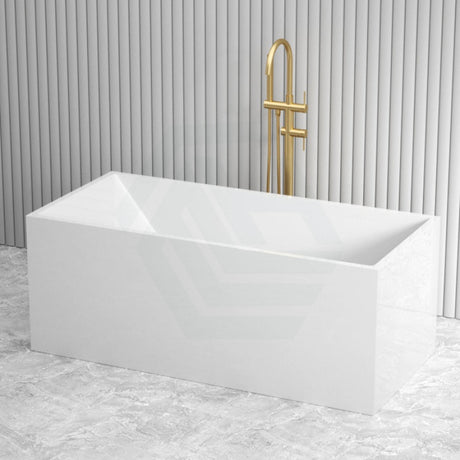
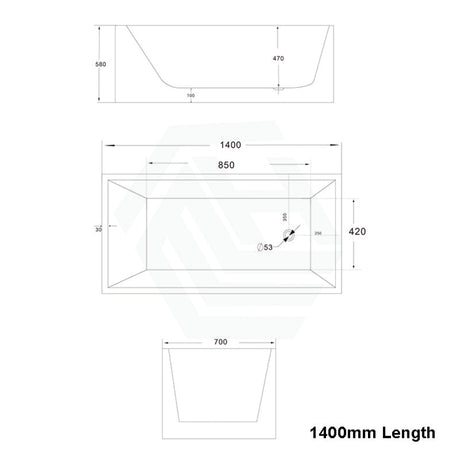
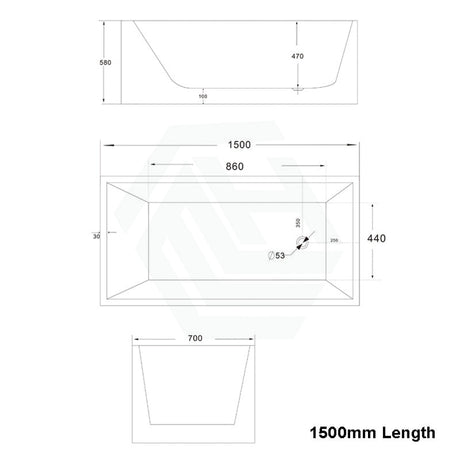
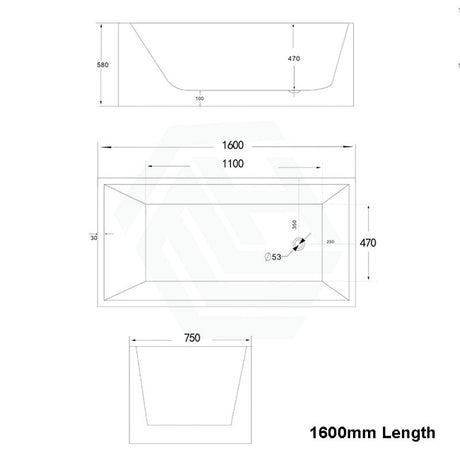
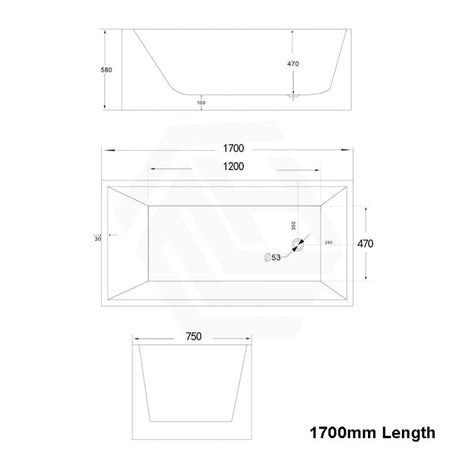
Choosing the Right Bath for Your Layout
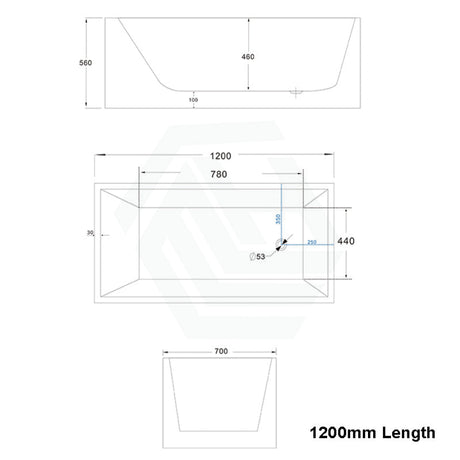
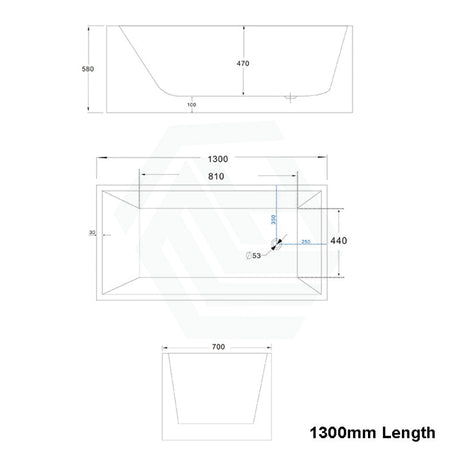
Once you've determined which fixtures go where, you need to work out the best bath for the space. The type and size of bath you choose can affect traffic flow, plumbing costs, and the overall look of the design. While freestanding baths make a striking statement, they consume considerable room — around 1800mm of clear floor space around the bath is required for easy cleaning and access to the taps. Freestanding bathtubs range in price from $878 to over $7,000 AUD. A back-to-wall bath suits a bathroom floor plan where one side of the bath can sit against the wall, and these cost between $938 and $2,085 AUD. Fienza bathtubs offers both freestanding and back-to-wall options to suit all budgets and floor plan layouts.
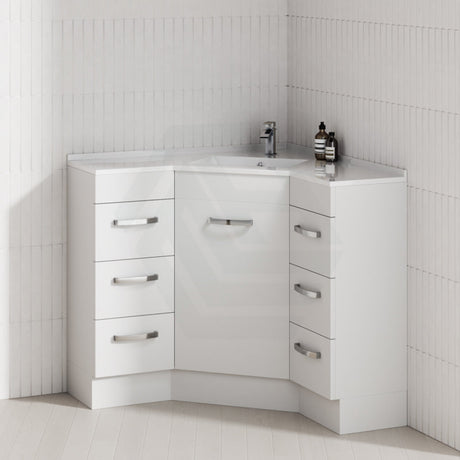
For the small bathroom where space is at a premium and you really want a bath, a tub corner installation — positioning the bath in the corner of two walls at 90 degrees — offers the smallest floor footprint. Walls directly abutting a bath must be waterproofed to a minimum of 150mm above the bath rim — Corner Baths range in price from $958 to over $2,085 AUD and can work in a wide variety of floor configurations.

Optimising Small and Large Bathroom Layout Ideas
If you have a bathroom under 4m², your bathroom layout ideas are about recovering as much floor space as possible. Wall-hung vanities—available from 400mm wide and starting from around $50 AUD at the budget end, up to $2,828 AUD for premium cabinetry—free up floor area visually and practically. Similarly, a wall-hung toilet pan with concealed in-wall cistern removes 150–200mm of floor depth compared to a floor-mounted toilet suite. Swapping an inward-opening door for a sliding or pocket door can recover 700–800mm of floor space. Also think about fixture sequence — toilet at one end, shower in the middle, vanity by the door — to create a logical flow.
Conversely, if you have a bathroom of 8m² or larger, your bathroom layout ideas are about zoning. A double vanity from 1200mm to 1800mm wide can separate the grooming area from the bathing area to reduce morning congestion. Corner baths are an excellent way to use what is often dead corner space in a larger bathroom, with prices ranging from approximately $958 to $2,085 AUD and can be paired with a freestanding shower screen to separate the wet area.
Regardless of bathroom size, any windowless bathroom must have a compliant exhaust fan — windowless wet areas must have exhaust ventilation of at least 25 litres per second (NCC 2022, ABCB Housing Provisions, Part 10.8)—factor that into your layout when positioning the exhaust fan, and always engage a licensed electrician for installation. Once you've got the compliance boxes ticked, ultimately the best bathroom layout ideas come from the space you have, how your household uses it, and where your existing plumbing sits — not just what looks good on a mood board.
References
National Construction Code 2022, ABCB Housing Provisions, Part 12.2 Livable Housing
AS/NZS 3000:2018 Electrical Installations (Wiring Rules), Standards Australia
National Construction Code 2022, ABCB Housing Provisions, Part 10.2 Wet Areas
National Construction Code 2022, ABCB Housing Provisions, Part 10.8 Condensation Management