07 May, 2026
Leaking Toilet Cistern: Common Causes and DIY Repair Steps
Leaking toilet cistern: identify common causes and fix it with simple DIY steps. Stop water waste and running sounds with these practical Australian repair solutions.

What Causes a Toilet Cistern to Leak?
A toilet cistern leaking is typically caused by one of four faults, and it helps to learn more about each one as their characteristics vary.
Inlet valve / ballcock fault The inlet valve (often called the ballcock) is responsible for refilling the cistern after each flush. A worn inlet valve seal will often sound like the cistern is hissing or trickling, and the cistern will be constantly running, even when it's full. These valves can fail a lot quicker in places where the water is hard, as mineral build-up will erode the rubber seal.
Worn flush valve or flapper The flush valve is a rubber seal that sits at the base of the cistern. As this seal wears down, it will allow cistern water to leak into the toilet bowl even when it hasn't been flushed. You'll also likely hear the cistern filling up again even when you don't press the button to flush. This is a very common fault.
Cracked cistern body It doesn't occur too often, but it does happen, and is more prevalent on older porcelain toilets. You may find water pooled on the floor near the toilet, or dripping down the cistern sides. If so, you'll need to replace the cistern.
Failed cistern-to-pan gasket The gasket (rubber washer) between the cistern and pan can fail over time. A failed seal like this will have water leaking from the base of the cistern only, rather than the floor around the toilet. Make sure you know how to tell the difference, as it is a different process to repair.

How to Identify Where the Leak Is Coming From
Once you're comfortable with the possible causes, you next need to find exactly where the water is leaking from, so you know what parts to buy.
A simple dye test works well. Put some food colouring into the cistern, wait ten minutes and check the toilet bowl for colour. If colour has leaked into the bowl and you haven't flushed, then your flush valve is the issue.
If the water is leaking from the bottom, dry off the floor and under the cistern thoroughly, then line the cistern-to-pan joint and the base of the pan with dry paper towels. Flush twice and see where the paper towels have turned wet. This will let you know if the leak is at the joint between the cistern and pan, at the pan connector, or through a crack in the cistern body.
Also check where the overflow tube is in the cistern. If the water line is sitting higher than the overflow tube, you'll get water trickling into the bowl. This is a float adjustment, not a failed seal, so check that first.
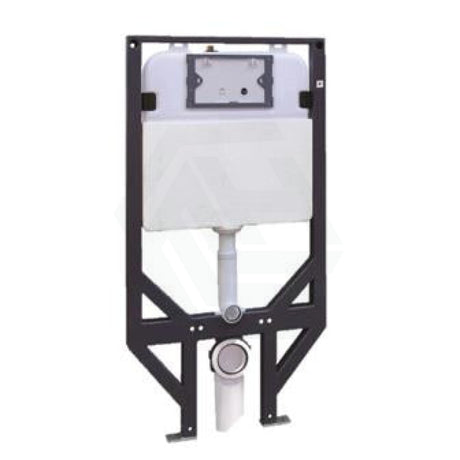
![]()
Tools and Materials You'll Need for the Repair
Now that you know what part of the toilet is leaking, you should know what parts to get to fix it, and what tools you'll need. Don't risk a trip to the hardware store only to discover you got the wrong replacement part or tool.
Equipment: adjustable spanner; flathead and Phillips head screwdrivers; needle-nose pliers; a bucket; and dry towels.
Materials — depending on the problem, you might need one of these:
- Inlet valve kit — approximately $15–$35
- Flush valve or flapper — approximately $8–$2
- Cistern-to-pan bolts and rubber washers — approximately $10–$15 per set
- Wet-area silicone sealant — approximately $10–$15
Always purchase WaterMark-certified replacement components. Under Australian plumbing standards, non-certified parts may not be accepted by local authorities, and any copper alloy components in contact with drinking water must meet lead-free requirements. Not every inlet valve fits every cistern — check your cistern model before purchasing.

Step-by-Step DIY Repair Guide
Parts and tools in hand, here are the most likely repair scenarios:
- Isolate the water supply at the isolation valve behind or beside the toilet, or at the mains.
- Flush the toilet to drain the cistern, then remove the lid.
- Remove any remaining water and dry the cistern with a towel.
- Replacing the inlet valve: Disconnect the flexible water pipe, unscrew the locking nut beneath the cistern and withdraw the old inlet valve. Install the new unit.
- Replacing the flush valve: Disconnect the flushing mechanism from the overflow. Unscrew the old flush valve from the base of the cistern and install the new unit by pressing firmly.
- Replacing cistern-to-pan bolts and rubber washers: Unscrew the bolts from underneath and remove the cistern from the pan. Fit the new bolts and washers, re-install the cistern and finger-tighten each bolt by an extra quarter turn. Don't overtighten or you may crack the porcelain.
- Turn the water back on and flush twice to clear any air from the system. Dry each joint with paper to check for moisture.
Expect to spend between 30 and 60 minutes replacing a flapper or inlet valve. A cistern-to-pan gasket replacement will take 90 minutes. In hard water areas, a new inlet valve can suffer from calcium build-up in as little as 12 to 18 months, so check it regularly.
If you're unsure how to stop a toilet from running after completing these steps, revisit the float height and flush valve seat before calling a plumber — these are the two most common oversights. You can also browse the full range of toilet bowl parts to find WaterMark-certified replacements suited to your cistern model.

When to Call a Licensed Plumber
Most leaking toilet cisterns can be fixed by a homeowner. However, Australian plumbing law mandates a licensed plumber for certain scenarios.
If the cistern body is cracked, it requires replacement and you may need to replace the entire toilet suite, including the toilet bowl and cistern. Cisterns older than 20 years are worth replacing, as they are significantly less water efficient. Newer dual-flush units carry a WELS 4-star rating as a minimum.
Reconnecting the incoming water supply line must be carried out by a licensed plumber in most states. So must the pan connector if your leaking toilet is traced back to where it joins the waste pipe. Any leak upstream of the isolation valve also requires a licensed plumber. You must not attempt to access a concealed in-wall cistern system — for example, Geberit systems — yourself; contact a licensed plumber instead. Home insurance claims can be voided by unlicensed plumbing work, and you risk breaching plumbing regulations set by each state and territory.
Typical costs from licensed plumbers for a cistern replacement or pan connector repair range from $150–$400 (AS/NZS 3500.4), depending on your state and the complexity of the job. Always check your state/territory requirements, as plumbing regulations vary across Australia. While you're upgrading your bathroom, a bidet spray is a popular and easy-to-fit addition that requires no licensed plumbing work in most states.
A toilet flush not working after a repair is also worth investigating before booking a plumber — it is often simply a matter of reconnecting the flush button linkage or adjusting the flush valve height.
References
National Construction Code 2022, Volume Three (Plumbing Code of Australia), Part A5 Documentation of Design and Construction — Lead-Free Copper Alloy Requirements
National Health and Medical Research Council — Australian Drinking Water Guidelines
WaterMark Certification Scheme, Australian Building Codes Board
AS/NZS 3500.4 Plumbing and Drainage — Heated Water Services, Standards Australia