09 April, 2026
Toilet Cistern Leaking: Step-by-Step Repair Guide
Toilet cistern leaking? Learn how to diagnose and fix internal leaks, base seals, supply lines and flush valve issues with simple DIY steps and prevention tips.

Toilet Cistern Leaking: Step-by-Step Repair Guide There is no such thing as a small problem when it comes to a leaking toilet. What starts as a tiny leak can quickly escalate into a huge issue. I have seen people leave a small leak go for months, only to discover that they have a damaged sub-floor or a higher-than-usual water bill. A cistern leak can usually be fixed without the need for a professional. You just need to know what to look for and how to repair it.
Where Toilet Leaks Come From
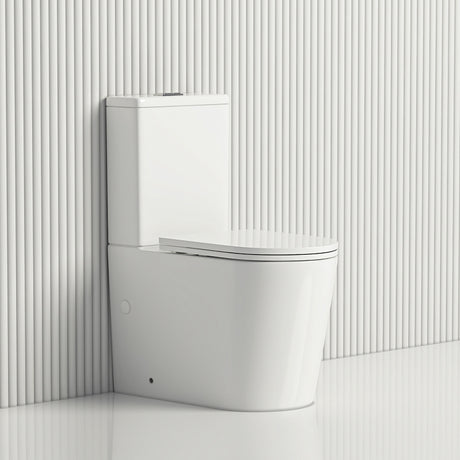
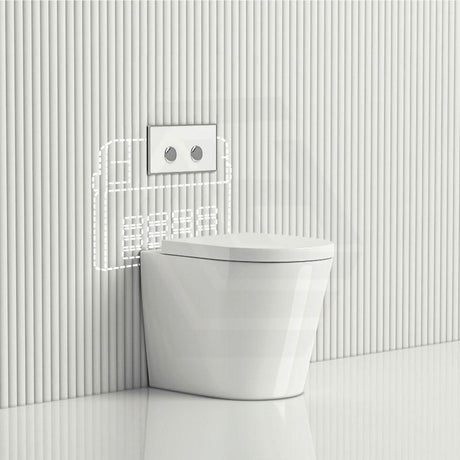
There are only a few places where a toilet can leak: Within the cistern: Inside the cistern there is the fill valve and the flush valve. The fill valve regulates the amount of water that enters the cistern, and the flush valve creates a seal to keep the water in the cistern until you flush. Over time, both of these parts can fail, causing the water to leak into the toilet bowl or out the back of the cistern. Between the cistern and bowl: The bolts and rubber washers that attach the cistern to the bowl can become damaged over time. Around the base: If the wax ring that seals the pan to the floor becomes damaged, water can leak out onto your floor. From the supply line: The flexible hose that runs from the cistern to the wall tap can crack or loosen at the fittings, causing a leak.

How to Identify the Source of Your Leak
Before you start taking things apart, try to locate where the leak is coming from. Dry the toilet off completely, then place some dry paper towel around the base of the toilet and behind the cistern. Wait for half an hour to see which paper towel is now wet. This will give you an idea of where the leak is. If the leak is coming from inside the cistern, place some food colouring in the water. If after 15 minutes the water in the bowl has changed colour, you know that the flush valve seal is leaking. This type of toilet cistern leaking will increase your water bill, but you won't actually see any water on the floor.

Repairing Cistern Leaks: Internal and External
The most difficult type of leak to find is an internal leak. The flush valve seal creates a seal at the bottom of the cistern. As it deteriorates, it will cause water to slowly leak into the bowl. To replace the seal, switch off the water at the isolation valve, then flush the toilet to empty the cistern. Remove the old seal, taking it with you to the hardware store so you can ensure you purchase the correct size. Most seals are not a universal fit, so don't assume you can just take any. Once you have the new seal, it should just push or clip into place. If your fill valve is leaking, you will hear the toilet cistern keeps running long after it should have stopped. The fill valve regulates the amount of water that enters the cistern. If it fails, the cistern will overfill and the water will run into the overflow tube. Replacements can be purchased at most hardware stores for anywhere from $15-$40. Most fill valves are designed to be fitted by the homeowner. If the leak is coming from where the cistern joins to the bowl, the rubber washers on the mounting bolts have deteriorated. You will need to empty the cistern, undo the bolts, replace the washers, then put it all back together. This really is a simple half-hour fix, unless the bolts have rusted.

Fixing Base Leaks and Wax Ring Issues
A base leak means the wax ring that seals the toilet outlet to the floor flange has failed. Let's be real, this is the repair nobody likes because you have to take the whole toilet off. However, it isn't rocket science. Stop the water supply, flush the cistern and bowl to empty it, disconnect the supply line, undo the base nuts and lift the toilet up. Scrape the old wax off, push a new wax ring onto the flange, lower the toilet back down onto the nuts and press firmly home. Re-tighten the base nuts evenly (do not overtighten as you will crack the porcelain), and you're done. Unless the flange is broken, in which case it might be time to call in a licensed plumber! Understanding your wc cistern parts will make the how to fix leaking toilet cistern process far easier when you need to buy new parts.

Prevention Tips for Future Leaks
Preventing a toilet cistern leaking is far easier than fixing one. Inspect the inside of your cistern every 6 months. Inspect the rubber seals, if they are twisted, split, or mineral encrusted, replace them before they leak. A $10 seal today saves a $200 water bill tomorrow. Pay attention to your toilet's behaviour. If it is running for longer than usual after each flush, or seems to cycle on and off at random, it may have developed a leak. Check your supply line as well, braided flexible hoses should be replaced every 10 years or so, but inspect it every year for signs of bulging or moisture around the connections. If you are renovating or replacing your toilet suite, spend the money on good quality toilet cistern components. The cheap stuff has a far shorter lifespan, and sourcing spares for no-name brands can be incredibly difficult. Buy a complete toilet and cistern from a reputable brand, the internal components will be of higher quality and they will be easier to replace if anything goes wrong. If you need to how to replace toilet cistern parts, the process is the same as for a base leak (drain, disconnect, undo and lift).