05 May, 2026
Hamptons Bathroom Ideas: Timeless Elegance with a Clawfoot Bath
Hamptons bathroom ideas for Australian homes: clawfoot baths, shiplap walls, subway tiles and brushed gold fixtures. Timeless elegance meets modern functionality for a luxurious retreat.

What Defines a Hamptons Bathroom Style?
The Hamptons style is all about three things: symmetry, restraint, and quality. Nothing happens accidentally, and there is nothing too much. Consider white shiplap-style wall panelling next to subway tiles in 75×300 mm or 100×300 mm — both iconic aspects of the style. Then there is the floor in hexagonal mosaic porcelain or herringbone mosaic porcelain, so there are some patterns, but they don't clash with the wall tiles.
In terms of finish choices, taps are in chrome or brushed nickel (they aren't usually combined in the Hamptons style), the focus of the room is a freestanding bath (which is usually in the middle and visible once the door opens), and marble-look porcelain tiles for the wall tiles as well as the floor tiles (porcelain tiles are lower porosity than ceramic, and far more durable in wet areas) finish everything off. Every choice has been made carefully, making it seem more of a sanctuary and less of a bathroom.

Choosing the Right Clawfoot Bath for Your Renovation
Having established the basic elements of the Hamptons style, the most important product decision is the bath. Here is what to know about the different types available.
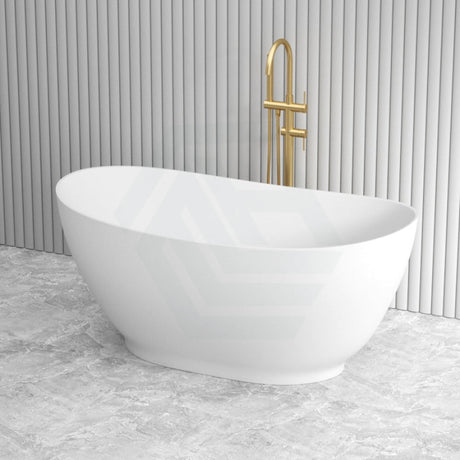
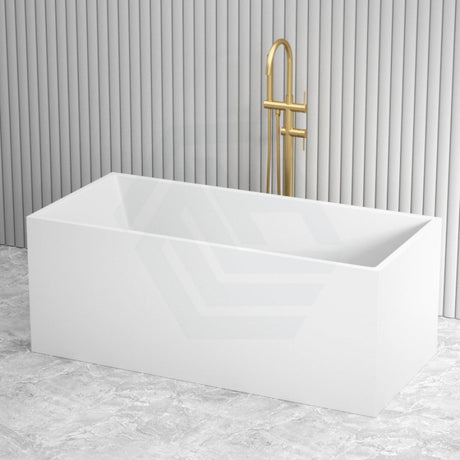
There are three types of baths to choose from: a slipper bath, a double-ended bath, and a roll-top. Slipper baths have one high end where you can lean back. Double-ended styles are symmetrical and suit a central placement beautifully. Roll-top baths have a gently curved rim — the silhouette of a roll-top is arguably the most instantly recognisable image of a Hamptons bathroom.
Material choice can make all the difference for bath renovation ideas. Acrylic baths are the most practical, weighing between 25 and 40 kg, which makes floor reinforcement less of a concern, and they are priced from around $878. A cast iron bath, on the other hand, can weigh between 100 and 180 kg, which means you will need to engage a structural professional to determine whether your floor is strong enough to accommodate it. Stone resin is a good middle ground — heavier than acrylic, but with outstanding heat retention. It is also common to overlook where the waste outlet will be situated; confirm your plumber's rough-in location before ordering, as freestanding baths have fixed waste positions that cannot always be adjusted after the fact. Allow four to six weeks once materials are on-site for a typical Hamptons bathroom renovation and note that popular chrome and brushed nickel tapware sets from Australian suppliers often carry a four to eight week lead time, so order early.

Materials, Fixtures, and Fittings That Complete the Look
Once you have selected your bath, all the materials and fixtures should fit together seamlessly, both aesthetically and in terms of durability and compliance.
For wall tiles, 75×150 mm or 100×200 mm subway tiles in gloss white remain the defining Hamptons choice. Floor tiles in hexagonal mosaic porcelain in white or soft grey will give the character of a period property and ensure the style feels genuine rather than imitated. For cabinetry, go for shaker-style vanity cabinets. Moisture-resistant MDF will be sufficient in a more budget-conscious setup, but a premium plywood option from Australian brands such as Aulic will stand the test of time much better. Vanities generally run from $600 to $2,828, and the basin mixer and waste are almost always sold separately.
In Australia, all tapware must carry WaterMark certification before a licensed plumber can legally install it (WaterMark Certification Scheme). This cannot be circumvented — non-certified products may be rejected by local plumbing authorities. From 1 May 2026, all WaterMark Schedule of Products must meet lead-free standards, so check product specifications carefully when purchasing in advance. AS/NZS 3500.4 also mandates that hot water delivered to bathroom outlets be no hotter than 50°C, meaning whatever bath mixer you choose must be equipped with a tempering or thermostatic mechanism. Chrome and brushed nickel tap sets from brands like Meir and Fienza suit the Hamptons theme perfectly — wall-mounted sets are available from $52 to $807.

Playing with the Classic Hamptons Colour Palette: White, Grey, and Navy
Now that materials and fittings are sorted, colour is next on the list. Getting the balance of white, grey, and navy right is the difference between a space that looks curated and one that feels crowded.
White is always the foundation — use it for shiplap wall panelling, vanity joinery, and ceilings, where a semi-gloss or low-sheen finish is recommended for wet areas. For grey bathroom ideas within the Hamptons palette, opt for a warm grey-brown tone (greige) for main wall surfaces rather than a cool-toned slate, which can read as industrial. A claw foot bath in high-gloss white pops nicely against warm grey without the space feeling chilly.
Use navy in small doses. It makes an impression as a navy bathroom vanity, a feature wall behind the bath, or in accessories like towel racks and picture frames. In a smaller bathroom, don't let navy account for more than 20 per cent of the total surface area, as it will absorb light rather than add depth. In a north-facing Australian bathroom with strong natural light, navy can be used a little more liberally. In a south-facing bathroom, keep navy to the joinery only and let white and warm grey take the walls.

Layout, Sizing, and Installation Considerations
Once your colour scheme and materials are decided, it is essential to confirm the layout can accommodate them. Before your tradie is called in, make sure room dimensions and plumbing positions suit a freestanding bathtub installation.
A wet room dedicated only to a bath needs to be at minimum 2,400 mm × 2,100 mm to allow for a standard freestanding bath (1,500 mm or 1,700 mm) plus clearances. Ensure there is at least 600 mm of unimpeded clear space on each side. This aligns with accessibility guidelines and creates a proportioned space that doesn't feel squeezed. A tub with claw feet requires either a floor-mounted or wall-mounted tap — never a deck-mounted mixer. Ensure your licensed plumber roughs in the correct supply points before tiling.
AS 3740:2021 sets the requirements for waterproofing in wet areas. Walls adjacent to the bath must be waterproofed to a minimum of 150 mm above the bath rim, with a flashing horizontal leg of at least 40 mm at wall-to-floor junctions. Do not skip the waterproof membrane under and around your freestanding bath — water migrates beneath the bath during use, and inadequate waterproofing leads to expensive structural damage. If you opt for a heavy cast iron foot claw bathtub, a floor load assessment is required before installation. Combined weight of bath, water, and occupant can exceed 400 kg.
Engage a licensed plumber for all water supply, waste, and overflow connections. Engage a licensed electrician for heated towel rails or LED mirrors — RCD protection is required in wet areas under AS/NZS 3000. Confirm waste trap depth before tiling; it is one of the most common and most expensive installation errors in bathroom renovation ideas. These details, done right, are what turn a collection of hamptons bathroom ideas into a bathroom you will love for years.
References
WaterMark Certification Scheme, Australian Building Codes Board
National Construction Code 2022, ABCB Housing Provisions, Part 10.2 Wet Areas
AS 3740:2021 Waterproofing of Domestic Wet Areas, Standards Australia