13 May, 2026
Bathroom Decor Ideas: How to Style a Beautiful Bathroom
Explore our bathroom decor ideas to nail colour, storage and mirrors. Style a stunning bathroom with confidence using our Australian guide.

Video Credit: Simply R Home
You know that instant in every bathroom design, whether it's a tiny update or total rebuild, that can make or break it. In my experience, it's always an early design decision — like colour, storage, and the mirror-vanity relationship — that causes it. Get that right, and all you need is the right finishing touches to do the rest of the styling for you.
Bathroom Colour Ideas: Choosing a Palette That Works
Picking a palette for your bathroom isn't as easy as finding a paint colour you love. Tile finish, grout colour, and paint sheen can all have a massive impact on how your colour will look, depending on how much natural and artificial light your space has. When specifying colour for a bathroom, always find out first what the light situation is like. For example, a north-facing bathroom will carry deeper colour without making the space feel oppressive. On the flip side, a south-facing room will generally benefit from warm neutrals and a greige palette to counteract the cool flat light.
Great bathroom colour ideas generally work well on three surfaces simultaneously: wall tile, floor tile, and painted or panelled wall areas above the tile line.
The contrasting grout trend is strong right now — and for good reason. However, it's something you'll need to think hard about, based on how long you plan to live in your space. Dark grout will do a good job of hiding limescale, but it will also show soap scum and product residue more readily than mid-tone grout. Pale grout looks spotless after one wipe but requires more regular attention in a busy household.
A detail that gets overlooked all too often is undertones and the relationship between the cabinetry and tile. A vanity in warm white will look yellower in a room with a cool-toned white tile. Always hold tile samples, paint chip, and cabinet door together in the room first — not the showroom — to make sure they work together before committing to your scheme.

Bathroom Niche Ideas: Built-In Storage That Saves Space
Once you have a colour scheme you're really comfortable with, it comes down to ensuring your surfaces do double duty — and built-in niches are one of the most efficient ways to add storage without disrupting the clean lines your chosen scheme creates.
A recessed shower niche is one of the most practical bathroom niche ideas available, but it requires planning at the framing stage. Standard stud spacing in Australian residential construction is typically 450 mm or 600 mm, which comfortably accommodates a niche of around 300 mm wide by 900 mm tall — sufficient for bottles, soap dispensers, and a small plant. Placement height should sit between 1,200 mm and 1,500 mm from the floor substrate, which positions the shelf comfortably within arm's reach for most adults.
Critically, any niche constructed within a wet area must be fully waterproofed. The NCC 2022 requires shower walls waterproofed to at least 1,800 mm (NCC 2022, ABCB Housing Provisions, Part 10.2) above the floor substrate, and the membrane must extend into the niche — including the back wall and side returns. AS 3740:2021 provides the detail on membrane application (AS 3740:2021) and overlap requirements, and compliance is non-negotiable. Beyond waterproofing, if the wall you are targeting is load-bearing, a structural assessment is required before any framing is removed.
For those working within a tighter budget or in a rental context, freestanding niche shelving in a finish that coordinates with tapware — matt black is currently the strongest seller in the Australian market — provides a practical alternative without any construction work.

Bathroom Mirror Ideas: Size, Shape, and Placement
Now that the storage question is out of the way, let's talk about the wall above the vanity — and the mirror that graces it. Your mirror is arguably just as important as your niche or shelving to the function and sense of space.
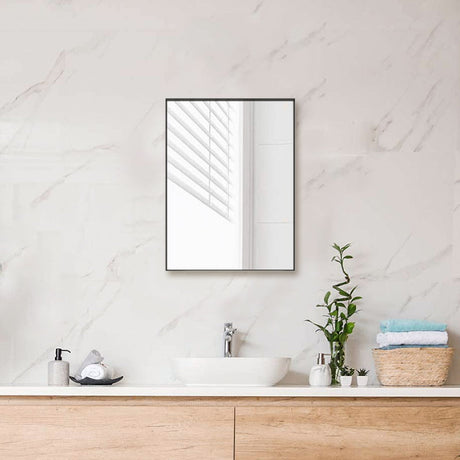
My rule of thumb for dimensions is that the width of the mirror should match the vanity or sit within 50–100 mm either side. A mirror that is excessively wider looks like a floating object on the wall, while one that is too small will make the vanity look undersized beneath it. In terms of height, I like to position the bottom of the mirror about 900–1,000 mm off the finished floor. This height will work for the majority of householders, but for a family bathroom, you may want to consider either lowering the mirror or choosing a full-wall version instead.
Generally speaking, there are three categories of good bathroom mirror ideas: framed, frameless, and LED backlit. Framed options such as those from Fienza, starting at $138, suit traditional and transitional styling well, while LED mirrors, priced from $178 for a round model to $734 for a larger oval design, provide the added benefit of task and ambient lighting. Any hardwired LED mirror must be installed by a licensed electrician — it is not something you want to attempt yourself.
The round mirror placed above a rectangular vanity is one of the key trends right now; the contrast of forms creates a stylish statement without adding cost.

Styling Your Vanity: Freestanding and Painted Options
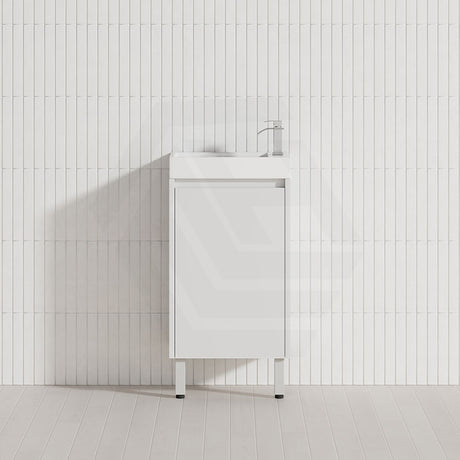
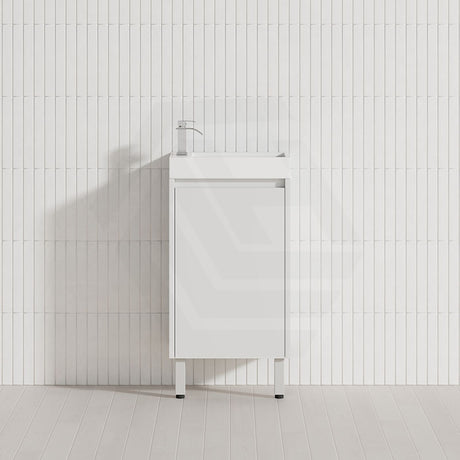
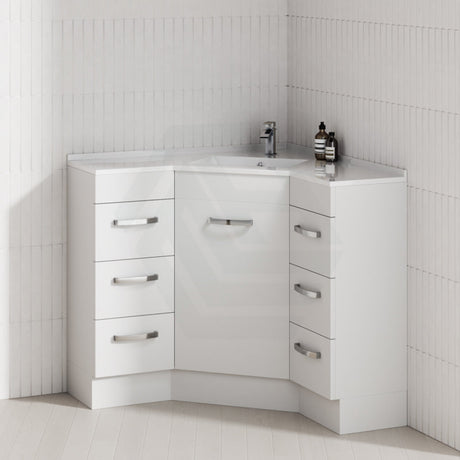
With the mirror sized and chosen, let's address the vanity beneath it. A freestanding bathroom vanity — meaning a design that stands on legs rather than being wall-mounted — gives the bathroom an airy, open quality that suits minimalist styling and is easier to clean underneath. Freestanding bathroom vanities currently range from around $238 through to $1,378, with cost dictated by cabinet material and basin configuration. For moisture resistance at the lower end, PVC board construction is a sound choice; higher-end designs typically use plywood or solid timber cores.
A painted bathroom vanity is a separate consideration from form factor — finish is about the look, not the shape, and a vanity can be both freestanding and painted. Two-pack polyurethane is the most durable painted finish available; it is more moisture resistant and harder than acrylic enamel, and will retain its colour and sheen far longer in a humid environment, though it costs more to respray. Remember that vanity cabinets don't include a basin mixer or waste — budget for those separately. Aulic, Lukka, and CETO all offer freestanding and wall-hung configurations in white gloss through to a range of woodgrains.

Finishing Touches: Accessories, Lighting, and Layout Tips
Once the vanity is chosen, it's the decisions about lighting, accessories, and clearances that make a bathroom work seamlessly every day — and these final choices are where good bathroom decor ideas truly come together.
Towel rails are typically fixed between 900 mm and 1,100 mm from the finished floor — high enough to avoid splash, low enough to reach comfortably. Robe hooks sit in roughly the same zone. Finish consistency matters: if you have brushed gold tapware, carry that through to the towel rail, toilet roll holder, and robe hooks. Both Meir and Aquaperla stock products across the major finishes — matt black, brushed gold, gunmetal, and brushed nickel — and 304 stainless steel construction is the quality benchmark to look for.
Lighting is governed by electrical zones under AS/NZS 3000:2018. Zone 0 (AS/NZS 3000:2018) is inside the bath or shower, Zone 1 is the area above it, and Zone 2 extends 600 mm beyond the bath or shower boundary. Luminaires must meet the minimum IP rating for their zone: IP67 is required for Zone 0, while IP44 or higher is required for Zone 1 and Zone 2. All hardwired work — including LED mirrors and heated towel rails — must be carried out by a licensed electrician.
Clearances are equally important. From October 2023, the NCC 2022 Livable Housing provisions require a minimum clear floor area of 900 mm by 1,200 mm (NCC 2022, ABCB Housing Provisions, Part 12.2) in front of any toilet in new Class 1a dwellings, and a minimum clear door opening of 820 mm for bathroom entry. Those are minimums — I always work to larger clearances wherever the floorplan allows.
Good bathroom decor ideas ultimately come back to this: once clearances are working and finishes form a cohesive theme, the accessories, greenery, and even the soap dish become the final details that complete the picture.
References
National Construction Code 2022, ABCB Housing Provisions, Part 10.2 Wet Areas
AS 3740:2021 Waterproofing of Domestic Wet Areas, Standards Australia
AS/NZS 3000:2018 Electrical Installations (Wiring Rules), Standards Australia
National Construction Code 2022, ABCB Housing Provisions, Part 12.2 Livable Housing