27 May, 2026
Best Way to Clean Shower Screen: Our Top Picks for 2026
Find the best way to clean shower screen glass and banish soap scum and limescale. Our Australian guide covers top picks for 2026.

Video Credit: Clean With Confidence
Why Shower Screens Need Regular Cleaning (and What Goes Wrong If You Skip It)
There is nothing more satisfying than the gleam of a freshly cleaned shower screen. Conversely, nothing can be quite as depressing as a shower screen that has been left for ages on end and has now become dull, streaky, and stained. I have been guilty of both the aforementioned experiences. It is something that most of us experience at one point in time or another. The truth is that soap scum that begins as a thin layer of dirt will, with time, become increasingly difficult to remove — and in severe instances, will never come out at all.
The water is considered very hard in many cities and regions in Australia, so limescale and calcium deposits build up faster here than in other parts of the world. Left alone, the mineral residue will not only cause the screens to look poor quality — the deposits will actually etch the glass surface and cause permanent damage that cannot be reversed even by hard scrubbing. Additionally, the rubber seals and aluminium channels of shower screens often trap moisture, which promotes the growth of mould.
The good news is that these issues can all be prevented by following a straightforward maintenance routine. The best way to clean shower screen glass is not the kind of heavy-duty deep cleaning that happens once or twice a year. Instead, it is about making the habit of a simple cleaning routine and preventing residue from building up in the first place.

Best Cleaning Methods for Glass Shower Screens
A squeegee. This is your best bet and it will cost you very little. After every shower, take a squeegee and go from the top of the shower screen all the way to the bottom, overlapping as you do so. By doing this, you are removing any water before mineral deposits have a chance to form. It takes perhaps no longer than thirty seconds, but the long-term benefits are significant.
For a weekly wash, all that is needed is a mixture of equal parts white vinegar and water, left on for five minutes, then wiped down with a microfibre cloth. This will clear any light soap scum or early mineral deposits. Microfibre cloths should be used rather than standard cloths, as they will not scratch the glass and can pick up debris much more effectively.
Once a month, go a step further with a more thorough cleaning process. Using a paste of bicarbonate of soda and a few drops of dish soap, apply the mixture to a non-scratch scrubber and gently work it onto the glass surface, leaving it to dwell for ten minutes before rinsing off. Follow with a wipe down using a squeegee. This is, quite simply, the best way to clean shower screen glass on a regular rotation — simple, inexpensive, and highly effective.

DIY Cleaning Solutions vs. Store-Bought Products: What Actually Works
Technique and the product you use are just as important to consider.
Homemade solutions are surprisingly effective for regular maintenance. Undiluted white vinegar or mixed 50/50 with water works well to remove mineral stains caused by hard water. A paste of bicarbonate of soda and a small amount of dish soap tackles soap scum. Dish soap added to either mixture helps dissolve grease. These products are inexpensive and safe to use on standard tempered glass, chrome fittings, and most aluminium frames.
One important safety note: never mix white vinegar with any cleaning products containing bleach, as the resulting chlorine gas is genuinely dangerous in a small, poorly ventilated bathroom. Always open the window or run the exhaust fan when using any chemical cleaner — DIY or store-bought.
Commercial bathroom sprays do have their place, particularly for heavier mould growth in seals and grout lines. If using a commercial spray on nano-coated glass or tinted panels, check the label carefully to ensure the cleaner is not strongly acidic or alkaline — these can strip protective coatings. Warm water and a microfibre cloth will never cause damage to coated glass surfaces.

Choosing the Right Shower Screen for Easier Maintenance
Even the best cleaning routine is more effort than necessary if the shower screen itself is designed to trap dirt. This is where screen selection has a direct and very practical impact on how much effort you will spend cleaning for years to come.
Frameless screens are easier to clean, as there are no aluminium or rubber frames along the edges to collect soap scum and mould. It is simply a single sheet of toughened safety glass (compliant with AS/NZS 2208 (AS/NZS 3000:2018)) and some minimal hardware, making it much easier to wipe down. Semi-frameless screens sit somewhere in between. A fully framed screen — although generally the most cost-effective option ($130–$2,550) — will require more attention to the frame profiles, as these are where dirt builds up quickly. Rubber seals on framed or semi-frameless screens typically last three to five years before they need replacing, so factor that into your long-term maintenance expectations.
Glass thickness is also worth considering. The 10mm glass found in premium frameless screens is heavier and stronger, and generally comes with superior hardware. Nano coating — applied to the glass during manufacture — causes water to bead and run off rather than sitting on the surface and leaving deposits. It does not eliminate the need to clean, but it does reduce the effort required. Nano-coated glass options are available from both Covey and Fienza.

Bathroom Layouts: over bath shower screens, back to wall bath, and bath shower Combinations
If you are thinking about which screen will suit your bathroom, it helps to consider how the space is laid out.
If your bathroom combines the bathtub and shower in the same space, over bath shower screens are a practical and popular choice. These screens are specifically designed to span the bath opening, providing a waterproof barrier for the shower without requiring a separate shower base — making them a smart option in a compact bathroom. They are a sub-category of shower screen, distinct from a freestanding shower screen, and still require professional installation.
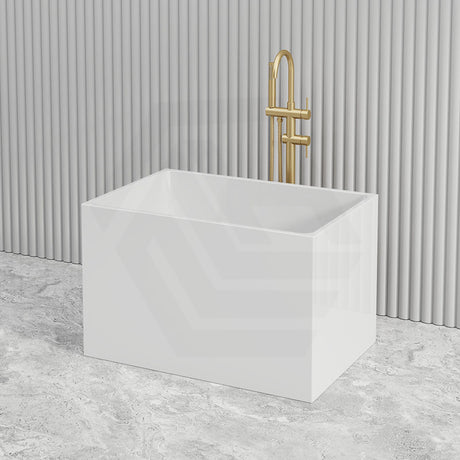
If you have a back to wall bath in your layout — the sleek, flat-sided baths typically built into a tiled surround, usually priced between $938–$2,085 from brands such as Broadway and Poseidon — you need to consider screen placement and cleaning access before installation. A back to wall bath sits within a built tiled frame, so waterproofing must be fully completed before a screen is installed. The screen will need to sit on or very close to the bath rim, with sufficient access to the seal and bottom frame for cleaning.
A bath shower is one of the most efficient ways to lay out a medium-sized bathroom, but to get the most from it you need to understand the best way to clean shower screen installations in these settings — particularly around the bath rim seal — when selecting your product. Look for screens with a minimal bottom rail profile and easily accessible hinges, and ensure the seal between the bath and screen is properly completed during installation. That is where the most cleaning attention will be needed.
References
AS/NZS 3000:2018 Electrical Installations (Wiring Rules), Standards Australia