16 April, 2026
Bathroom Waterproofing: Essential Steps and Australian Standards
Bathroom waterproofing guide Australia: essential steps, NCC & AS 3740 standards, membrane application and common mistakes. Protect your wet areas and avoid costly water damage.

I've lost count of how many bathrooms I've seen ruined by bad waterproofing. It is the one job you simply cannot screw up, and yet it's the step that homeowners know the least about. Bathroom waterproofing isn't sexy. You won't see it on The Block at reveal night. But get it wrong and you're in for structural damage, mould, and another bathroom renovation that happens way sooner than you want.
Why Bathroom Waterproofing Cannot Be Skipped
Without a decent membrane under your tiles, that moisture ends up in the substrate, in our case, typically cement sheeting or compressed fibre cement. This will gradually break down the substrate, encourage mould in the wall cavity and can also impact the timber framing behind the wall. I've seen bathrooms with tiles that look great on the outside but have a cavity behind that is black with mould. This is what happens if you skip or cut corners on bathroom waterproofing. In some circumstances, bathroom waterproofing failure can void your insurance, which is a painful experience should you ever need to claim for water damage.

Australian Standards and Compliance Requirements
In Australia, there are a couple of standards when it comes to bathroom waterproofing. The National Construction Code dictates that shower walls must be waterproofed to a height of at least 1800 mm above the substrate (NCC 2022, ABCB Housing Provisions, Part 10.2), while bathtub surrounds must be at least 150 mm above the rim of the bath (NCC 2022, ABCB Housing Provisions, Part 10.2). These are minimums, and they are mandatory for all construction or bathroom renovations.
This compliance can be shown by either complying with the National Construction Code Housing Provisions or AS 3740:2021 (NCC 2022, ABCB Housing Provisions, Part 10.2 and AS 3740:2021) with whichever one your waterproofer uses will apply for your project. All states and territories require that any bathroom waterproofing be performed by a licensed waterproofer who provides a compliance statement upon completion. Keep that certificate safe, you may need it for sale or inspection, especially if a bathroom dimensions Australia query arises.

Step-by-Step Waterproofing Process
So how to waterproof a bathroom properly? The process begins with the substrate being prepared by removing all old tiles or coverings and then cleaning and priming the surface. At this stage, your plumber should have completed all rough-in plumbing.
The waterproofer then installs either a liquid membrane or a sheet membrane on the floor and shower areas, including shower walls up to 1800 mm above the floor. The waterproofer should be paying careful attention to the junctions of the floor and walls and where the two surfaces meet, which is the most common place for leaks, a waterproofing membrane that bridges this junction with at least 40 mm horizontal legs (NCC 2022, ABCB Housing Provisions, Part 10.2). Allow the membrane at least 24 to 72 hours to cure before any tiling work commences.

Common Waterproofing Mistakes and How to Avoid Them
The most pervasive issue I encounter is waterproofing walls that are too short. Too often, I'll inspect a job and find the membrane terminating at 1500 mm, whereas standards demand a height of 1800 mm. This short fall leaves the upper wall exposed to spray from the showerhead.
Failing to adequately lap and seal junctions is another common pitfall. Corners where the walls meet the floor experience significant stress, and if you don't correctly seal the membrane at these junctions, the water will breach the membrane.
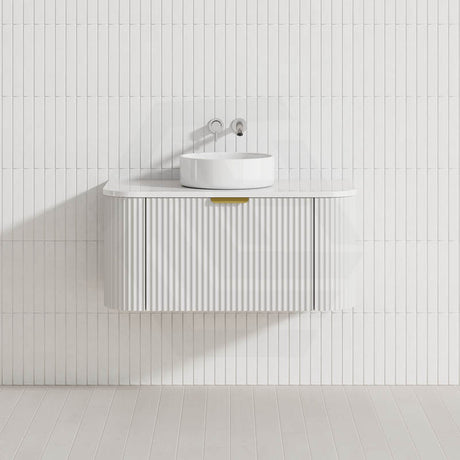
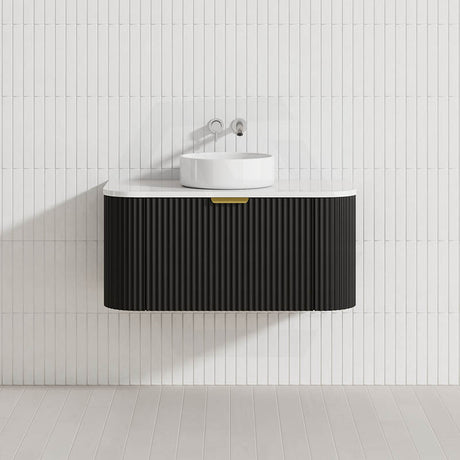
Selecting a vanity unsuitable for a wet area is also one of my most common grievances. Instead of using a vanity with legs touching the floor, you should select a wall mounted vanity. This ensures that water cannot pool at the base. A vanity wall hung off the wall with PVC cabinets is inherently waterproof, whereas MDF will swell and disintegrate under exposure to water.
I'll also mention bathroom caulking. Silicone around the shower screen base and bath edge provides a second line of defence. This is actually one of the few waterproofing-related items a homeowner can complete themselves in the wet area once the licensed waterproofing is complete.

Cost of Professional Waterproofing in Australia
Expect to pay between $50 to $80 per square metre for a professional waterproofing service. In a bathroom sized at say 4 to 6 square metres, you will be looking at a minimum $200 to $480. I personally see this as a place you shouldn't cut costs. Fixing water damage in a bathroom is one thing but fixing it where there is structural timber damage can cost upwards of $15,000 or more.
When calculating the cost, remember to factor in the fixtures within the wet area. For example, a wall mount vanity is a sound investment. You can purchase these for around $50 up to a price of $2,828 depending on design preference. This keeps your vanity off the floor in a wet area.
References
National Construction Code 2022, ABCB Housing Provisions, Part 10.2 Wet Areas
AS 3740:2021 Waterproofing of Domestic Wet Areas, Standards Australia