06 May, 2026
How to Install a Toilet Seat: Step-by-Step DIY Guide
How to install a toilet seat: simple step-by-step DIY guide with measuring tips, tools and common mistakes to avoid. Quick and easy replacement for your Australian bathroom.

What You'll Need: Tools and Parts for the Job
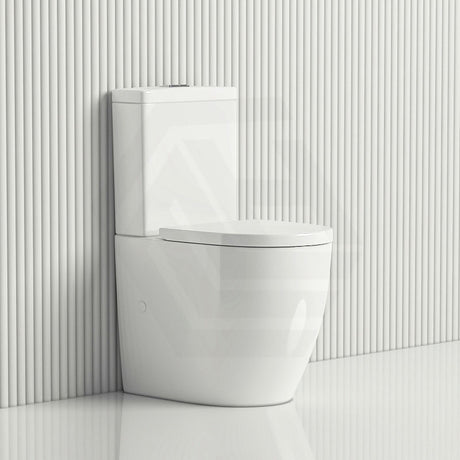
First and foremost, make sure you measure your toilet correctly. Toilet pans in Australia have been manufactured in two styles, round and elongated (D-shape), and seat lengths typically range from 430 mm to 470 mm. Measure from the hinge fixing holes to the front of the pan rim, and measure the spacing between the two hinge fixing holes (the standard Australian fixing-hole spacing for most Australian toilet pans is 155 mm centre-to-centre). Buy the seat first, measure second, and you'll be making a return trip to the hardware store.
You don't require many tools, just an adjustable spanner, a flathead screwdriver, and a tape measure. That's all.
A basic plastic toilet seat will run you anywhere from $20–$60. If you are buying a soft-close or quick-release toilet seat — brands like Fienza and Poseidon make solid options in this range — you're looking at $60–$200 or more. In my personal view, the soft-close mechanism is worth the extra expenditure. Slamming seats wear down hinge fittings faster than people expect, and you'll be replacing again sooner than you should.
When purchasing a replacement seat, it's also worth checking whether the fittings provided are WaterMark certified (WaterMark Certification Scheme). If you install a non-certified fitting, the plumbing regulator in your state may refuse the fitment. The best advice is to buy from a reputable supplier, particularly as the lead-free WaterMark Schedule requirement comes into effect from May 2026 for certain plumbing products.

How to Remove Your Old Toilet Seat
After you have the tools together and the correct seat measured and purchased, your first hands-on task is to remove the old seat safely without damaging the pan.
In Australia, most toilet pans use a top-fix method where bolts drop down through the pan's fixing holes and nuts are secured underneath. Some older suites use a bottom-fix arrangement where the nut tightens from below the pan rim. The process is similar either way.
- Flip open the hinge caps (if present) to expose the bolt heads.
- Hold the bolt head steady with a screwdriver while using your spanner to loosen the nut from underneath.
- Lift the seat and hinge assembly clear of the pan.
Seized or corroded nuts are very common when toilet seats haven't been changed for a long time. If your seat hasn't been replaced in ten years or more, soak the seized nut with penetrating oil for ten to fifteen minutes before trying again. Forcing a seized nut risks cracking the porcelain, which is a much bigger and more expensive problem to deal with.
Once you have removed the old seat, thoroughly clean the hinge fixing area. The base of old hinge fittings usually harbours a buildup of bacteria and residue that you don't want sitting under your new fittings.

How to Fit and Secure the New Toilet Seat
Now that you have removed the old seat and cleaned the mounting area, you are ready to fit your new seat — this is the most critical stage of how to install a toilet seat, requiring precise positioning and correct bolt tension.
- Position the new hinge posts over the pan's fixing holes and confirm the seat sits centred on the pan rim.
- Thread the bolts down through the fixing holes. Most modern seats use plastic bolts with a plastic nut, and these are suitable for most situations.
- Hand-tighten the nuts, then give a quarter-turn with the spanner. Firm, not forceful.
Over-tightening is the single most common mistake here. Porcelain cracks under uneven stress, and a cracked pan means replacing the entire toilet suite — a job that does require a licensed plumber. The seat should feel secure and should not rotate laterally, but you should not need to struggle to tighten further. If your new seat has a quick-release hinge — a useful feature for deep cleaning — follow the manufacturer's locking instructions before tightening fully, and confirm the seat is correctly aligned.

Common Mistakes to Avoid When Installing a Toilet Seat
It's useful to be aware of the common mistakes people make, as these are what lead to a wobbly seat, a cracked pan, or premature replacement. Whether you're figuring out how to replace a toilet seat for the first time or how to change toilet seat fittings on an older suite, the pitfalls are the same.
- Buying the wrong size — measure the pan length and fixing-hole spacing before you buy.
- Over-tightening the bolts — snug is sufficient; over-torquing will crack the porcelain.
- Not cleaning around the hinges — old dirt under new fittings smells and breeds bacteria.
- Incompatible fittings — not all seats fit all pans, particularly older or non-standard suites.
Note also that hot water at bathroom outlets is limited to 50°C under Australian standards (AS/NZS 3500.4) — not directly relevant to fitting a seat, but worth knowing if you're working on the rest of your bathroom at the same time. If you're also upgrading your pan, check whether you need a p trap for toilet or an s trap configuration to suit your floor waste outlet.

How to Look After Your New Toilet Seat
By avoiding those mistakes, you're setting yourself up for a durable installation. A regular maintenance routine will extend the lifespan of your new seat further.
Wipe the seat at least once a week using a non-abrasive bathroom cleaner. Abrasive cleaners damage plastic or duroplast seats, causing discolouration and making the surface harder to keep clean. Apply a small amount of silicone lubricant to soft-close hinges every six months to keep the mechanism operating smoothly.
Every couple of months, check the hinge bolts and re-tighten the nuts a quarter turn with a spanner — this is essentially how to tighten a toilet seat before a minor wobble becomes a persistent problem.
Standard plastic seats typically last five to ten years; duroplast and resin seats are more durable, which is why I lean towards the higher-quality product when I can. Most new toilet seats come with a one-year warranty, so keep your receipt. If the seat discolours, cracks, or the hinge no longer closes properly despite lubrication, it's time to repeat how to install a toilet seat — but at least you know exactly what to do now. Browse the full range of toilet seats at MyHomeware to find the right fit for your pan, or if you're replacing the whole suite, check whether an s trap for toilet suits your bathroom's floor outlet.
References
WaterMark Certification Scheme, Australian Building Codes Board
National Construction Code 2022, ABCB Housing Provisions, Part 12.2 Livable Housing
AS/NZS 3500.4 Plumbing and Drainage — Heated Water Services, Standards Australia