30 April, 2026
Walk-In Shower Ideas: Design, Dimensions and Installation Guide
Walk-in shower ideas for Australian bathrooms: design tips, minimum dimensions, hobless layouts, shower niche sizing and waterproofing requirements. Practical guide for creating a modern, accessible shower space.

What Makes a Walk-In Shower Different (And Why They Are So Popular)
Stepping into a walk-in shower is a small luxury, even on the dullest Tuesday. There is no shower curtain wrapped around your shins or a hob to climb over; it is merely a seamless, open entry into a space that feels almost twice as big. It is this feeling that explains the sudden proliferation of walk in shower ideas across Australian renovation websites and publications recently.
What sets a walk-in shower apart from the standard alcove setup? There is no door and no hob. It consists of a fixed glass screen (or no screen at all in the case of a full wet room) with a floor that gently falls away towards a linear or point drain. This gives the bathroom a cleaner, more expansive appearance that is far easier to care for. Perhaps more important than the aesthetic, a walk-in shower without a hob is ideal for the elderly, those with limited mobility and those who use wheelchairs.
Walk in shower ideas are just as popular in compact ensuites as they are in grand master bathrooms. The open design pulls the eye across the full span of the room rather than splitting it up with a bulky shower enclosure, which is what keeps designers and homeowners coming back to them.

Minimum Dimensions and Layout Configurations
Before you get swept up in a Pinterest-worthy design, you need to know whether your bathroom can actually hold a walk-in shower. The minimum practical size for a walk-in shower is 900 x 900 mm—tight but usable for a single fixed panel and an overhead shower head. If you have more room, 1000 x 1200 mm is a much more comfortable option and leaves space for a handheld shower rail.
Three layout configurations dominate Australian bathrooms. A linear walk-in shower runs along a single wall with one fixed glass panel—it works well in narrow spaces. A corner configuration sits into two walls with the panel across the open side—ideal for square or L-shaped rooms. Then there is the doorless wet room, where the entire floor is graded and waterproofed to a drain, eliminating the need for any glass at all. Walk in shower dimensions will change depending on which configuration you choose, but the golden rule stays the same: you need a minimum clear entry width of 600 mm for comfortable daily use.
Think about screen requirements too. A fixed panel generally starts at 800 mm wide for adequate splash protection, and standard shower screen height in Australia is 2000 mm. If your ceiling is lower, some suppliers offer custom-cut panels, so measure before you order.

Shower Niche Design: Getting the Dimensions and Height Right
A well-placed shower niche transforms dead wall space into useful storage for bottles, soap and razors—without cluttering up your beautiful walk-in shower with hanging caddies. Getting shower niche dimensions right, though, makes all the difference between a feature that works and one that just feels like an afterthought.
The standard shower niche sizes in Australia are 300 x 300 mm (perfect for a one-bottle shelf), 300 x 600 mm (vertical, allowing for multiple shelves), or 600 x 300 mm for a horizontal recess that spans the width of the shower. For a walk-in shower the most popular size is the horizontal 600 x 300 mm because it sits easily between two studs and offers a wide shelf area.
For shower niche height, 1000 to 1200 mm from the finished floor is the sweet spot. This makes everyday items easy to reach when standing, and when sitting in a shower chair if required. If you want a double niche design with one niche higher up than the other, position the second niche around 1500 mm high for infrequently reached items. Finally, a shower niche's internal depth will generally be from 80 to 100 mm. Your tiler will need to build the niche into the shower wall construction before waterproofing, so make sure your niche is thought out and in the right place before the walls are tiled.

Waterproofing, Drainage and the Technical Must-Knows
This is where your walk-in shower plans meet engineering. A hobless shower entry means water has no physical barrier to stop it from travelling throughout the rest of your bathroom. It means that every millimetre of fall and every waterproofing layer is extremely important.
The National Construction Code requires shower walls to be waterproofed to a minimum of 1800 mm above the floor substrate (NCC 2022, ABCB Housing Provisions, Part 10.2). For walk-in showers without a raised shower step, the waterproofed floor area must extend well beyond the shower zone—unenclosed showers require waterproofing to at least a 1500 mm horizontal radius from the shower rose connection. These are not optional; they must be handled by a licensed waterproofer.
Drainage is just as crucial. Your two main options are a channel (linear) drain positioned along one wall, or a traditional point drain at the centre of the shower floor. Channel drains are the more popular pick for walk-in showers because they allow a single-direction floor fall, which is simpler to tile and looks sleeker with large format tiles. The floor gradient must sit between 1:80 and 1:50 (AS 3740:2021)—too flat and water pools; too steep and it feels awkward underfoot.
If you are renovating rather than building new, check whether your existing floor structure can accommodate the required fall. Timber-framed floors sometimes need additional work to create the gradient, and that adds to both cost and timeline. A good bathroom with cabinets and well-planned storage starts with getting these invisible layers right—because no amount of beautiful tilework will save a shower that leaks.

Style, Materials and How to Make Your Walk-In Shower Shine
With the structural stuff out of the way, it is time for the fun stuff! Walk in shower ideas are just as much about making a visual statement as they are about delivering on functionality. The materials you pick here set the tone for your whole bathroom.
Large format porcelain tiles—think 600 x 1200 mm panels in stone or concrete look—are the go-to choice for walk-in shower walls. They create a seamless, clean visual, are easier to keep spotless, and make the space feel bigger. Use a textured or matte finish for your shower floor tiles to boost slip resistance. Or, why not add penny round mosaics on the shower floor? They are so good for following the gradient and can add a nice tactile contrast to large format wall tiles.
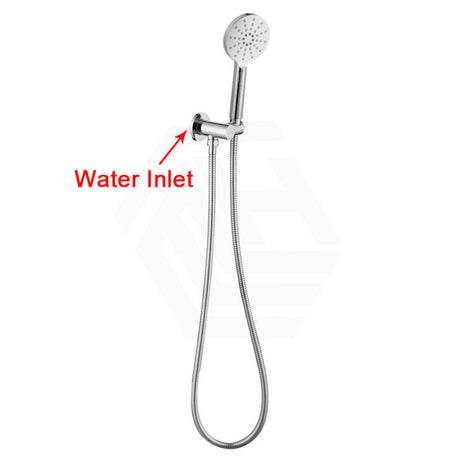
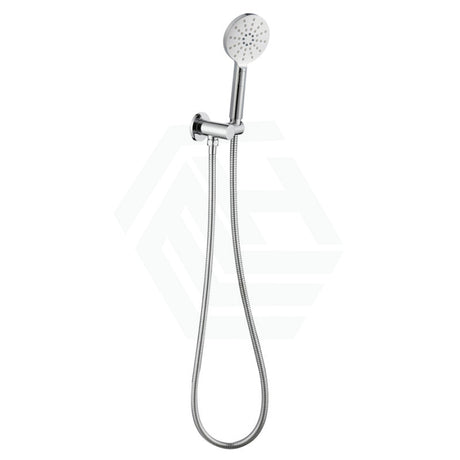
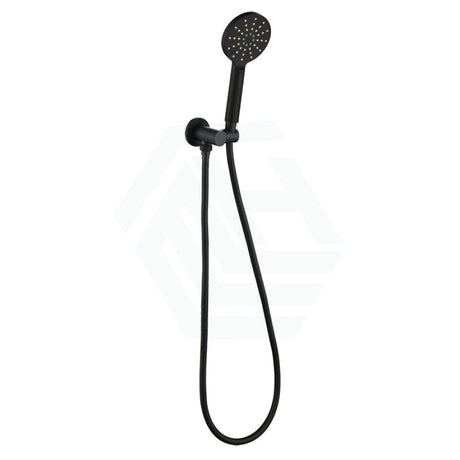
This is where you can let some personality shine through with your choice of tapware. While matte black tapware remains the dominant finish across Australian bathrooms, brushed gold and gunmetal grey are both rising quickly. A twin rail shower set (fixed overhead plus handheld on a rail) starting from around $269 gives you the best of both worlds—rainfall luxury and targeted rinsing. Match your wall mixer, shower arm and floor waste in the same finish for a cohesive, intentional look.
For the glass panel itself, frameless is the premium standard. Most walk-in glass panels use 10 mm tempered safety glass certified to AS/NZS 2208:1996, and nano coatings are available to help prevent water spots. On a tighter budget, consider semi-frameless sliding screens for that clean, modern aesthetic at a lower cost. And while you are thinking about the broader bathroom, do not forget how complementary features tie the room together—something as unexpected as bidet toilet seats or a compact bath vanity corner unit can round out a renovation beautifully.
References
National Construction Code 2022, ABCB Housing Provisions, Part 10.2 Wet Areas
AS 3740:2021 Waterproofing of Domestic Wet Areas, Standards Australia