18 May, 2026
Bathroom Splashback Ideas: Protect Your Walls in Style
Discover practical bathroom splashback ideas to protect your walls from moisture and mould. An Australian guide to materials and styles.

Video Credit: Decor Shows
What Is a Bathroom Splashback and Why Do You Need One?
Do you ever come into the bathroom and see walls pock-marked with moisture damage behind the basin? Or that the plasterboard beneath it feels spongy in certain areas? You can even smell the mould on the edges.
This is what can happen when a bathroom is either newly built or a complete renovation that doesn't feature a splashback.
A bathroom splashback is a water-resistant surface that is installed to the wall section behind your basin, bath or shower. A splashback is designed to protect the substrate beneath it from water damage. According to the National Construction Code in Australia, splashbacks are mandatory. In bathrooms, this requires shower walls to be waterproofed at least 1800 mm (NCC 2022, ABCB Housing Provisions, Part 10.2) above the substrate and bath-adjacent walls to be waterproofed to at least 150 mm above the rim of a bath. A splashback is then applied on top of this layer. It forms a visible and easy-to-clean surface over waterproofing.
Bathroom splashbacks are needed for bathroom protection, but they can also provide the most expressive surface in the bathroom. That is the appeal of thinking up bathroom splashback ideas.
Since splashbacks are needed, the next question is what material? Every material has a different cost and various factors around how it might last over time and how difficult it is to clean.

Best Materials for Bathroom Splashbacks
Ceramic is usually the cheapest starting point for a splashback. Ceramic tiles generally cost between $12–$47 per tile and are one of the more affordable materials for a standard bathroom. Ceramic tiles are resistant to moisture and relatively easy to clean, but they are more porous than porcelain tiles, so they need more grout sealing. Porcelain tiles are fired at a higher temperature, which makes them denser and far less absorbent. Brands like DW Tile, Everstone and Kai Ming offer porcelain options ranging from $6 to well over $600 per piece depending on format and finish — the stone-look and marble-look ranges from Everstone are particularly striking right now.
Another popular option for a bathroom splashback is glass. It creates a seamless look, it's easy to wipe down and visually opens up a room. Any glass used in wet areas must conform to AS/NZS 2208 safety glazing standards and you should make sure you check this specification before you buy. Onix glass mosaics also create a lovely middle ground between glass's sleek look and the textural feel of tiles. Natural stone, in particular marble, is luxurious but demands more frequent sealing and careful maintenance. Acrylic and PVC panels give a more budget-friendly and DIY approach but they aren't as long-lasting as a tile or stone splashback.
Whatever material you go with, ventilation is something you can't afford to overlook — especially in a bathroom with no window. Any windowless bathrooms must exhaust a minimum of 25 L/s (NCC 2022, ABCB Housing Provisions, Part 10.8) to effectively disperse condensation.
If you are using a tile splashback, and they are still the most commonly used splashback material in Australian bathrooms, what tile pattern, tile shape and tile size you choose will have as much an impact on the performance and maintenance requirements as the tile body itself.

Bathroom Tile Ideas for Splashbacks: Shapes, Sizes and Layouts
This is where bathroom tile ideas for a splashback get really fun. Subway tiles, usually 75×300 mm or 100×300 mm in Australian sizing, are popular for a reason. When a subway tile is laid in a standard brick-bond it's timeless. Laid in a vertical stack the subway tile feels much more contemporary. Hexagon tiles, penny rounds and fish-scale shapes all create a lovely organic movement to the walls of the bathroom. Large-format tiles, 600×1200 mm, give a smooth, pared-back look and have far fewer grout lines to clean around.
The smaller tile means more grout joints and more area to clean. Using epoxy grout for tile splashbacks in wet zones is worth the extra cost because it is stain-resistant and does not require sealing. It's another story with large tiles. Because a flat substrate is needed to avoid lippage, hire a professional to handle the prep work unless you know what you're doing. You also have to consider the proportion between the size of the tile and the size of your room. A 25×25 mm mosaic could be too distracting in a large bathroom, and 600×1200 mm tiles might be too large for a tiny ensuite. 300×600 mm tiles are a pretty safe bet for most bathrooms around Australia. Once you've determined your format, you have to think about the more basic question of bathroom wall ideas: do you need a bathroom feature wall?

Bathroom Wall Ideas: Colour, Texture and Feature Walls
A bathroom feature wall is one of the most straightforward ways to upgrade your bathroom. Choose one wall, like the one behind your bath or vanity, and use it to stand out from the rest of the room through colour, texture or material. The impact of a bathroom feature wall can be stunning without being overwhelming.
Your choice of colour can have an impact here: light-coloured tiles will reflect light and make the room seem more open, which is good for small rooms. Darker, more assertive colours like forest green, charcoal grey or navy blue make more sense in larger bathrooms and can also help to disguise water marks that would be more visible on pale tiles. If a busy tile pattern is the main attraction, the grout lines will be less obvious, while large-format stone-look tiles with simpler colours can achieve a similar aesthetic.
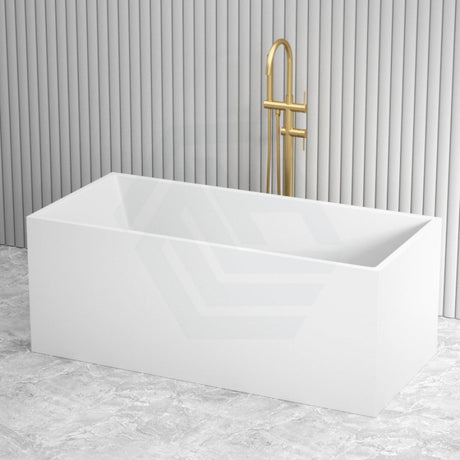
Bathroom feature walls are also popular around the bath. Think about a square bathtub paired with a feature wall that stretches from floor to ceiling with marble-look porcelain or a larger-scale mosaic in warm terracotta colours. The straight edges of Square Bathtubs complement such a bold look well. You'll want to keep the bathroom tiling around your square bath tubs less complex though. Having more complicated tile cuts near the edge of the bath looks messy, and you want to let the look of the square bathtub shine by keeping the surrounding walls simpler. You'll also find that you can apply an even run of sealant along square bath tubs more easily than around a rounded rim.

Installation Costs, Practical Tips and Common Mistakes
Tilers in Australia will typically charge between $60 and $120 per hour, or $50–$70 per m² for the actual laying of the tiles. Ceramic tiles start at $35 per m² with more premium porcelain products ranging around $120 per m² and upwards. A bathroom splashback covering 4–6 m² might cost anything between $800 to $2,500, depending on the tiles you choose and how complicated the installation may be.
Common mistakes to avoid: Waterproofing. You can't tile without it, and it needs to be applied by a licensed waterproofer. It needs to be left for at least 24–48 hours to dry. It cannot be skipped or rushed. Also, a licensed plumber must complete any plumbing and have it certified before you tile. Back-buttering. For larger-format tiles, it's a must to use adhesive both on the tile and substrate to prevent failure later. Expansion joints. Any junctions between tiles and walls or between walls need to include an expansion joint to account for the expansion and contraction of building materials throughout the year. Tiles that don't have these joints will crack in the long run. Tiling around a freestanding square bath tub is particularly sensitive and the sealant must go right along the rim of the bath to ensure water can't sit against the wall. It should be smooth and continuous. Allow at least three to four days after your bathroom splashback is completed before you begin to use that space.
These bathroom splashback ideas show there's no need to compromise between function and beauty in your bathroom.
References
National Construction Code 2022, ABCB Housing Provisions, Part 10.2 Wet Areas
National Construction Code 2022, ABCB Housing Provisions, Part 10.8 Condensation Management
AS 3740:2021 Waterproofing of Domestic Wet Areas, Standards Australia
State plumbing licensing legislation (VBA Victoria; Fair Trading NSW; QBCC Queensland; Building Practitioners Board WA; CBOS Tasmania; ACTPLA ACT; Building & Energy SA; ABPB NT)