08 April, 2026
How to Waterproof a Bathroom: Essential Tips for Renovators
How to waterproof a bathroom the right way in Australia. Step-by-step process, AS 3740 standards, common mistakes to avoid, and why professional waterproofing is essential to prevent costly damage.

Waterproofing is one of those things that nobody thinks about until it goes wrong. And when it goes wrong, it goes catastrophically wrong. I have seen water damage rip through subfloors, rot timber framing, and destroy adjacent rooms, all because someone decided to cut corners on waterproofing during a bathroom renovation. If you are planning any kind of bathroom work that involves tiling or wet areas, understanding proper waterproofing is not optional. It is the single most important step in the entire renovation process.
What Waterproofing Actually Involves (and Why It Matters)
Waterproofing is the application of a liquid membrane to the floor and walls of your bathroom’s wet areas. It creates a continuous, impermeable barrier that prevents water from seeping through tiles and grout into the structural elements of your home. Think of it as a sealed envelope around your shower, bath, and floor areas. Without it, water finds its way into everything. Timber swells, steel corrodes, mould grows in places you cannot see. I have pulled apart bathrooms where the waterproofing was either done badly or not done at all, and the damage behind the tiles was staggering. This is why knowing how to waterproof a bathroom properly is essential for anyone undertaking a renovation.
Australian Standards and Legal Requirements You Cannot Skip
In Australia, bathroom waterproofing is governed by AS 3740, the Australian Standard for waterproofing of domestic wet areas. This is not a suggestion; it is a legal requirement. Any bathroom renovation that involves removing tiles, altering plumbing, or building a new wet area must comply with this standard. The work must be carried out by a licensed waterproofer, and it must be inspected and certified before any tiling can begin. If you skip this step, your building insurance will not cover any water damage that occurs. I have spoken with too many homeowners who learned this the hard way. When you plan how to renovate a bathroom, waterproofing compliance should be the first item on your checklist, not an afterthought.

Step-by-Step: How the Waterproofing Process Works
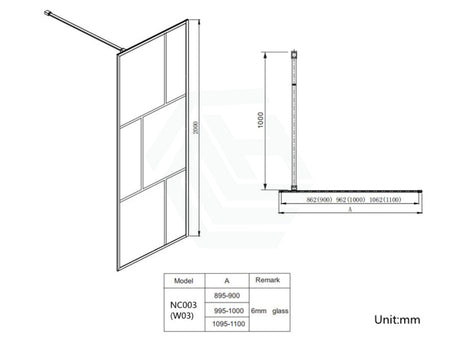
The process itself is straightforward but must be done precisely. First, the substrate (usually cement sheet or sand and cement screed) is prepared, it must be clean, dry, and free of dust. Any cracks or joints are sealed with a bond breaker tape. Then a primer is applied to help the membrane adhere. The liquid membrane is then applied in at least two coats, with each coat going in a different direction to ensure complete coverage. The membrane must extend at least 150 millimetres up the wall from the finished floor level in the general bathroom area, and at least 1800 millimetres high on the walls in the shower recess. That is how to waterproof a bathroom to Australian Standards. Curing time between coats is critical, rushing this step is one of the most common mistakes. Once that is done, the entire area needs to be inspected and certified before you can start laying any tiles.

Choosing Fixtures and Finishes for Your Waterproofed Bathroom
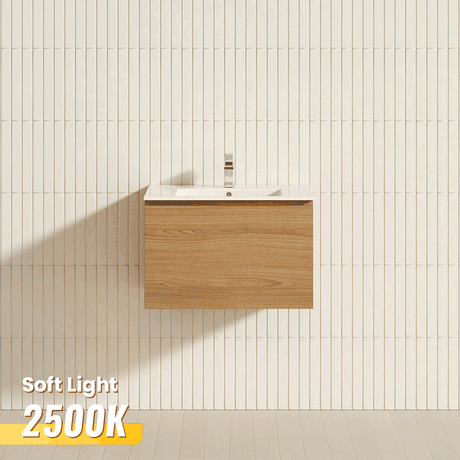
While that is all going on, you should be finalising the fixtures and finishes for your bathroom. Your bathroom colour ideas will influence everything from the tile you buy to the tapware finishes you choose. One of the bathroom trends that has stood the test of time is the use of dark fixtures and fitting in bathrooms. A black vanity will look incredible against white or light-coloured tiles. So if you like the way this looks, it is a good idea to start looking at black vanities for bathrooms that offer you storage and looks. The same goes for your toilet renovation ideas. Your toilet should match the colours you have chosen for your bathroom renovation for a cohesive look. Black toilets are incredibly popular when it comes to modern bathroom designs. Whichever fixtures and finishes you choose, make sure they are ready to be installed the minute your tiling is done. Delays in between these processes will only add time to your bathroom renovation.

Common Waterproofing Mistakes and How to Avoid Them
I have worked in the plumbing trade for many years. In that time, I have seen that most waterproofing failures can be attributed to a few simple and avoidable mistakes. The first is not leaving enough time between coats for the membrane to dry. You need to let each coat dry before you apply the next, which can take 24 hours or more. The second is not applying enough membrane. You need to make sure the membrane reaches the right heights on the walls and you need to ensure every join, corner and penetration is properly sealed. The third is using cheap waterproofing products. Yes, good waterproofing products are more expensive, but they will last for decades. Cheap products will break down within a few short years. And the fourth (and possibly the worst of them all) is trying to do it yourself. This is not a DIY project. Part of understanding how to waterproof a bathroom is knowing when to leave the project in the hands of a licensed professional. Proper waterproofing will only add a fraction of the cost to your renovation compared to what you will have to pay when you have to fix any water damage.