07 October, 2025
7 Easy Steps for Toilet Cistern Replacement Success
Master toilet cistern replacement with our 7-step DIY guide. Save money and complete the job in under 3 hours with simple tools and expert tips for a leak-free, efficient installation.


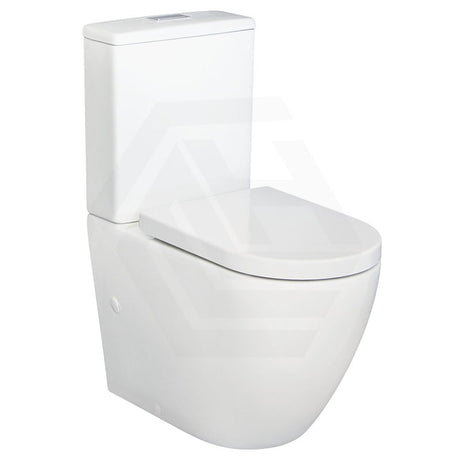
A toilet cistern replacement may look complicated, but with the right preparation it can be a straightforward task. Many homeowners worry about leaks or flooding, but in most cases the work can be completed within a few hours. It’s important to remember that Australian plumbing regulations are strict. The Plumbing Code of Australia requires licensed professionals for most major installations. In some areas, basic toilet cistern replacement is allowed as DIY work, while in others it must be carried out by a licensed plumber. Always check local council requirements first, as non-compliance can affect insurance and safety.

What Actually Goes Wrong With Cisterns?
Before starting a toilet cistern replacement, it helps to know the common failure points:
- Worn rubber seals – cause leaks and constant trickling.
- Corroded metal components – weaken over time and affect flushing power.
- Cracked plastic flush valves – prone to damage under constant water pressure.
- Running noise or weak flushes – typical signs the cistern needs repair or replacement.
Essential Tools for Toilet Cistern Replacement
| Tool / Item | Purpose & Notes |
|---|---|
| Adjustable wrench | Essential for loosening and tightening nuts during a toilet cistern replacement, ensuring fittings aren’t damaged. |
| Screwdriver set (magnetic tips) | Prevents screws from dropping behind the toilet, making the toilet cistern replacement process smoother. |
| 600mm spirit level | Keeps the new cistern aligned properly; accurate leveling is key in a successful toilet cistern replacement. |
| Plumber’s tape (pink PTFE) | Provides stronger sealing under Australian water pressure compared to white tape, reducing leaks after replacement. |
| Neutral cure silicone | Seals joints safely without corroding fittings, a useful extra step in long-lasting installations. |
Cost Guide
If you’re starting from scratch, expect to spend around $85 on essential tools for the job. The replacement toilet cistern itself typically costs between $120 and $280, depending on the brand and model. Altogether, most DIY toilet cistern replacement projects can be completed for under $400, making it a cost-effective alternative to hiring a professional for straightforward jobs.
Real-World Pre-Installation
Water Supply Shutdown
Locate and close the toilet isolation valve before starting. If you can’t find or operate it, shut off the mains instead. After that, empty the cistern completely and use a towel to absorb any remaining water to avoid spills.
Check Existing Set-up
Inspect the current cistern for cracks or damage around the mounting bolts. Measure the distance between the bolt holes — the standard is usually 180mm, but confirm before purchasing a replacement.

The Actual Cistern Upgrade Process
Step 1: Disconnect Water Supply
Turn off the water supply and disconnect the inlet pipe. Use two wrenches — one to hold the cistern connector and another for the supply line nut — to avoid twisting pipes and creating leaks.
Step 2: Remove Mounting Bolts
Apply penetrating oil to the bolts securing the cistern, wait a few minutes, and then loosen them with a ring spanner. Remove the old cistern once the bolts are free.
Step 3: Position the New Cistern
Place the new cistern onto the mounting points and check alignment with a spirit level. Keeping it level prevents stress on the porcelain and ensures proper function.
Step 4: Connect Water Supply
Fit new washers and wrap PTFE tape around the threads. Tighten connections by hand, then add a quarter turn with a wrench. Avoid over-tightening, as it can damage fittings and cause leaks.
Step 5: Test for Leaks and Function
Turn the water back on slowly and check each connection by touch as well as sight. Flush several times to ensure the system is working correctly and no water is escaping.
Step 6: Adjust Settings
Set the water level according to the manufacturer’s mark, usually 20–25mm below the rim. Adjust the flush mechanism if needed to improve performance and reduce noise.
Step 7: Verify Final Operation
Run a full flush cycle and observe the refill time. A cistern should refill in about 90–120 seconds. Confirm there are no leaks and that the unit operates smoothly.

When Things Go Sideways
- Leaks usually occur at the inlet connection, mounting bolts, or flush valve, but they can often be fixed by tightening the fittings, replacing worn washers, or reseating the valve correctly.
- Weak flush performance often happens when air is trapped in the system, and it’s usually solved by briefly disconnecting the inlet to purge the air before reconnecting.
- Noise during filling such as water hammer is common with Australian water pressures (350–500 kPa), and can be reduced by fitting a water hammer arrestor or adjusting the inlet valve flow rate.
How to Choose a Quality Toilet Cistern
-
DIY vs Professional Work
While DIY can save 60–70% of project costs, around 40% of home installations need professional correction within a year. For structural mounting issues, pipe modifications, or compliance concerns, call a licensed plumber. -
Price and Value
Quality replacement cisterns range from about $120 for basic models to $380 for premium dual-flush units with features like soft-close lids. Professional installation usually adds $180–$250. A DIY toilet cistern replacement can cost under $300, but remember to factor in tools and possible complications. -
Long-Term Performance
Australian-made cisterns from brands such as Caroma or Fowler generally last 3–5 years longer than cheaper imports, especially in hard water areas. Regular maintenance helps extend lifespan.

Conclusion
A successful toilet cistern replacement comes down to preparation, patience, and following instructions carefully. The process saves money and builds practical skills. Take photos before disconnecting parts, read instructions thoroughly, and avoid rushing — habits that make any toilet cistern replacement smoother and more reliable.