09 September, 2025
Toilet Bowl Not Flushing: Causes, Fixes, and Maintenance Tips
Troubled by a toilet bowl not flushing? Discover common causes like clogs, low water levels, or faulty flappers, plus easy DIY fixes to restore proper function. Know when to call a plumber and get maintenance tips to prevent future issues!


A toilet bowl not flushing disrupts everything. Whether it's a clog, a broken part, or water flow issues, the cause needs attention before it turns into a bigger hassle. Knowing what’s behind the problem helps you take action quickly and avoid unnecessary mess or repairs. This guide breaks down the most common reasons behind a toilet bowl not flushing, shows you quick DIY fixes, and explains when it’s time to call a plumber. You’ll also get simple maintenance tips to keep future flushing problems from happening. Let’s fix it.

Common Causes of the Toilet Bowl Not Flushing
A toilet bowl not flushing can stem from various underlying issues, often related to blockages, mechanical failures, or water supply problems. Here are the most frequent culprits.
- Clogged Toilet or Pipes: Excessive toilet paper, non-flushable items like wet wipes, sanitary products, or even hair can create blockages in the bowl or drain lines, which leads to slow draining or complete failure to flush, with water levels rising dangerously high.
- Low Water Level in the Cistern or Tank: If the water level doesn't reach the optimal level (approximately 1 inch below the overflow tube), the flush will lack power. This could be caused by a faulty float mechanism, a shut-off valve issue, or siphoning problems.
- Faulty Flapper or Flush Mechanism: A worn-out flapper, loose chain, broken flush button, or damaged lift rod prevents proper water release from the tank, resulting in weak or incomplete flushes.
- Blocked Rim Jets or Inlet Holes: Mineral deposits from hard water can clog the small holes under the rim, reducing water flow into the bowl and weakening the flush action.
- Water Pressure Issues: Low household or municipal water pressure might affect the tank's refill rate, which leads to insufficient flush strength. This is more common in older homes or during peak usage times.
- Outlet Valve or Washer Problems: When you find your toilet not flushing properly, it can be the deteriorated washers or stuck valves in the tank that impede water flow, causing partial flushes or none at all.
- Damaged Overflow Tube: Cracks or breaks in the overflow tube might cause water to escape prematurely, which prevents the tank from holding enough for a full flush.
Troubleshooting and DIY Fixes
Once you have pinpointed the likely cause, you can proceed with targeted troubleshooting and DIY fixes. Here are the steps.
Step 1. Turn Off Water & Inspect
Shut the water supply valve behind the toilet and remove the tank lid. Check the water level, flapper, chain, overflow tube, and outlet valve to find unusual issues.
Step 2. Unclog Toilet or Pipes
If you suspect a blockage, start with a plunger. Make sure it covers the drain hole and pump with firm strokes for 15-20 seconds. If that fails, try a toilet auger to break deeper clogs without scratching the pan. Another option is to pour hot water with dish soap into the bowl, let it sit for 10-30 minutes, then flush.
Step 3. Fix Low Water Level
Check if the isolation valve is fully open by turning it counterclockwise. Adjust the float arm or screw to raise the water level so it sits about ½-1 inch below the overflow tube mark for a stronger flush.
Step 4. Repair or Replace Flapper/Flush Parts
If the flapper is faulty, you need to replace it with a new one. Flush to empty the tank, unhook the old flapper. Install a new one and attach the chain. Adjust the chain so it has a little slack but isn’t too loose. If the handle or flush button sticks, clean it or replace it.
Step 5. Clean Rim Jets
For the blocked rim jets, pour white vinegar or mild cleaner into the overflow tube and let it soak for a few hours or overnight to dissolve deposits. Then scrub the rim jets under the bowl edge with a small brush or wire.
Step 6. Handle Overflow Tube or Outlet Valve Issues
Check the overflow tube for cracks or blockages and replace it if needed. For outlet valve issues, lubricate it if it’s sticking. You can replace the rubber washer if it’s worn, so the tank empties properly.
Step 7. Check Water Pressure & Flush Mechanism
Test water pressure at other taps. If it’s low everywhere, the problem may be the main supply. For toilet-only issues, clean or replace a faulty handle or flush button and ensure connections are secure.
Step 8. Test Flush & Confirm Fix
Turn the water supply back on, let the tank refill, and try several flushes to ensure the toilet works correctly. If problems remain, consider calling a plumber.
When to Call a Professional Plumber
With the step-by-step guide, you should be able to fix the toilet bowl not flushing issue. However, if the troubleshooting can’t seem to work, or the issues seem more complex than a simple DIY fix, it’s time to call a professional plumber. Here are the cases.
- Clogs won’t clear: Plungers or augers don’t work, or multiple drains are blocked. This may indicate a sewer line issue needing high-pressure jets or camera inspection.
- Complex tank repairs: Parts like a cracked overflow tube, faulty fill valve, or outlet valve need replacement beyond basic fixes.
- Low water pressure: If low water pressure is caused by hidden pipe corrosion or mineral buildup, professionals can use hydro-jetting to restore flow effectively.
- Recurring or severe problems: Persistent clogs, leaks, or root intrusion in outdoor pipes often require professional diagnosis.
- Emergencies: In emergencies with backups, overflows, or if you are unsure about any step, plumbers provide efficient solutions.
Maintenance Tips for Preventing Future Flushing Problems
Preventative maintenance is crucial to keep your toilet operating smoothly and prevent common causes from recurring. Here are some simple yet effective tips.
- Flush only toilet paper and human waste; avoid non-flushable items like wipes, sanitary products, or cotton swabs that lead to clogs; opt for single-ply or septic-safe paper.
- Clean the bowl weekly with a brush and cleaner to remove stains; inspect the tank monthly for proper water levels, flapper integrity, chain tension, and no leaks.
- In hard water areas, add vinegar to the tank periodically to dissolve minerals and prevent rim jet blockages or valve damage.
- Upgrade older toilets to dual-flush models for better efficiency and fewer pressure-related issues, using 3-6 litres per flush.
- Keep tools like a plunger and auger handy for quick responses to early signs such as slow drains or gurgling sounds.
- Arrange annual professional inspections, particularly for aging plumbing systems. This helps identify and address hidden problems early, extending the life of your toilets.
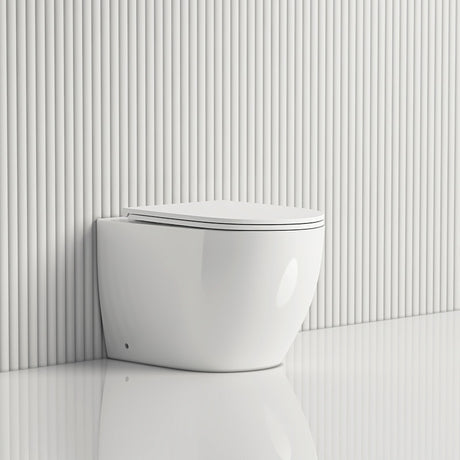
If you find your old toilet is beyond repair and look for an upgrade, MyHomeware offers an extensive selection of high-quality toilet pans and complete toilet sets. Designed with durability and efficiency in mind, these models feature sleek, modern designs that suit any bathroom style.

Conclusion
When you find your toilet bowl not flushing, don’t panic; just follow the troubleshooting guide above for simple DIY fixes. We have also discussed when professional help is necessary and shared practical maintenance tips to keep issues at bay. By following these insights, you can keep your toilet running smoothly and reliably. If you are looking for high-quality replacements or upgrades, check out the range of toilets at MyHomeware to find the perfect fit for your home and ensure long-lasting performance.