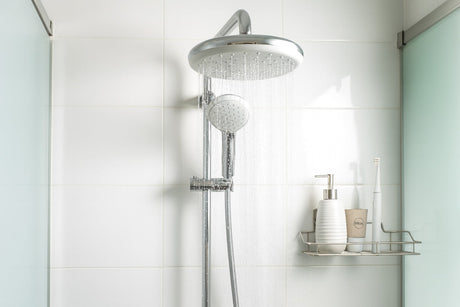
Changing a shower head is not hard. A new one can make the water flow better and feel nicer when you shower. It can also make your bathroom look fresh and new. Many people worry it will be tricky. But if you follow the steps, you can do it yourself without stress. If you want to know how to change shower heads, this guide will help. We will show you step by step, from getting your tools ready to taking off the old head and putting on the new one. We will also give you simple tips to make the job smooth and quick. When you follow this guide, you can change the shower head with confidence. And once it’s done, your daily shower will feel more comfortable and relaxing.

Why Do You Need to Change a Shower Head?
Over time, stuff like minerals and dirt can block the tiny holes in a shower head. This makes the water weak and the spray uneven. Old shower heads can also waste water and power. A new shower head can fix this. It gives stronger water flow and better spray. Many new ones let you change the spray or save water while still feeling nice. If your shower leaks or looks old, a new head can make it work better and look fresh. A low-flow shower head can also cut your water bill, since it uses less water but still feels good. Whether you want comfort, to save money, or just a nicer look, changing a shower head is simple and cheap. It can make your daily shower much better.
Tools and Materials You Will Need for Replacing a Shower Head
Before learning how to replace a shower head, the first step is to gather the necessary tools and materials. This will make the entire replacement process go much more smoothly. Here are the items you might need:
- Adjustable wrench or pliers: Used to remove the old shower head and install the new one.
- Sealing tape: Wrap it around the threaded connection to prevent leaks.
- Soft cloth or towel: When using a wrench, place a cloth on the shower arm to avoid scratching the metal surface.
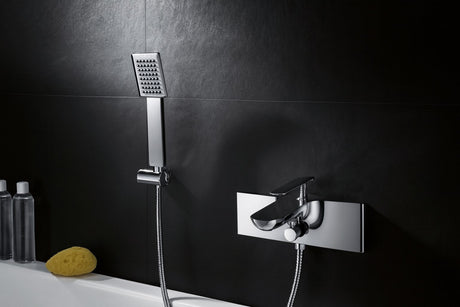
- New shower head: Choose from handheld, fixed, or multi-function models based on your needs.
When choosing a new shower, consider your bathroom style and the experience you prefer. MyHomeware offers options that vary widely in design and function, fitting both your needs and aesthetic.
How Do You Replace a Shower Head Step by Step?
After everything is ready, you can start to learn how to change out a shower head. Please follow these steps.
1.Turn off the water
Before you begin, turn off the shower water to prevent leaks during disassembly. You can turn off the main shower valve or the bathroom diverter valve.
2.Remove the old shower head
Use a wrench or pliers to gently unscrew the old shower head by turning it counterclockwise. If the connection is scaled, wrap the wrench with a cloth to protect it from scratches.
3.Clean the connection
After removing the old shower head, use a cloth to clean the threads of the shower arm. This will remove any leftover scale and old tape, ensuring a tighter fit and preventing leaks when you install the new shower head.
4.Apply sealing tape
Applying sealing tape in a clockwise direction around the threaded connection is crucial for preventing leaks.
5.Install the new shower head.
Thread the new shower head clockwise into the connection. Hand-tighten first, then gently secure it with a wrench. Be sure not to overtighten, as this could damage the connection.
6.Test the water flow
Turn on the water and check for leaks and ensure that the water flows smoothly. If there is a slight leak, you can tighten or re-wrap the raw tape appropriately.

Tips for Replacing a Shower Head Successfully
When you begin to change a shower head, keeping the following tips in mind can help ensure a smooth and successful replacement:
- Check the size. Before you buy a new shower head, make sure it fits the pipe coming from the wall. Most are the same, but some brands can be a little different. Checking first will save you trouble later.
- Use tools the right way. If you use a wrench or pliers, put a cloth between the tool and the metal. This stops scratches. Don’t use too much force or you could damage the pipe.
- Wrap with tape. Put plumber’s tape (Teflon tape) around the threads before you screw on the new head. Wrap it evenly, but don’t use too much. This helps stop leaks.
- Tighten slowly. First tighten the shower head by hand. Then give it a gentle turn with a tool if needed. Don’t force it. Too much pressure can cause leaks or break the parts.
- Test the water. Turn the water on and check the spray. Look for leaks around the connection. If it leaks, take it off, re-wrap the tape, and try again.
- Keep it clean. Even a new shower head needs care. Rinse and clean it once in a while to stop limescale and dirt from building up. This helps it last longer.
When Is It Time to Call a Professional?
Changing a shower head is usually easy. But sometimes it can be unsafe or too hard to do on your own. In these cases, it’s better to call a professional plumber:
- Aging or Damaged Pipes. If the shower pipes are cracked, rusted, or heavily scaled, removing the old shower head could cause problems. It might lead to leaks or damage the pipes.
- Worn Threads. If the connectors on your old shower head are rusted or worn, it might be hard to install a new one. The threads could get damaged during the process.
- Complex Water Pressure or Plumbing Issues. If the water pressure is unstable after replacing the shower head, it can be tricky to fix. Plumbing issues may also arise. Both of these problems require specialized tools and experience.
- Unfamiliarity with the installation methods. If you’re unsure how to change a shower head, it’s a good idea to hire a professional. They can save you time and effort while ensuring a safe installation.
Conclusion
Now that you know how to replace the shower head, updating your bathroom can be a simple and satisfying task. A clean installation improves water flow, saves resources, and gives your space a fresh feel. With the right tools, a few careful steps, and attention to detail, anyone can handle the process confidently. For ideas or inspiration when selecting your next shower head, explore the range of practical and stylish options available at MyHomeware.
FAQs
Can I Change a Shower Head Myself?
Yes, you can. It’s not hard and you don’t need a plumber. You just need pliers or a wrench and some Teflon tape. Turn off the water to the shower, then unscrew the old head. Clean the threads and wrap them with tape. Screw on the new shower head until it feels tight. The whole job usually takes less than 15 minutes, even if you’ve never done it before.
Do I Need to Turn the Main Water off to Change the Shower Head?
No, you don’t. You only need to turn off the water to the shower. This will stop water from running while you work. The main water shutoff is only needed for big plumbing repairs, not for something small like this.
Does Any Shower Head Fit Any Shower?
Not always. Most shower heads are made in a standard size, but some are different. The new shower head has to match the thread on your shower arm, which is the pipe coming out of the wall. Check the size before you buy. If it doesn’t match, you may need a small adapter. They are cheap and easy to find.
Do You Need a Plumber to Replace a Shower?
Most of the time, no. Changing a shower head is simple and safe to do yourself. You can do it with just a few tools and a little time. But if you see leaks that don’t stop, broken pipes, or very low water pressure, then you should call a plumber. That means the problem is bigger than just the shower head.