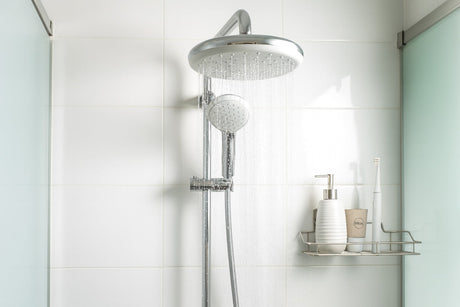
That drip-drip-drip from the leaking shower head is almost driving you crazy? It’s a common issue in the bathroom. Although it seems small, over time, it can waste a lot of water and increase your utility bill. What causes it and how to fix? In this blog, we will walk through the common problems that cause shower head dripping and how to fix each issue step by step. We will also share tips on when to call a plumber and how to prevent future leaks. Let’s get started.

What Common Problems Cause a Shower Head to Leak?
You might be dealing with a dripping shower head that starts as soon as you turn the water on, or the more frustrating dripping shower head when water is off. No matter which one you’re dealing with, the first step is to figure out why it’s happening. Here are the most common reasons:
- Old washer or O-ring: A small rubber ring sits where the shower head meets the pipe. Over time, it can crack or get flat. When that happens, water leaks through the threads.
- Mineral buildup: Hard water leaves white stuff like calcium inside the shower head. This blocks the tiny holes. The water pressure gets uneven, and water escapes through the seals. Sometimes it also makes water drip slowly even after you turn the shower off.
- Loose connection: The shower head may not be screwed on tight. Or the pipe in the wall could be a little loose. Both can let water leak out.
- Bad valve or cartridge: If water keeps dripping when the shower is off, the problem is deeper inside. The valve that stops water may be worn out. When it doesn’t seal well, a small trickle keeps coming, and you get a steady drip.
What Basic Tools Will You Need to Fix a Leaking Shower?
You don’t need a professional toolbox for most shower repairs. A small investment in a few basic tools will prepare you for a successful leaking shower repair.
- Adjustable Wrench or Pliers: This is for tightening or loosening the shower head and shower arm.
- Soft Cloth or Rag: Use this to protect the finish of your shower head and arm from the wrench.
- Thread Seal Tape (Teflon Tape): This thin white tape is essential for creating a watertight seal on threaded pipe connections.
- Replacement Washers and O-Rings: It’s wise to have a small kit with assorted rubber washers. These are inexpensive and readily available at any hardware store.
- White Vinegar and a Soft Brush: For cleaning mineral buildup, nothing works better or more safely than white vinegar. An old toothbrush is perfect for scrubbing.
- Shower Sealant: If you discover the leak is at the escutcheon plate (the decorative plate behind the faucet handle), you'll need a quality shower sealant to ensure the area is properly shower sealed against moisture.
How Do You Fix a Leaking Shower Head Step by Step?
Now it’s time to get to work. First, turn off the water supply to the shower. This might be a shut-off valve for the bathroom or the main water supply for your house. Then, follow the fixes for different causes. Here are several ways on how to fix shower leaking shower head.
Fix 1: Tightening the Connection
This is the easiest of all shower repairs and should always be your first step.
- Protect the Finish: Wrap your soft cloth around the base of the shower head where it connects to the shower arm.
- Gently Tighten: Using your wrench or pliers over the cloth, try to gently tighten the shower head by turning it clockwise. Sometimes, it’s just that simple.
Fix 2: Replacing the Washer
If tightening doesn't work, try to replace the washer.
- Unscrew the Shower Head: Unscrew the shower head completely by turning it counterclockwise.
- Inspect the Washer: Look inside the shower head’s connector. You will see a small rubber washer or O-ring. If it looks cracked, brittle, or flattened, it needs to be replaced.
- Replace and Reassemble: Pry out the old washer with a small screwdriver, pop in a new one, and re-wrap the shower arm threads with 2-3 layers of Teflon tape in a clockwise direction.
- Reattach: Screw the shower head back on, hand-tightening first and then giving it a final quarter-turn with the wrench. Turn the water back on and check for leaks.
Fix 3: Cleaning Mineral Buildup
If the shower head drips from the nozzles long after it's been shut off, a good cleaning is in order.
- Remove the Shower Head: Unscrew the shower head from the shower arm.
- Soak in Vinegar: Submerge the shower head in a plastic bag or bowl filled with white vinegar. Ensure all the nozzles are fully covered. Let it soak for several hours, or overnight for heavy buildup.
- Scrub and Rinse: After soaking, use an old toothbrush to scrub away any remaining limescale from the nozzles and the filter screen inside the connector.
- Reinstall: Rinse the shower head thoroughly with water, reapply Teflon tape to the arm, and screw the shower head back on.
Fix 4: Addressing a Faulty Faucet Cartridge
If the drip is constant and comes from the nozzles while the water is off, the faucet valve is the likely culprit. This repair is more involved but is manageable for a patient DIYer.
- Remove the Faucet Handle: This is usually held on by a small set screw, which might be hidden under a decorative cap.
- Remove the Escutcheon Plate: This plate sits behind the handle and can be unscrewed or pried off gently.
- Access the Cartridge: You will see a retaining clip or nut holding the cartridge in place. Remove it carefully.
- Pull Out the Old Cartridge: You may need special cartridge-puller pliers for this, depending on the faucet model. Note its orientation before you pull it out.
- Install the New Cartridge: Get an identical replacement cartridge. Slide it into place in the same orientation as the old one and resecure it with the clip or nut.
- Reassemble: Put everything back together in reverse order. Turn the water on slowly and check for leaks.

When Should You Call a Plumber?
While many leaks are simple to fix, some situations require professional expertise. You should call a plumber for a shower leak repair if:
- You’ve tried the steps above and the leak persists.
- The leak appears to be coming from behind the wall.
- You are dealing with a complex valve system and are not comfortable replacing the cartridge.
- The pipe threads on the shower arm or in the wall are stripped or damaged.
Attempting to fix these more complex issues without experience can lead to much more significant damage.
How Can You Prevent Future Leaks and Save Water?
Preventative maintenance can save you a lot of hassle. To avoid a future shower leaking from the shower head, follow these tips:
- Regular Cleaning: Soak your shower head in vinegar every few months to prevent mineral buildup.
- Check Seals Annually: When you clean the shower head, inspect the rubber washer and replace it if it shows any signs of wear.
- Don't Overtighten: When installing a shower head, overtightening can damage the washer or crack the plastic fittings. Hand-tight plus a gentle quarter-turn with a wrench is usually enough.
- Upgrade to Quality: A high-quality shower head lasts longer, uses water more efficiently, and reduces the risk of leaks. MyHomeware offers durable options that combine style with long-term performance.
Conclusion
Fixing a leaking shower is often easier than it looks. A loose seal, worn washer, or buildup of minerals can usually be handled with a few tools and a little time. Once you know how to fix leaking shower problems, you’ll save water and avoid bigger repairs. And when you need to upgrade your bathroom with fittings that last, MyHomeware has everything you need to keep your shower running reliably.
FAQs
How Much Does It Cost to Fix a Leaky Shower Head?
If you fix it yourself, it’s cheap. A new washer and some Teflon tape cost under $10. If you need a new faucet cartridge, the part is usually $20 to $60. If you hire a plumber, expect $100 to $250, depending on labor in your area.
Why Does the Shower Keep Dripping Even After It’s Turned Off?
Sometimes water is trapped inside the shower head and pipe. It will drip out slowly for a few minutes. Hard water buildup can make this worse. But if the drip never stops, the valve inside is worn out. The cartridge or valve needs to be replaced.
Can Cleaning Stop the Leak?
Yes, often. Hard water leaves mineral deposits that block the flow. This makes water push out through the seals. A good cleaning can clear the deposits and stop the drip.
How to Tighten a Shower Head?
Wrap a soft cloth around the base so you don’t scratch it. Use a wrench or pliers over the cloth. Turn the shower head clockwise, slowly and gently. Do not overtighten. Too much force can damage the washer or the pipe. A small turn is usually enough.