31 October, 2025
Shower Grab Rail Height Australian Standards: Requirements and Installation Tips
Discover the correct shower grab rail height in Australia with AS 1428.1 standards, installation tips, and safety guidelines for a secure, accessible bathroom.


Installing grab rails in your shower helps make it safer and easier to use, especially for seniors or anyone with limited mobility. But shower grab rail height Australian standards? And how do you make sure it’s installed correctly?
This guide covers everything you need to know, from AS 1428.1 height and placement rules to the right installation methods and materials. You’ll also find simple steps to help you design or upgrade a bathroom that’s both accessible and compliant with Australian safety standards.

Standards for Shower Grab Rail Height (AS 1428.1)
To keep your shower safe and meet Australian standards, you need to know the correct height for grab rails. Under the latest AS 1428.1 guidelines, these heights are set to make showers easier and safer to use for people with disabilities. Here’s a clear overview of the main height requirements:
- Horizontal grab rails: Mounted at a height of 800-810 mm(or 800-820 mm, per the 2021 update) from the finished floor level. For a continuous rail in a shower alcove, it should start within 100 mm of the entrance.
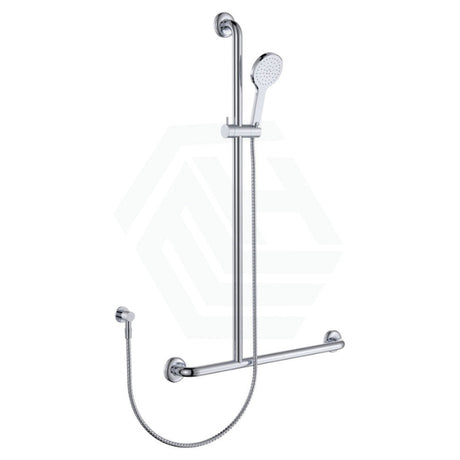
- Vertical grab rails: Installed at a height of 600-1000 mm from the floor, located at the entrance to the shower approximately 800 mm above floor level to assist with stepping in and out.
- Foldable grab rails: Install on the wall opposite the fixed horizontal grab rail, positioned 800-810 mm above the finished floor level when in the horizontal position.
Where Should Shower Grab Rails Be Positioned in a Typical Shower?
Proper placement ensures the rails effectively prevent falls and support safe movement within the shower area. According to AS 1428.1, grab rails should be strategically installed to assist with actions such as entering, standing, or sitting on a shower seat. Here’s a detailed guideline to achieve optimal positioning.
- Back Wall: Install a horizontal grab rail extending at least 1200 mm across the main shower wall, positioned 800-810 mm above the finished floor level. This provides stable support while standing or washing.
- Side Wall (Entry Wall): Fit a vertical or L-shaped grab rail adjacent to the entry. The lower section should start at 800-810 mm and extend upward to assist with balance and transfers in and out of the shower.
- Showerhead Wall: Place a vertical grab rail integrated with the adjustable showerhead holder, allowing users to steady themselves while adjusting the height. Maintain 50-60 mm clearance from the wall for a secure grip.
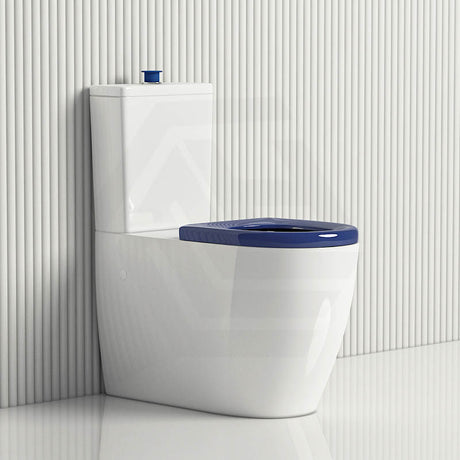
- Beside the Toilet: In bathrooms with combined layouts, install a horizontal grab rail beside the toilet, around 800 mm above the floor, to help with sitting and standing.
- Opposite Wall: If space permits, install a foldable grab rail on the wall opposite the fixed horizontal rail, positioned 800-810 mm above the floor when in the horizontal position. This offers additional support and flexibility for seated users.
- Accessibility Considerations: In roll-in or transfer showers, provide rails on at least two walls to ensure full support. Avoid obstructions from taps, shelves, or soap holders, and maintain at least 600 mm of unobstructed space above the grab rail.

Other Key Requirements for the Shower Grab Rail
Aside from height and position, shower grab rails must meet additional criteria to ensure durability and usability in moist conditions. The AS 1428.1 standard outlines several practical requirements that enhance safety and comfort. Here’s what to consider:
- Materials: Choose corrosion-resistant options such as stainless steel or aluminium to prevent rust in humid areas. Avoid materials that retain extreme temperatures or conduct electricity without proper earthing.
- Strength: Grab rails should withstand at least 1100 Newtons (about 112 kg) of force applied in any direction without bending or loosening. Additional reinforcement may be needed for heavier users.
- Length: Common lengths are 300 mm, 450 mm, 600 mm, and 900 mm, adjustable to suit wall stud spacing or user needs, ensuring consistent support across the shower area.
- Diameter: Opt for 30-40 mm to allow a full hand grip, promoting secure hold without excessive effort. The exposed edge should have at least a 5 mm radius to improve comfort and safety.
- Finish: Select slip-resistant finishes for a firm hold, and maintain at least 30% luminance contrast with surrounding walls to improve visibility, especially for users with limited vision.
How Do You Install Shower Grab Rails Securely?
Once you know the correct shower grab rail height and key standards, the next step is installation. Just follow these step-by-step instructions for a secure and durable fit.
-
Step 1. Assess and Plan
Evaluate the wall material (brick, concrete, timber-framed, or plasterboard). For brick or concrete walls, rails can be mounted anywhere using masonry anchors. For timber-framed or plasterboard walls, locate studs using a stud finder and secure both ends of the rail to at least two studs for maximum stability and load support. -
Step 2. Determine the direction
Horizontal for balance during standing or washing, vertical for pulling up or showerhead adjustment, angled (45 degrees) for forearm leverage in transfers, or foldable on the opposite wall for flexibility with seated users. -
Step 3. Mark the height
Mark heights at 800-810mm (or 800-820mm per 2021 update) for horizontal and foldable rails, and 600-1000mm for vertical, ensuring positions align with user height, reach, and shower layout. -
Step 4. Select Fixings and Fittings
Choose appropriate fittings (Exposed for easy home installation, Concealed for modern appearance, or Vandal-Proof for public settings) and fixings that match the wall type(per step 1); make sure they support at least 1100 Newtons of force. For wet areas, include seals around screw holes to prevent water ingress and rust. -
Step 5. Prepare the Wall
Use a measuring tape and level to mark fixing points aligned with studs. For tiled walls, employ a masonry drill bit to avoid cracking; drill holes accordingly. -
Step 6. Attach the Rail
Secure the rail at both ends to the wall structure or studs using screws or anchors. Integrate with existing fittings if replacing towel rails or attaching to shower hoses, ensuring a 30-40mm diameter for grip and 50-60mm clearance from the wall. -
Step 7. Check Clearance and Obstructions
Verify 50-60mm distance from the wall for hand movement, at least 600mm unobstructed space above the rail, and no obstructions along the top 270° arc for horizontal/angled rails or full length for vertical ones. Avoid interference with taps, shelves, or other fixtures. -
Step 8. Test and Finish
Apply force in all directions to confirm stability and 1100N capacity without movement or rotation. Seal any holes to prevent leaks, and consult a professional if unsure about wall strength, user needs, or electrical safety near water.
Conclusion
Installing grab rails at the correct shower grab rail height Australian standards, usually 800 to 810 mm from the floor, keeps your shower safe, easy to use, and comfortable. Following AS 1428.1 guidelines helps everyone move with more confidence and stability.
Choosing rails made from strong, rust-resistant materials and keeping the right spacing around them adds extra safety and long-lasting use. For quality fixtures that combine safety, comfort, and modern style, check out the full bathroom range at MyHomeware.


