A faulty toilet flush button can be annoying when it sticks, needs several presses, or doesn’t respond at all. On top of that, it can waste water or even lead to leaks that raise your bills. How to fix it? Fortunately, this toilet flush button replacement guide explains how to spot the cause, carry out simple repairs, and keep your system working smoothly. You’ll also find advice on when to call a professional and how to prevent future issues. Let’s begin!

Signs that Your Toilet Flush Button Needs Replacement
Recognising early warning signs can prevent minor issues from escalating into costly repairs. Here are the signs that you might need a toilet flush button replacement.
- If your flush button requires multiple presses to activate or feels loose and wobbly when pushed, it's often a clear indicator of wear.
- Visible cracks, discolouration, or moisture damage around the button suggest internal corrosion or breakage, especially in older models.
- If the toilet continues running after flushing or shows signs of leaks around the cistern, the button mechanism might be failing to seal properly.
- A stuck or jammed button that does not return to its position, leading to constant water flow and potential overflow risks.
- Unusual noises during flushing, or the button no longer engages the flush valve effectively.
These issues are common in push-button systems. Addressing them promptly can save water and avoid bigger plumbing problems.
How to Replace a Toilet Flush Button
Once you have identified the need for replacement, it’s time to tackle the problem. Now, let's dive into the practical steps for toilet flush button replacement for most standard models.
Tools & Parts You’ll Need
First off, you will need to gather these essentials:
- Adjustable wrench or pliers for loosening connections.
- Screwdriver (flathead or Phillips, depending on your model).
- Towel or bucket to catch any water.
- Rubber gloves for hygiene.
- Possibly a new flush valve if the button is integrated.
- Optional: replacement flush button kit that matches your toilet's size.
- Optional: plumber's tape for seals and a flashlight for better visibility inside the cistern.
Step-by-Step Replacement Guide
Follow these clear steps to replace a toilet flush button and restore smooth, reliable flushing without unnecessary hassle.
Step 1. Prepare the area and shut off the water
Turn off the water valve behind the toilet. Give it a flush to let most of the water out. Take off the cistern lid and place it somewhere soft so it doesn’t get damaged. Use a towel to soak up any water that’s left in the tank, leaving it dry and ready for the next step.
Step 2. Remove the old flush button
Unscrew retaining clips or nuts with a screwdriver. If threaded, turn counterclockwise with pliers to loosen. Disconnect rods or cables by unclipping or pulling straight out; note their length and position for correct reassembly later.
Step 3. Inspect and clean the area
Check inside the cistern with a flashlight for limescale, dirt, or seal damage. Wipe debris away with a damp cloth. If replacing a full valve, measure it against the new kit to ensure the correct size and compatibility.
Step 4. Install the new flush button
Place the new button through the cistern lid hole and hand-tighten, finishing with pliers if needed. Reconnect rods or cables, adjusting their length to match the flush valve. If fitting a full kit, secure nuts and clips firmly.
Step 5. Test and finalise
Reattach the lid carefully, then turn the water supply back on. Let the tank fill before flushing multiple times. Confirm smooth operation, with no leaks or unusual noises. Tighten fittings or use plumber’s tape if small leaks appear.
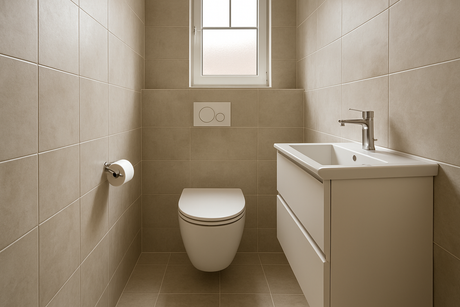
Special Cases: Concealed or Wall-Mounted Buttons
Back-to-wall toilets are designed with a concealed cistern tucked neatly within the wall itself. In this case, you can follow the steps below.
Step 1. Turn off the water supply, using an adjustable wrench if the valve is stiff.
Step 2. Remove the panel near the flush button to reveal the cistern.
Step 3. Unclip or unscrew the button from the front plate. Use pliers if it’s tightly fixed. Disconnect the connecting rod from the flush valve.
Step 4. Clip or screw the new button onto the plate. Reattach the rod securely to the valve mechanism, adjusting length if needed.
Step 5. Secure the access panel. Turn the water supply back on and test the result of toilet flush button replacement.
When to Call a Plumber
While DIY toilet flush button replacement is manageable for many, some situations warrant professional expertise to avoid further damage. Consider professional help if you notice:
- Persistent leaks or weak flushes even after replacement may signal deeper problems, such as clogged drain lines or low water pressure.
- Water backing up into other fixtures, a strong sign of a sewer line blockage that requires specialised tools to resolve.
- Foul odours or multiple toilets failing to flush indicate a wider plumbing issue that needs expert diagnosis.
- Inaccessible cisterns or older systems where DIY repairs could cause damage.
- If you’re unsure about any step, calling a plumber prevents mistakes that could turn a small repair into a major job.
Tips to Maintain Your Toilet Flush Button
After successfully handling toilet flush button replacement, proactive maintenance can prevent recurrence and extend the component's lifespan. Here are simple but effective tips:
- Regularly clean the toilet flush button and surrounding area with mild soap to remove grime and mineral deposits that cause sticking. Avoid abrasive cleaners that might scratch or corrode the mechanism.
- Check and adjust the connecting rods or cables periodically to ensure they are not too tight or loose can lead to jamming.
- Flush the toilet gently to reduce wear on the button springs.
- Use vinegar soaks monthly to dissolve limescale buildup inside the cistern.
- Avoid flushing non-degradable items that strain the flush system.
- Schedule annual inspections if you live in hard water areas.
- Replace seals or O-rings every few years as preventive care.
- For in-wall cistern toilet systems, ensure the concealed parts are ventilated to prevent moisture damage and corrosion.

Conclusion
A faulty flush button can waste water, cause leaks, and disrupt daily routines, but with the right tools and guidance, toilet flush button replacement can be a task most homeowners can manage. Learning the signs of wear, following step-by-step instructions, and keeping up with simple maintenance will keep your toilet working efficiently. If problems extend beyond the button, a plumber’s expertise is the safest choice. And when it’s time to upgrade or refresh your bathroom, you’ll find reliable options designed for everyday use at MyHomeware.
FAQs
Can you just replace the toilet flush button?
Yes, in most cases, you can replace only the button without changing the whole flushing system. The key is making sure the problem is limited to the button and not the flush valve or other internal parts. If the button feels loose, cracked, or unresponsive, a simple replacement usually solves it. However, if the toilet keeps running after installing a new button, further repairs inside the cistern may be needed.
How to replace a toilet push button valve?
Replacing the flush button valve is slightly more involved than swapping out just the button. It requires accessing the cistern’s internal parts. First, turn off the water supply, flush the cistern, and remove the lid. Then, disconnect the old flush valve by unscrewing or unclipping it from the base. Next, install the new push button valve. Make sure it fits securely with the button mechanism. Test the flush several times to ensure smooth operation.
Does any flush valve fit any toilet?
Not all flush valves are universal. Different toilets use different sizes and designs depending on the manufacturer and cistern model. Before buying, measure your cistern opening and check compatibility with the replacement part. Many brands provide model-specific valves to ensure proper fit. Using the wrong valve can lead to leaks, improper flushing, or wasted water. You will need to confirm specifications before purchase.
How do I measure my toilet flush button?
Remove the cistern lid and carefully unscrew the existing button. Use a ruler or caliper to check the button’s diameter and the stem length. Measure any connecting rods or cables as well, since they need to match up with the flush valve. Also, take note of whether your toilet has a single or dual flush design, as the sizing and operation can differ. With these measurements, choosing the right replacement is straightforward.