24 December, 2025
How to Loosen Shower Head Safely & Easily: A Quick Guide
Stuck shower head? Step-by-step guide to loosen & remove with vinegar soak, pliers & WD-40. Safe tips for calcified fixtures – upgrade easily without damage!


Replacing a bathroom fixture should be a simple task, but mineral deposits and rust often make it a battle. A stuck fixture is usually caused by long-term limescale buildup or overtightening, turning a quick swap into a frustrating experience. Many may wonder how to loosen shower head safely?
This guide provides several step-by-step methods for removal using household items, and details how to clean and reinstall your unit for optimal performance. Let’s get your water flowing freely again.

Why Won't My Shower Head Loosen?
Before grabbing the heavy-duty tools, it is helpful to understand why the fixture is stuck. In most cases, the culprit is not mechanical failure but rather environmental factors.
- Mineral Buildup (Scale): The most common reason for a stuck connection is hard water. Water containing high levels of calcium and magnesium evaporates, leaving behind hard, crusty deposits known as limescale. This scale acts like cement between the threads of the shower arm and the head.
- Rust and Corrosion: If the shower arm is made of steel and the head is brass (or vice versa), galvanic corrosion can occur over time, essentially welding the two metals together. Rust can also seize the threads if moisture has penetrated the seal.
- Overtightening: If the previous installation was done with excessive force, the threads may be locked tight. Plumbing fixtures generally only need to be hand-tight plus a quarter turn.
- Old Thread Sealants: Old plumber's tape (Teflon tape) or pipe dope can sometimes harden over decades, creating a bond that is difficult to break without leverage.
How to Loosen and Remove a Stuck Shower Head
There are several methods to tackle this problem, ranging from gentle hand removal to using chemical dissolvers. It is best to start with the least invasive method to avoid damaging the shower arm.
The Friction Method (Hand Removal)
The simplest way to loosen a stuck shower head is to try with your hands first. Wet handles and soap make everything slippery, so drying and adding grip usually helps a lot.
- Dry everything: Turn off the water. Dry the shower head area and your hands with a towel.
- Improve your grip: Wrap a dry towel around the connection nut, or put on rubber cleaning gloves so your hand doesn’t slip.
- Twist the nut: Turn the nut counter-clockwise with steady, firm pressure. If it shifts, continue turning until it comes off.
Using Pliers or an Adjustable Wrench
If hand strength isn't enough, you need mechanical leverage. However, metal tools can scratch the finish of your fixtures. So, be careful.
- Protect the finish: Wrap a rag or a piece of thick cloth around the connecting nut to protect the chrome or finish.
- Adjust the tool: Use a pair of tongue-and-groove pliers or an adjustable wrench. Clamp it over the cloth-covered nut.
- Stabilize the arm: If possible, use your other hand to hold the shower arm pipe steady. This prevents you from twisting the pipe inside the wall, which could cause a leak.
- Turn: Apply force counter-clockwise. A sudden, sharp jerk is often more effective than slow pressure for breaking a seal.
The Vinegar Soak (Dissolving Minerals)
White, crusty buildup around a stuck shower head is usually limescale. It acts like glue and makes the head hard to turn. Vinegar helps melt that buildup so the joint loosens more easily.
- Prepare the solution: Fill a plastic sandwich bag halfway with white vinegar.
- Submerge: Place the bag over the shower head so the connection nut is fully submerged in the vinegar.
- Secure: Use a heavy-duty rubber band or zip tie to secure the bag to the shower arm.
- Wait: Let it soak for at least a few hours, preferably overnight. The acid in the vinegar eats away the calcium carbonate.
- Remove: Take off the bag and wipe away the loosened gunk with a cloth. Then try twisting the shower head loose again, by hand or with a wrench. It should turn much more easily now.
Penetrating Oil and Heat
For rusted connections that won't budge, penetrating oil can help lubricate the threads.
- Apply Oil: Spray a penetrating lubricant (like WD-40) onto the threads where the head meets the arm. Let it sit for 2 hours.
- Clean: Wipe off excess oil so your tool doesn't slip.
- Apply Heat (Optional): If safe (and no plastic parts are involved), use a hair dryer on high heat to warm the metal nut. Metal expands when hot, which can break the rust seal.
- Twist: Attempt to unscrew with your wrench immediately after heating.
How to Clean the Shower Head and Reinstall It?
Once you have successfully removed the unit, you have a choice: clean the existing one or upgrade to a new model.
Cleaning the Removed Head
If you plan to reuse the old fixture, deep cleaning is essential to restore water pressure.
- Deep Soak: Submerge the entire head in a bucket of warm vinegar for 4-6 hours.
- Scrub: Use an old toothbrush to scrub the nozzles. For stubborn clogged holes, use a toothpick or safety pin to poke out debris.
- Rinse: Flush water through the intake to push out loosened scale.
Considering an Upgrade
Sometimes, cleaning isn't enough. If the internal plastic is cracked, the finish is peeling, or the nozzles are permanently blocked, replacement is the best option.
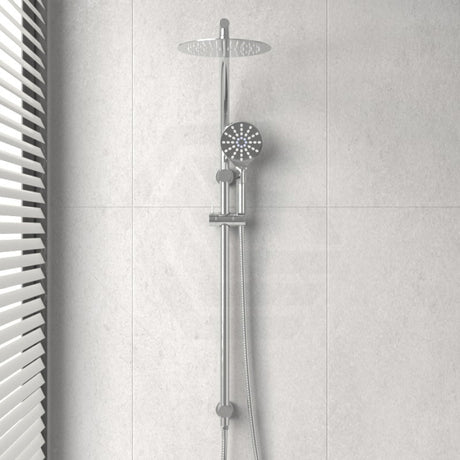
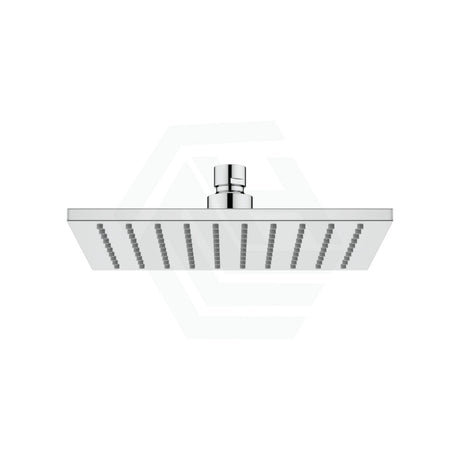
If you are looking for a straightforward replacement, a shower head only option is ideal. MyHomeware offers a variety of shapes, from sleek square designs to classic round rainfall heads. These are built with materials like brass and stainless steel to resist the very rust that caused your previous head to stick.
With finishes ranging from matte black to brushed champagne, you can easily match your existing taps. Plus, features like self-cleaning nozzles help prevent future mineral buildup, reducing the need for frequent maintenance.
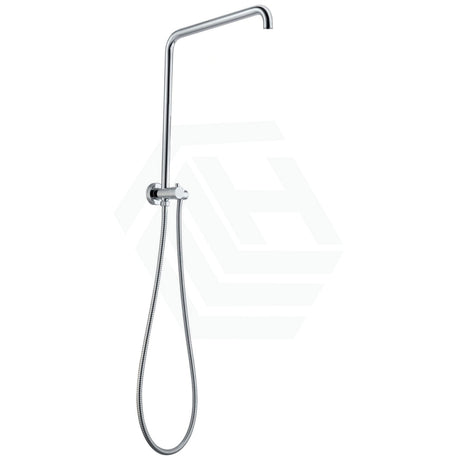
For those who want more flexibility, consider switching to a handheld shower set. These are particularly useful for cleaning the bathtub, washing pets, or assisting children. MyHomeware’s handheld sets are designed with universal BSP threads, making them compatible with most Australian plumbing setups.
They often feature multiple spray modes, from massage to mist, allowing for a customized shower experience. The addition of a handheld unit can significantly elevate the functionality of your bathroom without requiring major renovations.

Reinstalling the Fixture
Whether reusing the old one or installing a new MyHomeware product, the installation process is the same:
- Clean Threads: Use a wire brush or steel wool to remove old tape and gunk from the shower arm threads.
- Apply Tape: Wrap new Teflon (plumber's) tape clockwise around the threads 2-3 times. This ensures a watertight seal and lubricates the threads for easier future removal.
- Screw On: Align the new head and twist it on clockwise by hand.
- Tighten: Hand-tighten as much as possible. Use a wrench for a final 1/4 turn if necessary, but do not overtighten.
- Test: Turn on the water and check for leaks. If it drips, tighten slightly more.
Conclusion
Learning how to loosen shower head fittings is a handy home skill that can save you a call-out fee. Hard water, rust, or old sealant can all make a shower head stick, so slow, gentle steps work best. Use vinegar to soften limescale, avoid forcing the fitting, and wrap metal parts with a cloth before using tools to protect the finish.
Once the old shower head is off, a modern, good-quality replacement can make showers feel better and look neater. If you want a fresh look and reliable parts, you can check out MyHomeware for new shower fittings and accessories.