31 October, 2025
Shower Grout Repair: Causes, Step-by-Step Fix & Cost Guide
Master shower grout repair with our DIY guide. Discover causes, tools, step-by-step fixes, costs, and pro tips to prevent leaks, mould, and water damage in your bathroom.

Shower grout is prone to cracking, discolouration, and wear over time, which can lead to leaks and mould growth. Many homeowners notice these problems but don’t know how to fix them properly, leaving their showers vulnerable to further damage.
This blog will guide you through everything you need to know about shower grout repair, including the causes, tools for repairing, estimated cost, and step-by-step DIY instructions. Read on!

Main Causes of Shower Grout Damage
Shower grout faces water, heat, and cleaning products every day, which can cause it to crack, fade, or wear away over time. Before you begin repairing it, it helps to know what causes the damage.
- Poor Initial Installation: When grout is mixed too runny, applied unevenly, or made with low-quality materials, it forms weak bonds and pinholes. This accelerates deterioration, especially in areas with narrow joints or small tiles.
- House Settling and Structural Shifts: Minor foundation movements or aging structures can crack grout lines, creating gaps that expose tiles to further damage and water infiltration.
- Mould, Mildew, and Bacterial Growth: Persistent humidity encourages mould and bacterial buildup that gradually erodes grout. Black spots, soft patches, or a powdery texture often signal deep-seated moisture issues beyond surface cleaning.
- Wear from Daily Use and Age: Constant cleaning, foot traffic, and temperature fluctuations gradually cause flaking, gaps, and brittleness in aged grout, leaving joints vulnerable to cracking and water infiltration.
- Chemical Exposure and Cleaning Habits: Harsh cleaners or prolonged moisture from poor ventilation degrade grout, while leaks from membranes or shower screens accelerate wear in specific areas.
- Moisture Infiltration and Humidity: When grout isn’t sealed properly, it soaks up water and starts to soften or crack. Constant moisture also leads to mould and mildew, which stain the grout and weaken the seal between tiles. Even a small leak, like a dripping or leaking showerhead, can make the problem worse over time.
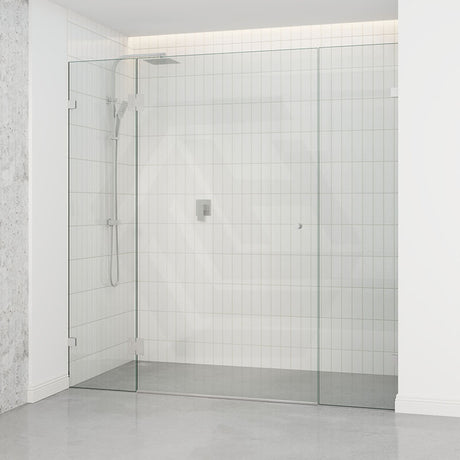
If your showerhead is old or leaking, it’s worth upgrading. Consider a modern showerhead from MyHomeware. The sleek designs feature adjustable spray modes, water-saving options, and better pressure control, which improves comfort.

Tools and Materials You'll Need to Repair Shower Grout
If your shower grout has cracks or gaps, you’ll need a few basic tools to remove the old grout, clean the area, and apply new grout. Here’s what to get ready:
- Safety Gear: Wear a dust mask, safety glasses, gloves, and ear protection to stay safe while working.
- Grout Removal Tools: Use a grout saw for small spaces, a multi-tool with a grout blade for tough areas, and a scraper or knife to clear old grout without breaking tiles.
- Cleaning Supplies: Have a sponge, a bucket of water, and a mold or steam cleaner to clean the area. Use a brush, dustpan, or vacuum to get rid of dust and debris.
- Application Tools: You’ll need a grout float for spreading grout, a trowel or mixing paddle to mix it, and a silicone tool to smooth corners.
- Materials: Get new grout (cement or epoxy grout for shower), a grout additive for flexibility, a grout sealer for shower to keep out moisture, and silicone caulk for corners and edges. Use drop sheets or masking tape to protect surfaces.
- Optional Items: You can add a waterproofing sealer for extra protection or use premixed grout if you want a quicker, simpler option.
How to Repair Shower Grout Step by Step?
Regrouting a shower requires a systematic approach: remove damaged material, apply new grout, and seal for protection. Here are the detailed steps for shower gout repair.
-
Step 1. Prepare the Area
Begin by inspecting the shower for cracks, mould, or loose tiles. Protect drains, floors, and surrounding surfaces with drop sheets and masking tape. Always wear safety gear to safeguard against dust, debris, and tool hazards. -
Step 2. Remove Old Grout
Use a grout saw or multi-tool with a grout blade to carefully cut and remove damaged grout. For rock-hard epoxy, scuff the surface if complete removal is difficult. Take care to avoid scratching tiles, and sweep or vacuum all debris from the joints. -
Step 3. Clean the Joints
Steam clean or apply a mould treatment to eliminate spores. Wipe thoroughly with a damp cloth and allow the joints to dry completely, ensuring strong adhesion for the new grout. -
Step 4. Mix New Grout
In a clean bucket, prepare grout according to the manufacturer’s instructions. Use epoxy grout for shower areas for superior waterproofing, or cement-based grout with additives for flexibility. When using epoxy, mix in small batches due to its rapid setting time. -
Step 5. Apply Grout
Use a grout float at a 45-degree angle, and press grout diagonally into the joints. Work in manageable sections to ensure all gaps are filled. Remove excess grout using the float’s edge to maintain clean lines. -
Step 6. Wipe and Smooth
After the grout begins to set partially, gently wipe the tiles diagonally with a damp sponge; do not disturb the joints. Buff the tiles dry with a cloth for a polished, professional appearance. -
Step 7. Apply Silicone in Flexible Areas
Remove old silicone from corners or hob-screen joints. Apply new caulk to provide elasticity and prevent cracking from movement or settling. -
Step 8. Seal the Grout
Once the grout has cured for 24-72 hours, apply a grout sealer for the shower evenly using an applicator. Sealing protects against stains, moisture, and bacteria, extending grout life up to 20 years. -
Step 9. Cure and Test
Allow the grout and sealers to fully cure(24-48 hours). Plug the drain and fill the shower with water to test the work and check for leaks.
What Is the Average Cost to Regrout Shower?
In Australia, the cost to regrout shower can vary depending on the shower size, type of grout used, labour fees, condition of the existing grout, and location. Here’s a breakdown based on 2025 data from Airtasker, providing benchmark costs for shower regrout.
| Factor | Average Cost (AUD) | Details |
|---|---|---|
| DIY Materials (per kg) | $1.50–$22 | Generic sanded grout at $1.50/kg; specialist epoxy at $22/kg. Tools add extra costs; suitable for small jobs, but risk improper application. |
| Professional Labour (per sqm) | $25–$40 | Standard rate for shower tile regrouting; starts at $25/sqm in affordable areas like NSW, up to $40/sqm in others. |
| Small Shower (e.g., 3 sqm) | $75–$120 | Basic re grouting shower without complications; median around $100 for labour + materials in regional areas. |
| Standard Shower (e.g., 5 sqm) | $125–$200 | Typical full job; overall median $250, including grout and cleaning. Higher for epoxy or mould treatment. |
| Large or Complex Shower (e.g., 10+ sqm) | $250–$400+ | For bigger areas or with repairs, it can reach $1,030 in high-end cases like urban Victoria. |
Tip: Additional factors such as tile/grout cleaning, mould/water fixes, premium grout types like epoxy, and location premiums (higher in urban areas like Victoria or Queensland) can increase overall costs by $100–$500 or more.
When Should You Call a Professional?
While many homeowners handle basic shower grout repair, certain situations require expert intervention. Here are the cases you should call a professional instead of DIY.
- Extensive Damage: If grout is missing in large areas, powdery, or accompanied by loose tiles, you need to ask a professional to assess underlying structural issues.
- Water Leaks or Mould: Persistent leaks behind walls or deep mould growth often point to membrane failure. Professionals can diagnose and restore proper waterproofing to prevent recurring damage.
- Complex Materials: Using epoxy grout for shower areas or handling intricate tile patterns requires licensed expertise to ensure correct application and a flawless finish.
- Time Constraints: Regrouting a shower is time-consuming and messy. If you lack experience or tools, hiring a pro saves effort and ensures durability in high-moisture spaces.
- Warranty Needs: For guaranteed results lasting over 10 years, professionals provide full assessments, sealed workmanship, and long-term protection against leaks or grout deterioration.
Conclusion
Shower grout repair is something most people can do on their own. It helps stop leaks, mould, and water damage while giving your bathroom a fresh look. First, figure out what caused the problem. Then remove the old grout, put in new grout, and seal it well so it lasts longer.
If the grout is badly damaged or repairs seem too costly, getting help from a professional is a good idea. Once your shower looks new again, think about upgrading your fixtures with modern designs from MyHomeware. They’re built for better use, easy cleaning, and a clean, stylish finish that completes your bathroom.